Installation – Humminbird WIDE Paramount 3D User Manual
Page 12
INSTALLATION
INSIDE THE HULL INSTALLATION
INSIDE THE HULL INSTALLATION
Inside the hull installation requires the mount system and control
head be installed and operational. See Installing the Control Head
for instruction on installing the unit.
Inside the hull mounting generally produces good results in single
thickness fiberglass-hulled boats. Humminbird cannot guarantee
depth performance when transmitting and receiving through the
hull of the boat since some signal loss occurs. The amount of loss
depends on hull construction and thickness, and the installation.
This installation requires slow-cure two-part epoxy. Do not use
silicone or any other soft adhesive to install the transducer, as this
material reduces the sensitivity of the unit. Five minute epoxy has
a tendency to cure before all the air bubbles can be purged.
Step One - Determine the Mounting Location
Begin the transducer installation by determining where inside the
hull to install the transducer. Consider the following to find the
best location:
•
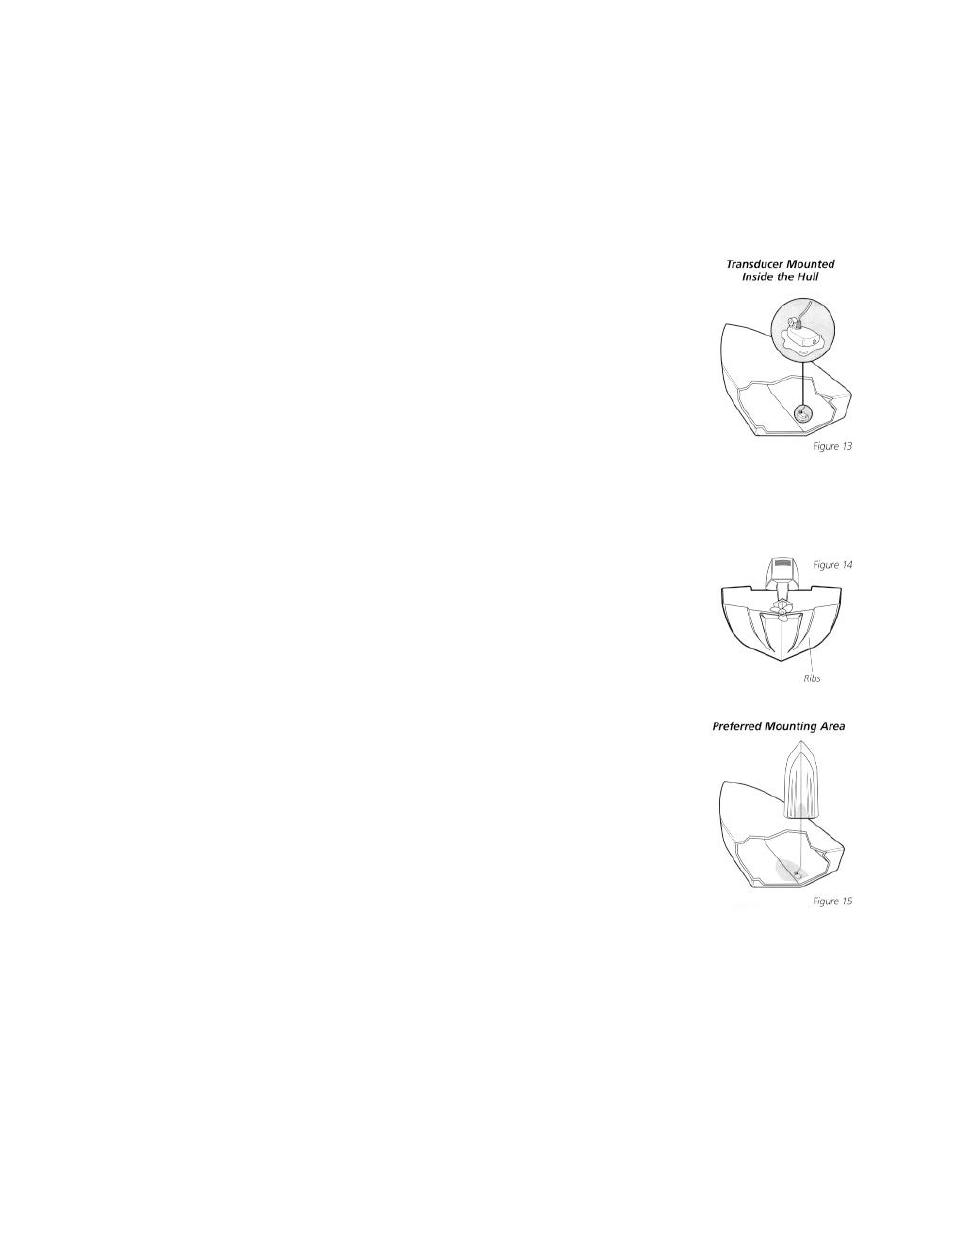
Observe the outside of the boat hull to find the areas that are
mostly free from turbulent water. Avoid ribs, strakes, and other
protrusions as these create turbulence (Figure 14).
•
As a general rule, the faster the boat can travel the further aft
and closer to the centerline of the hull the transducer has to be
located to remain in contact with the water at high speeds.
Step Two - Test the Mounting Location
There is no opportunity for adjustment after the transducer glued
in place. Therefore, it is best to perform a trial installation on inside the hull
transducers first, and run the boat at high speeds to determine the best mounting
area.
1. At the identified mounting location, lay the transducer body face down with
the pointed end towards the bow.
2. Fill the hull with enough water to submerge the transducer body. Use a sand
filled bag or other heavy object to hold the transducer in position.