Step 9: aligning the fixture fitter a – Hunter Fan 41597-01 User Manual
Page 5
41597-01 12/21/2002 5 © 2002 Hunter Fan Company™
41597-01 12/21/2002 6 © 2002 Hunter Fan Company™
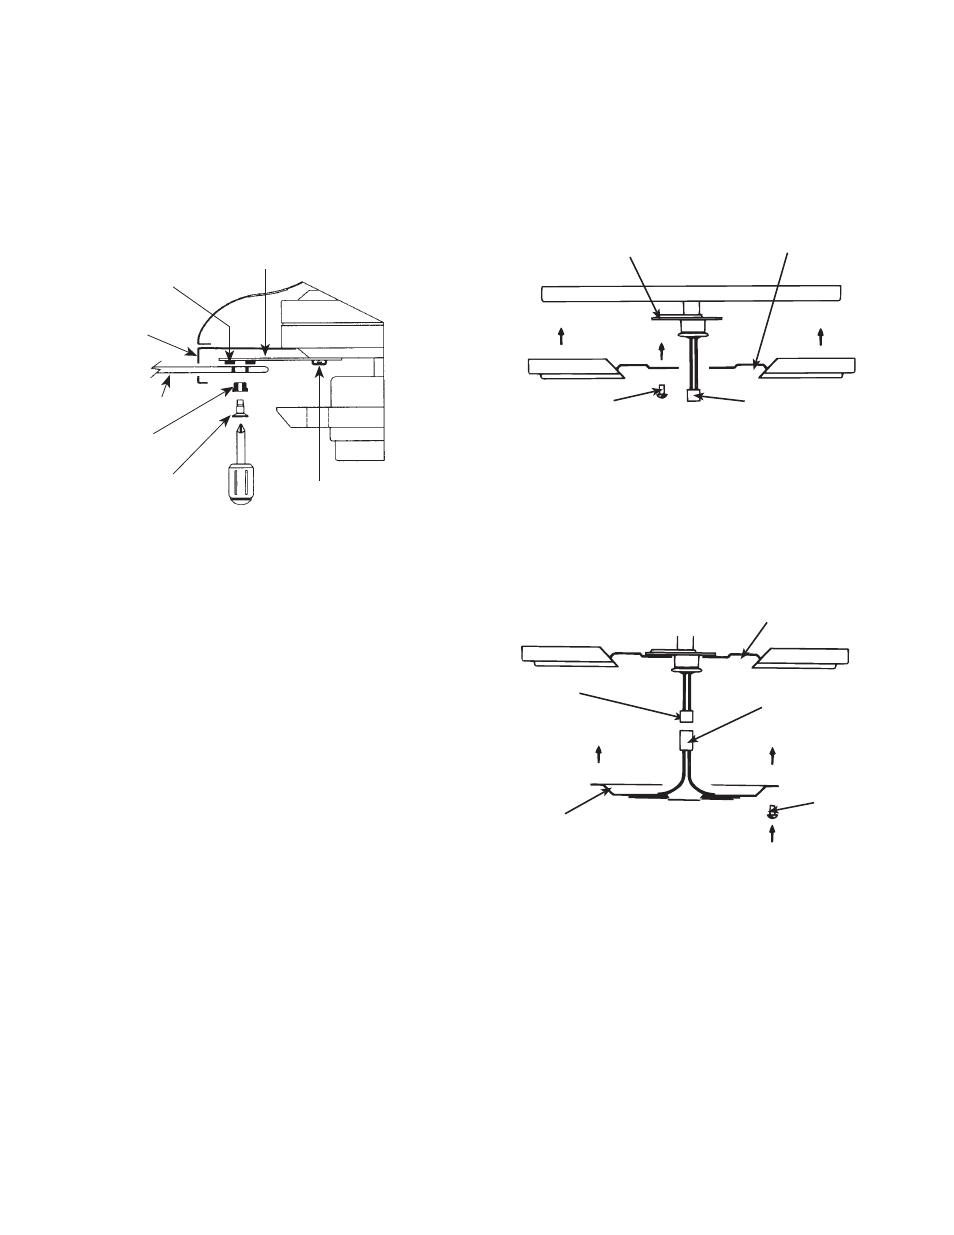
Step 9: Aligning the Fixture Fitter
A.
Assemble the fixture fitter to the fitter mounting plate by
inserting the upper plug connector through the hole in the center
of the fitter and securing the fitter to the mounting plate using (3)
3/8” long phillips round head screws with lockwashers. Tighten
the (3) screws securely. See Figure 9.
CAUTION: Failure to securely tighten the (3) assembly screws
could result in the light kit falling.
B.
Attach the light fixture to the fitter using (2) screws. Plug the
upper and lower plug connectors together. Tighten the (2) screws
securely. See Figure 9A.
CAUTION: Failure to securely tighten the (2) assembly screws
could result in the light fixture falling.
Install the included bulb. Connect the plug connector from the
bulb to the light kit.
Step 8: Fan Blade Assembly,
Installation, and Balancing
A.
Slide wood blade through slot in belly band and line up the (2)
holes in the blade with the rubber grommets in the blade bracket.
Insert rubber grommets into the (2) holes in the blade and as-
semble the blade to the blade bracket using the shoulder screws
provided in sack parts. When properly assembled, the end of the
blade grommets will fit inside the bracket grommet. Tighten the
shoulder screws to prevent vibration and wobble when the fan is
operating. See Figure 8.
Figure 9
Figure 9A
FITTER MOUNTING PLATE
FIXTURE FITTER
ASSEMBLY
SCREWS
UPPER PLUG
CONNECTOR
ASSEMBLY
SCREWS
LOWER PLUG
CONNECTOR
UPPER PLUG
CONNECTOR
LIGHT
FIXTURE
FITTER
BLADE
BRACKET
BLADE
BRACKET
GROMMET
MOTOR
BELLY
BAND
FAN BLADE
BLADE
GROMMET
SHOULDER
SCREW
BLADE BRACKET
ASSEMBLY SCREWS (10)
SWITCH
HOUSING
Figure 8
NOTE: When the screws are tight the blades may feel loose. This
is normal when using grommets and will not be a problem.
B.
Repeat the step shown above until all the blades are securely
attached.
C.
A blade balancing kit has been provided with your fan. Should
the fan wobble in operation, you may use the kit to correct the
balance per the instructions supplied with the kit.
NOTE: After installing all the blades, check the (10) blade bracket
assembly screws which attach the brackets to the motor. Make
certain they are tight. You can reach the screws by inserting a
screwdriver into the opening in the bottom of the switch housing.
Rotate the blades to access all (10) screws. See Figure 8.
Failure to tighten these screws will result in noise and wobble when
the fan is operating.