Installation and connections, System and power connections – Harman-Kardon HK 3390 User Manual
Page 11
INSTALLATION AND CONNECTIONS 11
English
Installation and Connections
speaker-level inputs on the subwoofer, and then
connect the speaker-level outputs on the sub-
woofer to your main left and right speakers, fol-
lowing the instructions provided with the sub-
woofer.
If your subwoofer can be switched on and off
with a trigger signal from the receiver, connect
either of the two Trigger Out mini-jacks
Q to
the subwoofer's Trigger Input with a suitable
cable, which usually comes with the subwoofer,
or may be purchased separately. This means that
the subwoofer (which is otherwise usually
switched on and off automatically by an internal
signal sensor) stays on as long as you listen to
music or movie sound. Even if no deep bass is
present in the signal for a while, the subwoofer
does not go into standby mode when it is con-
trolled by the trigger signal. Otherwise, when
controlled by a bass signal sensor, you may not
experience the first bass impulse when bass
returns, after the subwoofer has gone into
standby mode, because it has to switch on first.
This means that you may have a Speaker system
1 and a Speaker system 2 in two different
rooms, each with its own active subwoofer that
switches on when you select Speakers 1 or
Speakers 2. You may also have two active sub-
woofers in one room, one that is always working
with your main Speaker 1 set of speakers, the
other to be switched on or off according to your
taste if connected to the Sub Out linked to
Speaker 2, without any speakers being connect-
ed to the Speaker 2 terminals. This makes it easy
to add a second subwoofer only when watching
movies, where extra bass level may be desirable.
Set the uppermost LINK S/W ON/OFF switch that
controls the Trigger Out voltage for Speaker Set
1 to ON if you want this subwoofer to switch on
ONLY when you select Speaker Set 1. Set the
switch OFF if you want the subwoofer to always
receive the Trigger Out ON voltage and therefore
be switched ON always, even if you select
Speaker Set 1 to be OFF.
Repeat for the lowermost switch if you have two
subwoofers or wish to switch your single sub-
woofer ON and OFF separately with the Speaker
set 2 switch.
If your subwoofer is not equipped with a Trigger
Voltage input, the position of these two switches
is irrelevant.
System and Power Connections
Your Harman Kardon receiver is designed for
flexible use with external control components
and power amplifiers. These connections are
easy to make during an initial installation, or at
a later date should you choose to upgrade your
system.
Remote Control Extension
If the receiver is placed behind a solid or smoked
glass cabinet door, the obstruction may prevent
the remote sensor from receiving commands. In
this event, an optional remote sensor may be
used. Connect the output of the remote sensor
to the Remote IR In jack
3.
If other components are also prevented from
receiving remote commands, only one sensor is
needed. They may use this unit’s sensor or a
remote eye by running a connection from the
Remote IR Out jack
4 to the Remote In jack
on Harman Kardon or other compatible equip-
ment.
External Audio Power Amplifier
Connections
If desired, an optional, external amplifier may be
used in place of the HK 3490/HK 3390’s internal
power amplifier.
To connect an external power amplifier, first
remove the Pre-Out/Main-In Jumper Pins
D
that connect the Preamp Out
E and Main In
C jacks on the rear panel. Keep the jumpers in
a safe place should they be needed at a later
time.
Using high-quality audio interconnect cables,
connect the Preamp Out jacks
E to the input
jacks on your power amplifier. Make certain to
match the right output to the right input and the
left output to the left input.
Note that when an external power amplifier is
used, no special adjustments are required. All
volume and other control adjustments are made
using the standard front panel or remote con-
trols.
AC Power Connections
This unit is equipped with two accessory AC out-
lets. They may be used to power accessory
devices, but it should not be used with high-cur-
rent draw equipment such as power amplifiers.
The total power draw may not exceed 100W for
each outlet.
This Switched AC Outlets
I will receive
power only when the unit is on. This is recom-
mended for devices that have no power switch,
or those with a mechanical power switch that
may be left in the “ON” position.
NOTE: Devices with electronic power switches
may only go into a Standby mode when plugged
in here.
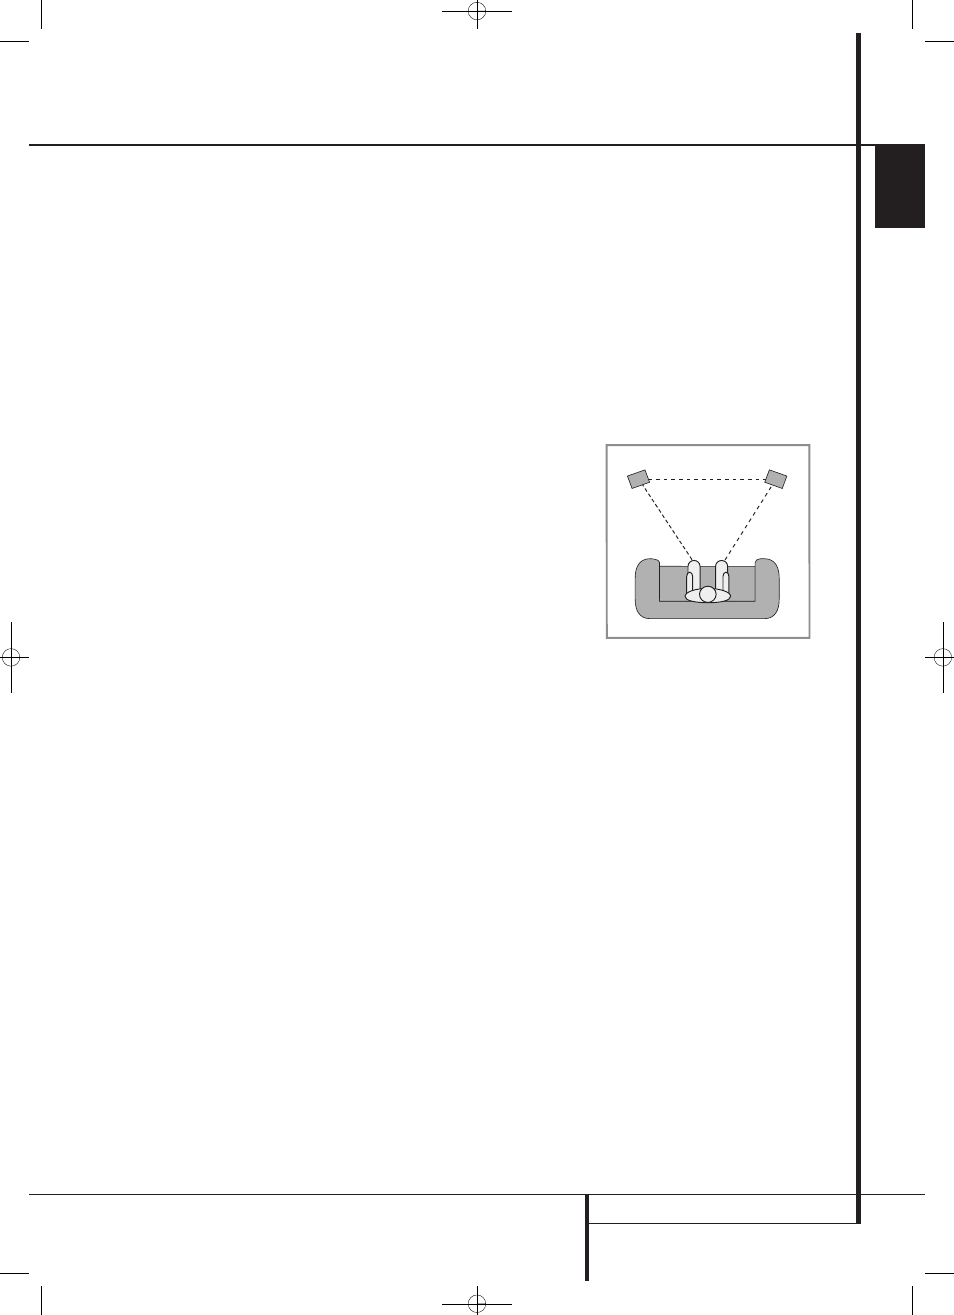
Speaker Placement
For optimal listening enjoyment, and for sound-
field reproduction that best re-creates the origi-
nal recording, it is good practice to place the
speakers so that they form a triangle with the
speakers at the front of the room, and the pre-
ferred listening spot at the third point of the tri-
angle. The distance between each speaker and
the listener should be identical.
For example, if the speakers are 2,5 meters from
one another, each of the speakers should opti-
mally be placed so that they are also 2,5 meters
from the listener. It is also desirable to place
speakers so that their tweeters, or highfrequency
drivers, are aimed at ear height when you are
seated in the listening position.
A good starting point for speaker placement is to make
the distance between the two speakers and the distance
between either speaker and the listener identical.
To optimize the sound field, or to suit your lis-
tening room environment, you may find that
some experimentation is required to find the
correct location. Ideally, pans from left to right
across the front of the room should sound
smooth, and instruments should appear to be
coming from the proper location within an
orchestra.
The placement of subwoofers should be done as
suggested in the manufacturer’s instructions. In
general, subwoofers often produce best results
when they are placed in the corner of a room,
along the same wall as the speakers, but optimal
placement will vary widely depending on room
size, the subwoofer type and the placement of
rugs and furniture in a room. It may be helpful
to temporarily position the subwoofer in the
usual listening position, then walk around the
room while program material is playing until the
bass reproduction sounds best to your ears. That
location is likely to be the optimum position for
the subwoofer.
Finally, when all connections are complete, plug
the power cord into a nonswitched 230-volt AC
wall outlet. You’re ready to enjoy the HK 3490/
HK 3390!
Right Front
Speaker
Left Front
Speaker
os0015CSK - HK 3390+3490 UK v11x.qxp:.ps 30/06/08 12:59 Side 11