Huffy N5-101 User Manual
Page 29
29
12/05
P/N 21401401
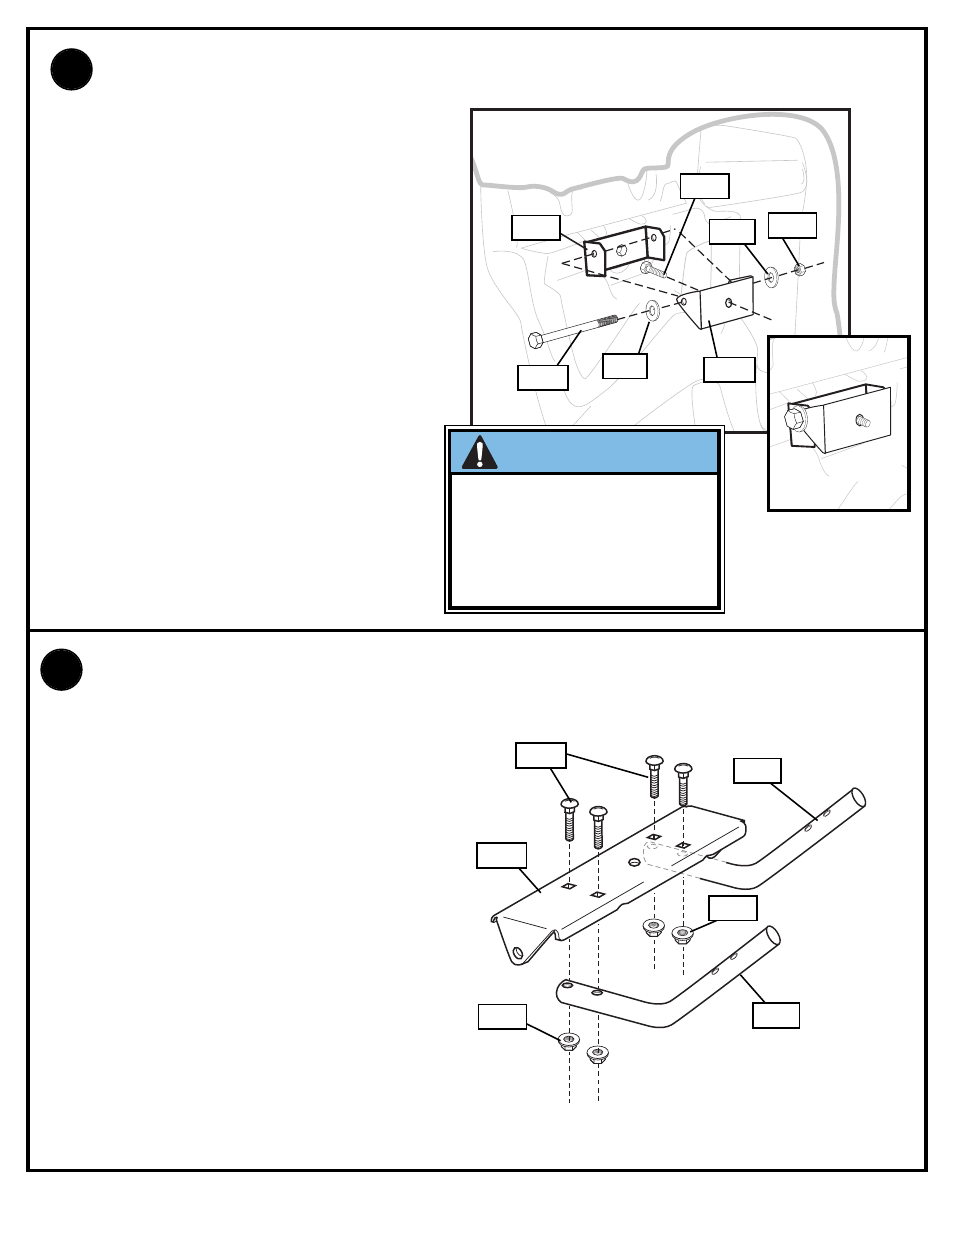
Insert bolt (H-10) through lower pivot bracket (P-15) as shown; bolt (H-10) will be secured in step 11.
Carefully place base assembly on its side. Install lower pivot bracket (P-15) with bolt (H-12),
washers (H-9), and lock nut (H-26) as shown.
Insérez le boulon (H-10) dans le support pivotant
inférieur (P-15), comme illustré ; le boulon (H-10)
sera fixé à l'étape 11. Posez délicatement le socle sur
le côté. Installez le support pivotant inférieur (P-15)
avec le boulon (H-12), les rondelles (H-9) et le
contre-écrou (H-26), comme illustré.
Die Schraube (H-10) wie gezeigt durch die untere
Drehhalterung (P-15) einsetzen; die Schraube (H-10)
wird in Schritt 11 festgezogen. Die Sockelbaugruppe
vorsichtig auf ihre Seite legen. Die untere
Drehhalterung (P-15) wie gezeigt mit Schraube (H-
12), Unterlegscheiben (H-9) und Gegenmutter (H-26)
befestigen.
Introduzca el perno (H-10) a través del soporte
giratorio inferior (P-15) como se muestra; el
perno (H-10) se fijará en el paso 11.
Cuidadosamente coloque el conjunto de la base
sobre su costado. Instale el soporte giratorio
inferior (P-15) con el perno (H-12), las arandelas
(H-9) y la contratuerca (H-26) como se muestra.
P-14
H-12
H-9
P-15
H-10
H-9
H-26
IMPORTANT! / IMPORTANT!
WICHTIG! / ¡IMPORTANTE!
DO NOT OVER TIGHTEN
NE SERREZ PAS TROP !
NICHT ZU FEST ANZIEHEN.
NO APRIETE EXCESIVAMENTE
Secure both hinge tubes (P-16) to second wheel bracket (P-4) with
carriage bolts (H-13) and flange nuts (H-11).
Fixez les deux tubes articulés (P-16) sur le
second support de roues (P-4) à l'aide des
boulons ordinaires (H-13) et des écrous à bride
(H-11).
Beide Gelenkrohre (P-16) mit Schlossschrauben
(H-13) und Flanschmuttern (H-11) an der
zweiten Radhalterung (P-4) befestigen.
Fije ambos tubos de articulación (P-16) en el
segundo soporte de la rueda (P-4) con los
pernos cabeza de carro (H-13) y las tuercas de
brida (H-11).
P-4
H-11
P-16
P-16
H-13
10.
9.
H-11