Operation instructions – Harbor Freight Tools 95801 User Manual
Page 8
Page 8
SKU 95801
For technical questions, please call 1-800-444-3353.
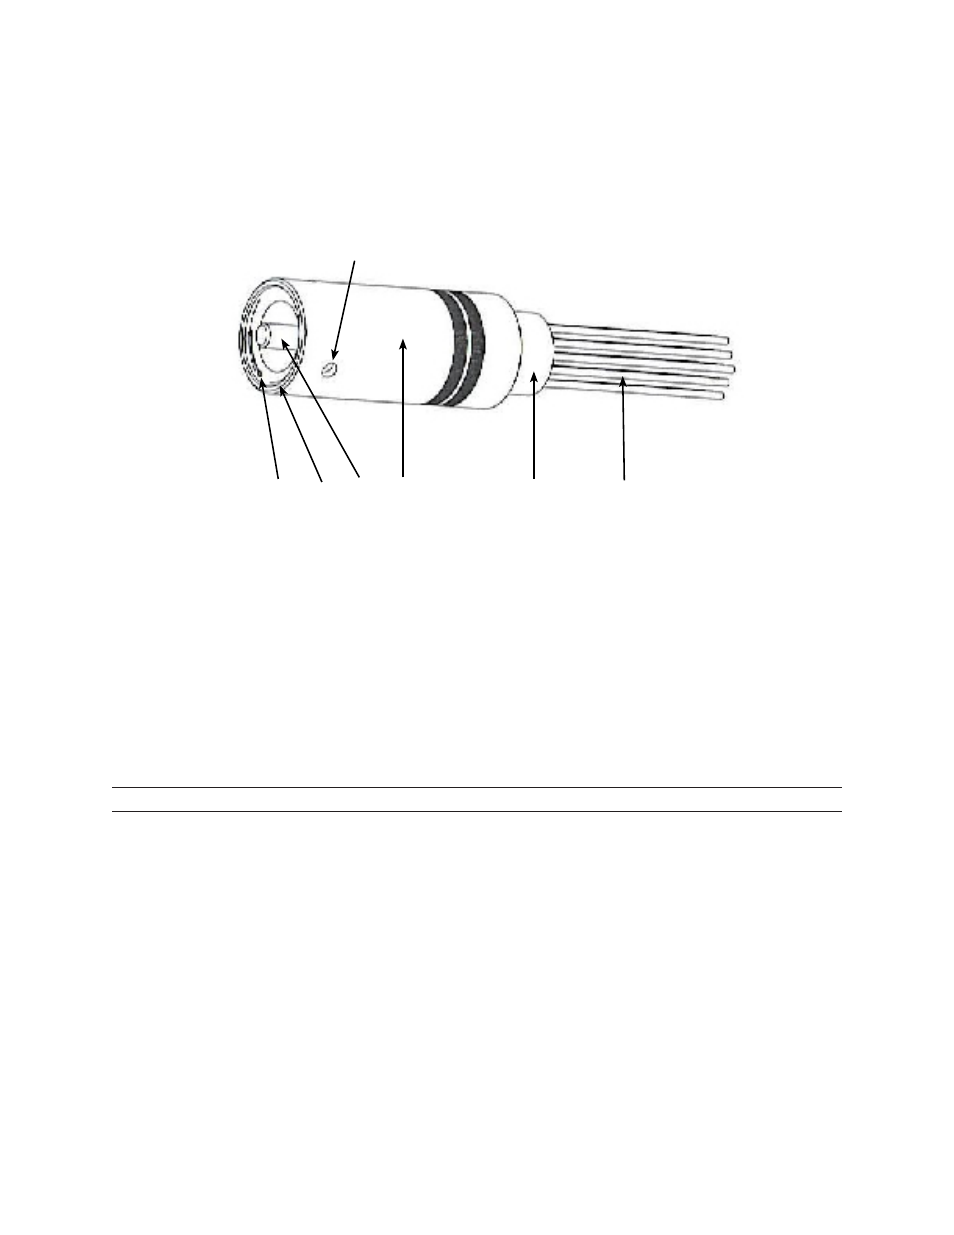
(1A). Slide one Retainer Ring (8A) around the Needles (5A) and fasten it at the
front end of the Barrel Assembly (1A). See
Figures 4 & 4A
2.
Figure 5
8A 7A 6A 1A 2A 5A
Hole for Set Screw
Holding the Barrel Assembly (1A) in one hand with the Needles (5A) pointing down-
ward, insert the Needle Driver (6A), the Screw Cap (7A) and the last Retainer Ring
(8A). See
Figures 4 & 5
3.
The Screw Cap (7A) has a Set Screw that holds it in place. Be very careful NOT
to tighten the Set Screw too tightly, snug is good. Otherwise you may damage the
plastic threads inside the Screw Cap (7A) causing it to bind or strip some threads.
4.
Insert the Barrel Assembly (1A) into the end of the Air Hammer Housing (1) and
thread the two parts together. As before do not over tighten, snug is good.
5.
The Air Hammer is now ready to be used as a Scaler.
OPERATION INSTRUCTIONS
1.
With the proper tool attached to the Air Hammer, attach your air supply to the Air
Inlet (7) at the base on the Housing (1). Turn on the air supply. Carefully place the
tool against the surface of the project you are working with. Make sure the project
is in a vise or attached to something that holds it securely so it cannot be moved
out of position.
2.
Set the Air Regulator (11) located at the base of the Housing (1).
Air pressure
should not exceed 90 PSI. Test the action of the Air Hammer and adjust the
Air Regulator (11) as necessary.
3.
Use a light touch on the Trigger (8). Never force the Air Hammer against the surface
you are working with. Easy, light pressure works best.
WARNING: If the Air Hammer is being used as a Scaler, use a ANSI-approved full
face shield and not just safety goggles to protect against Needles that may snap
off and could possibly cause personal injury.