Tool operation - continued tool loading, Staplers – HP Paslode 403606-10 User Manual
Page 8
Precision Placement Driving
■
Grasp the tool handle firmly and hold the bottom of the work
contacting element firmly against the workpiece until it is com-
pletely depressed.
■
Squeeze the trigger to drive the fastener.
■
Lift the tool from the workpiece.
■
Repeat the procedure for the next fastener.
Successive (Bounce) Driving
■
Grasp the handle firmly.
■
Squeeze the trigger and move the tool along the workpiece
with a bouncing motion, depressing the work contacting element
at the points where you want to insert a fastener.
■
Keep the trigger depressed and continue to bounce the work
contacing element against the workpiece, positioning the tool
above as carefully as possible.
■
When the desired number of fasteners have been driven,
release the tool trigger to avoid unintentional fastener discharge.
Sequential Operation
The sequential operating kit prevents succesive or "bounce"
driving.
■
Depress the work contacting element and hold it against the
work surface before pulling the trigger.
■
After each fastener is driven, completely release the trigger
and lift the tool from the work surface.
TOOL OPERATION -
continued
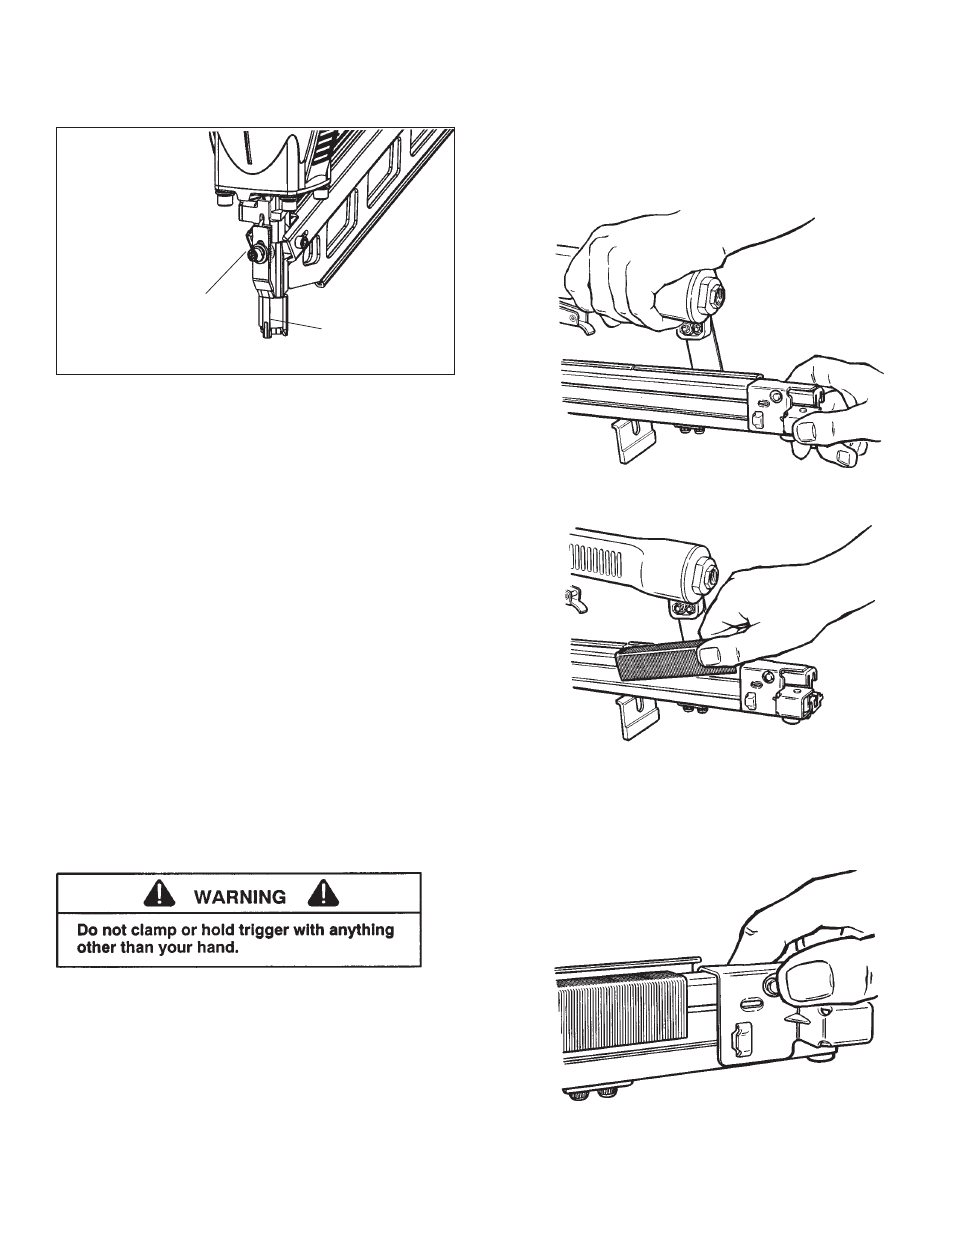
TOOL LOADING
➔
➔
Staplers
Step No. 1 – Pull back the rail follower until it
latches at the end of the magazine. The rail cover
will automatically open.
Step No. 2 – Insert the fastener strip into the
magazine rail.
Step No. 3 – Press the follower latch release button
or unlatch the follower and silde the follower forward
until it contacts the staple strip. The tool is now
ready for use.
SOCKET HEAD
CAPSCREW
WORK
CONTACTING
ELEMENT
MOVE UP
TO INCREASE
DRIVE DEPTH
MOVE DOWN
TO DECREASE
DRIVE DEPTH
8