Harbor Freight Tools Central Machinery 6" Belt & 9" Sander 6852 User Manual
Page 11
SKU 06852
For technical questions, please call 1-800-444-3353.
PAGE 11
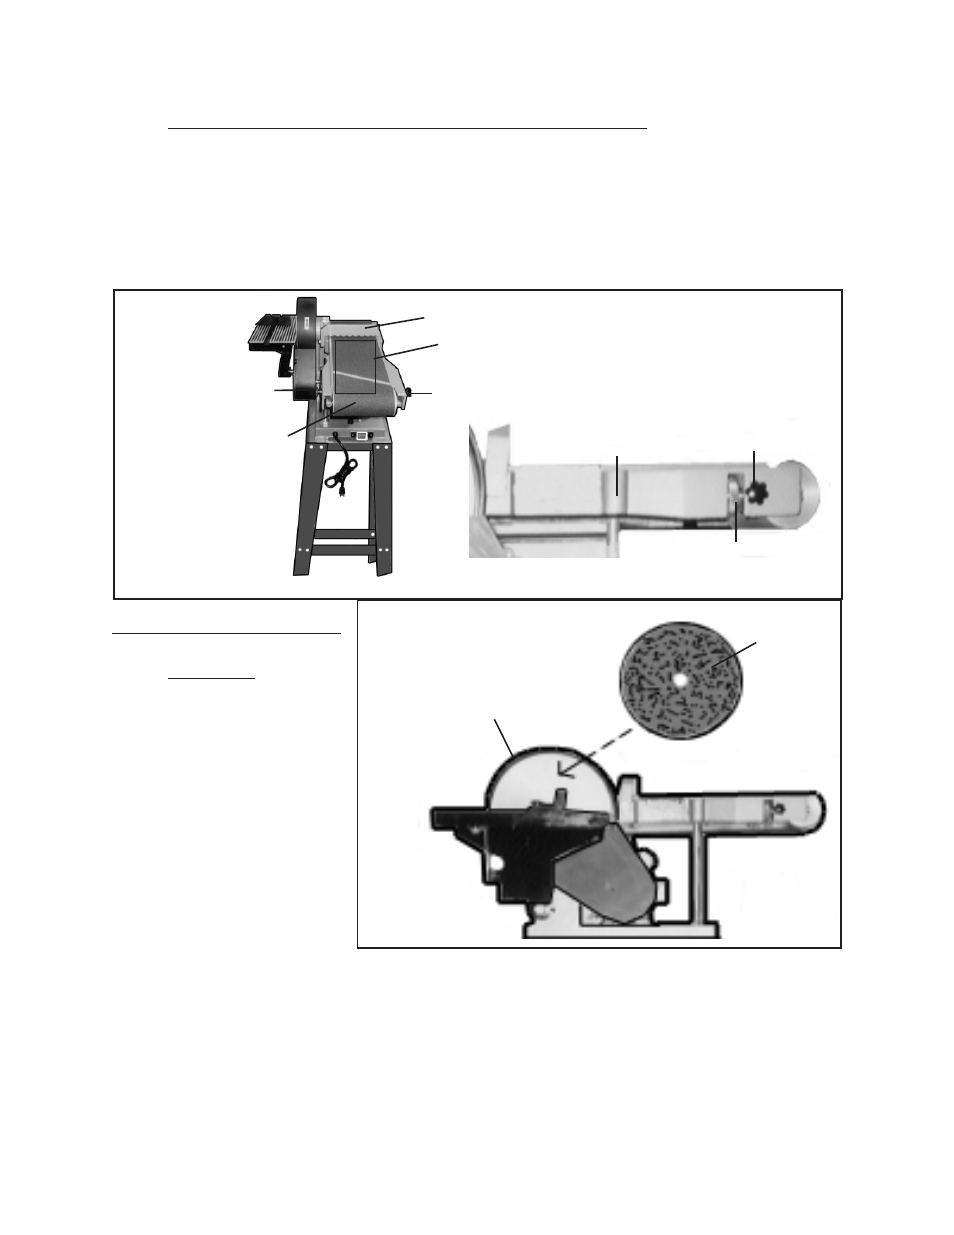
To Install A Sanding Disc:
1.
CAUTION: Always turn
the Power Switch (53)
to its “OFF” position
and unplug the Power
Cord (55) from its 110
volt electrical outlet
before perfor ming
this procedure.
(See
Figure B.)
2.
S w i n g t h e Ta b l e
Support Bracket (9)
out of the way and
remove the cover from
the Pulley Cover ( 22)
as explained on
page 9. Check to make sure the Sanding Disc Plate (16) is free
of dirt, oil, and other debris.
(See Figure I.)
3.
Remove the paper backing on the adhesive Sanding Disc (15), and stick the Sanding
Disc firmly and evenly onto the Sanding Disc Plate (16). Restore the Table Support
Bracket and Pulley Cover to their original positions.
(See Figure I.)
LOCK KNOB &
ADJUST NUT ASSY.
(44)
LOCK KNOB &
ADJUST NUT ASSY (44)
LOCK
KNOB (44)
ADJUST NUT (44)
SANDING BELT FRAME
(40)
FIGURE h
SANDING BELT (2)
SANDING DISC PLATE
(16)
SANDING DISC
(15)
FIGURE I
turn off the machine and unplug it from its electrical outlet. Then repeat Steps #2
through #7 to further increase the tension on the Sanding Belt.
(See Figures B
and h.)
9.
Attach the Back Stop (39) to the side of the Sanding Belt Frame (40), as shown in
Figure h.
BACK STOP (39)
Sand in this area.
REV 04b