HONDA 08B15-S9V-100 User Manual
Page 8
8 of 14
AII 25886 (0308)
© 2003 American Honda Motor Co., Inc - All Rights Reserved.
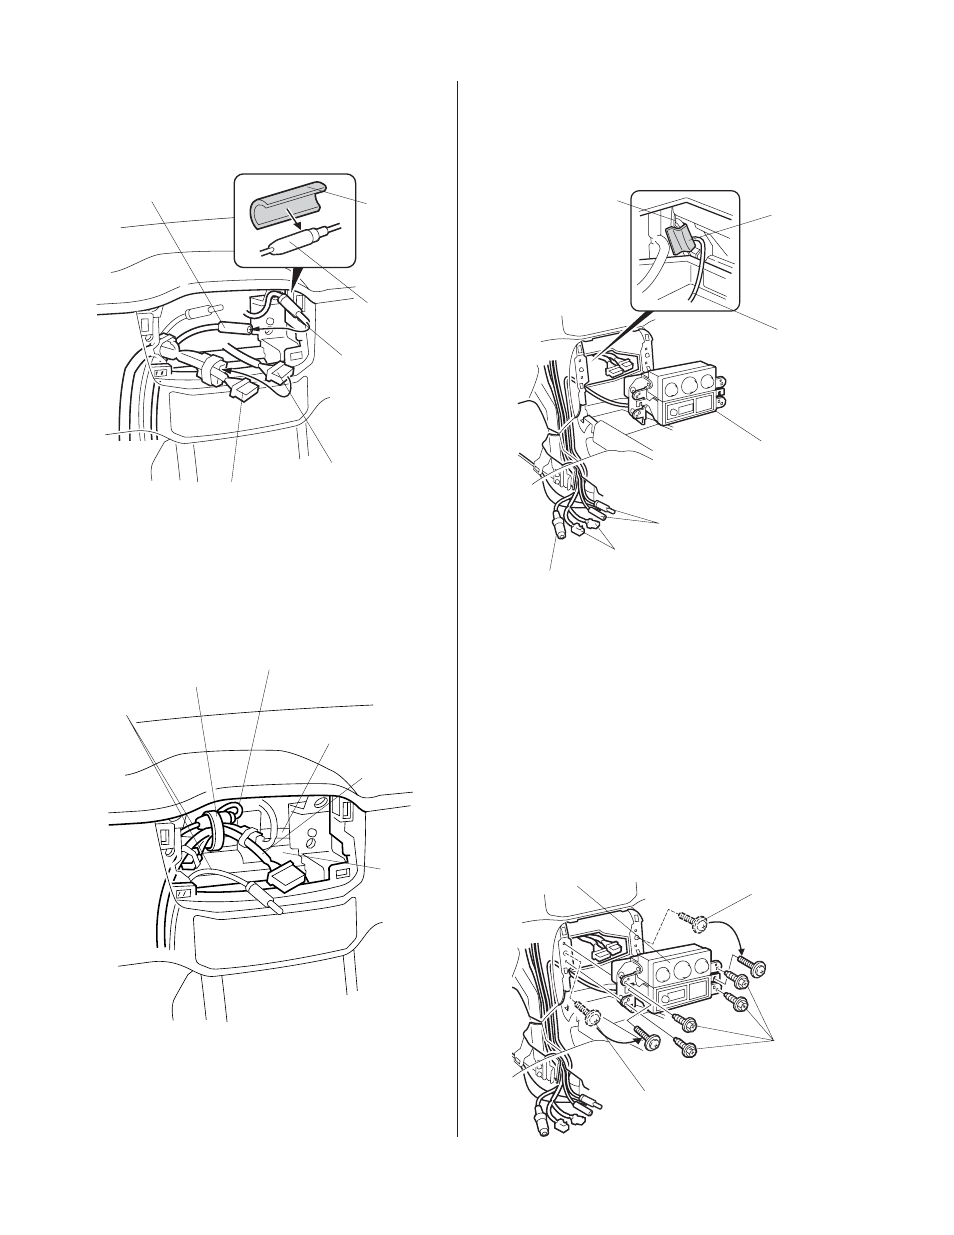
22. Plug the audio unit vehicle 20-pin connector into
the XM radio 20-pin connector that is blue-taped to
the XM radio harness. Wrap one EPT sealer
around the subantenna cable in the area shown.
25. Place the display module/heater control unit
assembly near the dashboard opening, and route
the display module cable along the XM radio
harness and the subantenna cables.
23. Plug the vehicle antenna cable into the
subantenna cable.
EPT
SEALER
SUBANTENNA
CABLE
XM RADIO
HARNESS 20-PIN
CONNECTOR
SUBANTENNA
CABLE
VEHICLE 20-PIN
CONNECTOR
VEHICLE
ANTENNA
CABLE
3131021M
VEHICLE ANTENNA
CABLE
XM RADIO
HARNESS
WIRE TIE
SUBANTENNA
CABLE
FRAME
PIPE
VEHICLE
HARNESS
24. Secure the XM radio harness and subantenna
cables to the vehicle harness with a wire tie.
DISPLAY MODULE/HEATER
CONTROL UNIT ASSEMBLY
DISPLAY MODULE
CABLE
EPT SEALER
VEHICLE FRAME
(Clean with
isopropy
alcohol.)
26. Using isopropyl alcohol on a shop towel, clean the
vehicle frame, then attach one EPT sealer on the
edge of the vehicle frame to protect the cables.
27. Remove the two screws from the side brackets at
the heater control unit opening. Plug in the heater
control unit connectors, and slide the display
module/heater control unit assembly into the
dashboard opening. Reinstall the two side bracket
screws, and the four heater control unit screws
removed in step 8.
SCREW
(reused)
SCREW
(reused)
SCREWS
(Removed
in step 8.)
XM RADIO HARNESS
SUBANTENNA CABLES
DISPLAY MODULE
CABLE
DISPLAY MODULE/HEATER
CONTROL UNIT ASSEMBLY