HONDA 08B15-S9V-100 User Manual
Page 5
© 2003 American Honda Motor Co., Inc - All Rights Reserved.
AII 25886 (0308)
5 of 14
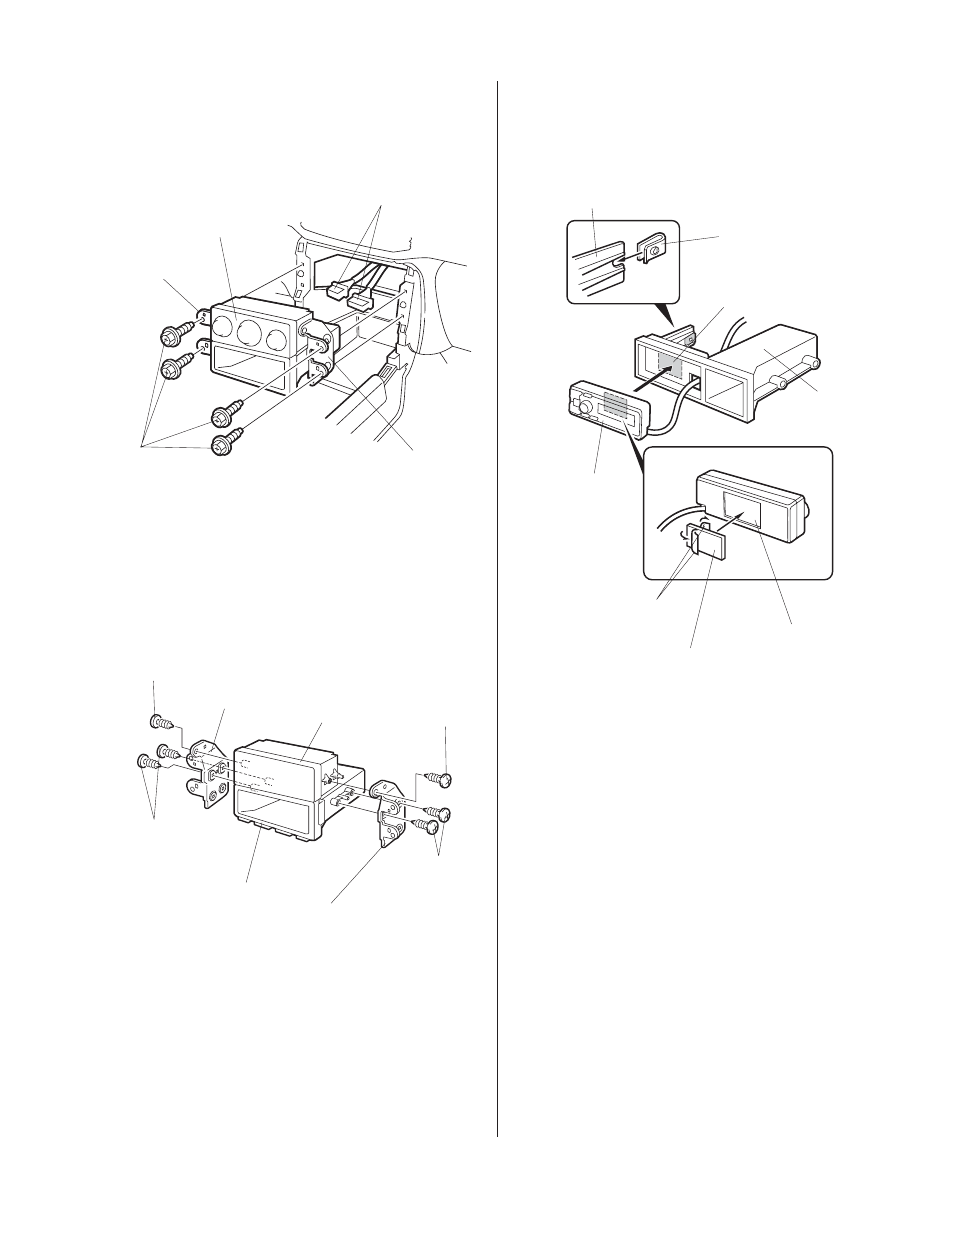
8.
Remove the four screws that fasten the left and
right vehicle bracket. Pull the heater control unit
and pocket toward you, and unplug the vehicle
connectors.
Clean with
isopropyl alcohol.
3121040M
Clean with
isopropyl alcohol.
DISPLAY
MODULE
POCKET FLANGE
DOUBLE-SIDED
ADHESIVE TAPE
DISPLAY
MODULE
DISPLAY
MODULE
POCKET
CLIP NUT
ADHESIVE
BACKINGS
10. Slide the clip nut onto the display module pocket
flange.
3131010M
RIGHT
VEHICLE
BRACKET
SCREW
HEATER
CONTROL UNIT
VEHICLE
CONNECTOR
LEFT
VEHICLE
BRACKET
SELF-
TAPPING
SCREW
LEFT VEHICLE
BRACKET
HEATER
CONTROL UNIT
RIGHT VEHICLE
BRACKET
SELF-
TAPPING
SCREW
SELF-
TAPPING
SCREW
(Reuse.)
SELF-TAPPING SCREW
(Reuse.)
9.
Remove the left and right vehicle brackets (six
self-tapping screws), and separate the heater
control unit from pocket. Set the pocket aside, it
will not be reused.
11. Attach the display module to the display module
pocket:
•
Using isopropyl alcohol on a shop towel, clean
the center of the back of the display module
where the double-sided adhesive tape will
attach.
•
Remove on backing from the double-sided
adhesive tape, and attach it to the display
module.
•
Remove the remaining backing from the
double-sided adhesive tape. Route the display
module cable through the hole of the display
module pocket, and attach the display module
to the pocket.