Installation instructions, Install the cooktop, Electrical connection – Hotpoint VBXR1060 User Manual
Page 28: Secure the cooktop, Optional: attach a blower transition duct, 28 connect the ductwork
Installation Instructions
INSTALL THE COOKTOP
ELECTRICAL CONNECTION
Electrical requirements:
120-volt, 60-Hertz, individual, properly grounded
branch circuit protected by a 15-amp circuit
breaker or time-delay fuse.
GROUNDING
IMPORTANT:
(Please read carefully.)
FOR PERSONAL SAFETY, THIS APPLIANCE
MUST BE PROPERLY GROUNDED.
The power cord of this appliance is equipped with
a three-prong (grounding) plug which mates with
a standard three-prong grounding wall receptacle
to minimize the possibility of electric shock hazard
from this appliance. The customer should have
the wall receptacle and circuit checked by a
qualified electrician to make sure the receptacle
is properly grounded and has correct polarity.
Where a standard two-prong wall receptacle
is encountered, it is the personal responsibility
and obligation of the customer to have it replaced
with a properly grounded three-prong wall
receptacle in accordance with the National
Electrical Code.
Do Not, Under Any Circumstances,
Cut Or Remove The Third (Ground)
Prong From The Power Cord.
Do not use an extension cord with this appliance.
Plug the power cord into an approved wall outlet.
16
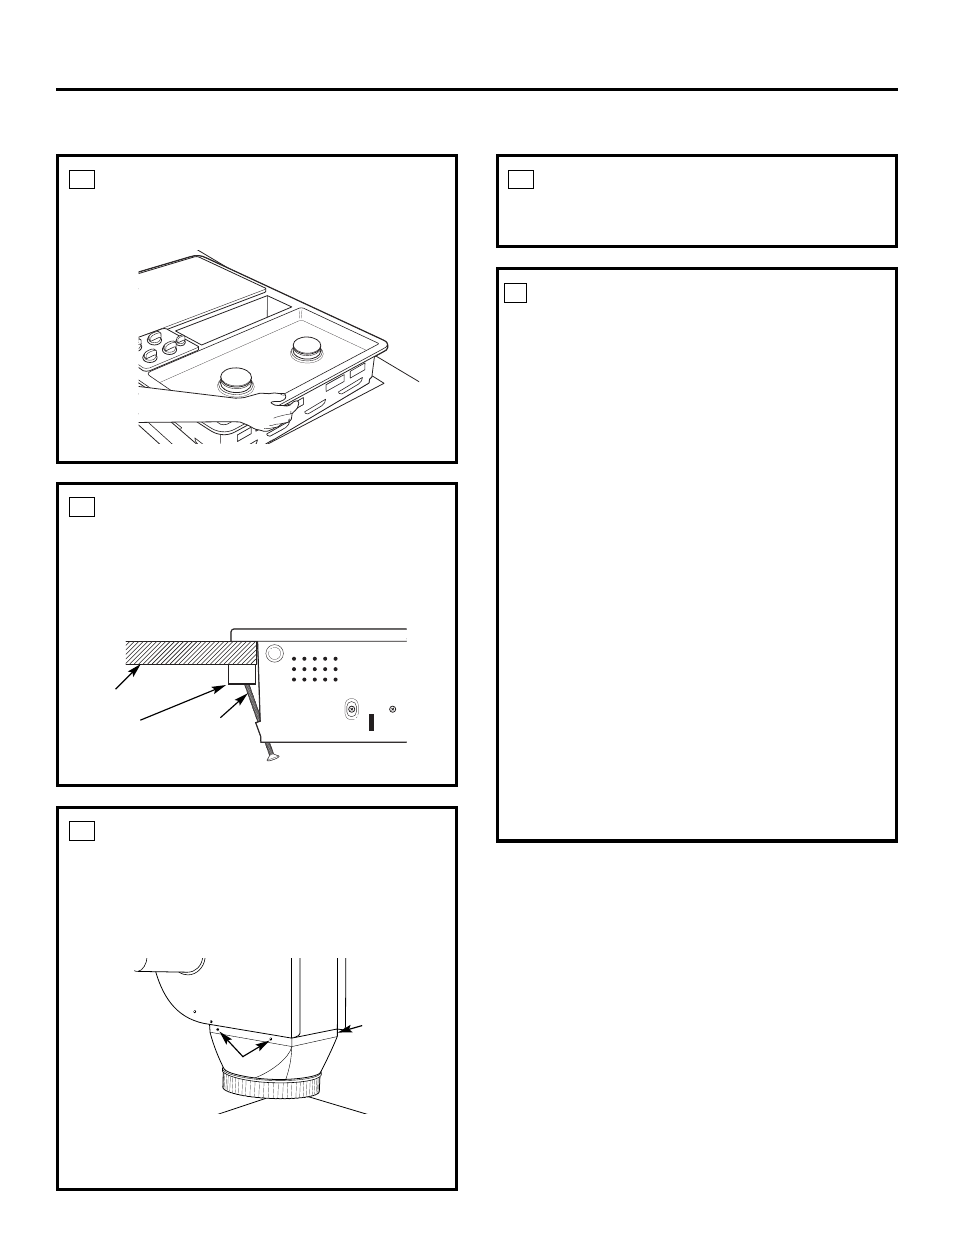
INSTALL THE COOKTOP
Lower the cooktop into the countertop opening,
guiding it into position.
12
SECURE THE COOKTOP
Tighten the tie-down bolts to secure the cooktop
to the counter. For countertops less than 1
″
thick,
securely attach filler blocks of wood to the bottom
of the countertop where the tie-down bolts will be
tightened.
13
Countertop
Filler wood block
for countertops
less than 1
″
thick
Tie-down
bolt through
cooktop tab
OPTIONAL: ATTACH A BLOWER
TRANSITION DUCT
If using 6
″
round standard ductwork, attach
a blower transition duct. This 3
1
⁄
4
″
x 10
″
rectangle
to 6
″
round transition duct is available at your
local building supply store.
Install the transition duct to the blower
outlet. Secure all joints with duct tape
to assure an airtight seal.
Screw
(on other side)
Screws
14
28
CONNECT THE DUCTWORK
Connect the ductwork prepared earlier
to the blower transition duct.
15