Setting up the refrigerator/freezer combo, Dispenser operation – haier HRF-663ASB2* EN User Manual
Page 14
Setting up the Refrigerator/Freezer Combo
Dispenser operation
Dispenser operation
Choose crushed ice, refrigerated water or ice cubes. Slightly push a glass against the ice/water
lever as shown in the illustration.
(1) Dispensing crushed ice
● Press the appropriate button so that the indicator
for crushed ice lights up.
● Lightly press against the lever so that crushed ice
is supplied.
(
2) Dispensing ice cubes
● Press the appropriate button so that the indicator
for ice cubes lights up.
● Lightly press against the lever so that ice cubes are
supplied.
(3) Dispensing refrigerated water
● Press the appropriate button so that the indicator
for refrigerated water lights up.
● Lightly press against the lever so that refrigerated
water is supplied.
Dispensing crushed ice
● Even with the ice cube option selected, some crushed ice may be supplied simultaneously. It is
also possible that the crushed ice supply is mingled with a few ice cubes.
● When crushed ice is frequently called for, it is normal for frost to build up around the outlet, but
it will eventually evaporate.
● Keep the glass close to the dispenser to prevent ice from spilling.
Dispensing refrigerated water
● Due to air in the water supply line, refrigerated water may not be available immediately after
installation. In this case, hold the dispenser lever pressed in for as long as two minutes to
evacuate any remaining air.
● After that, the supplied water will become increasingly cooler.
● Refrigerated water does not contain any ice cubes. To lower the temperature of the refrigerated
water, add crushed ice or ice cubes to it.
Caution: Keep fingers and objects away from the dispenser.
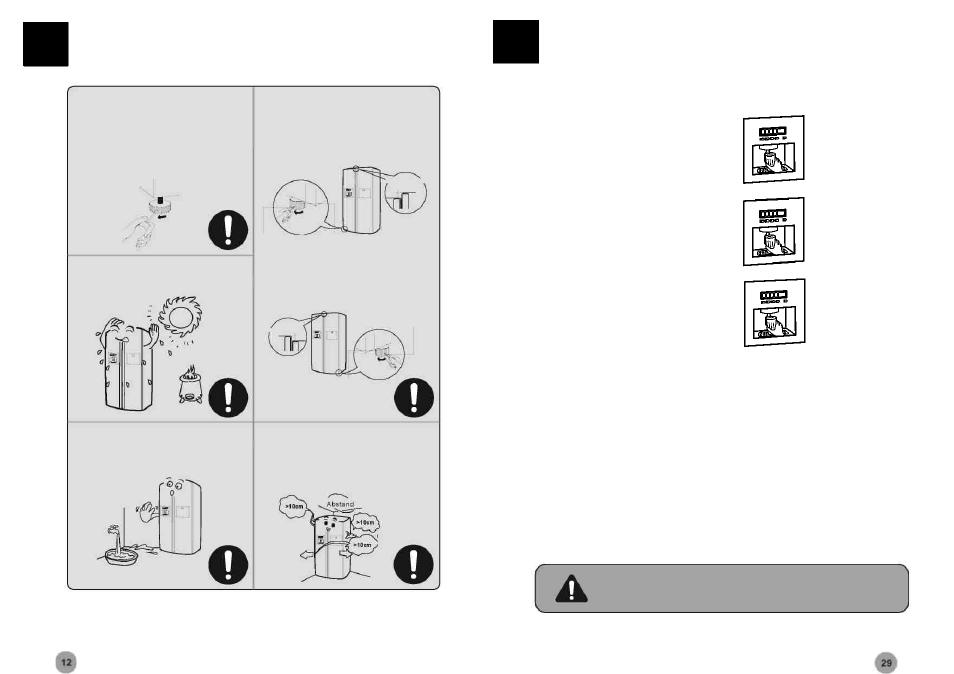
Be sure to choose a flat and level setup location. Use
sturdy and fireproof supports to correct an
unevenness in the floor. Turning an appliance foot
clockwise raises the appliance, turning it
anticlockwise lowers the appliance.
Height difference
Height difference
Left screw
Protect the setup location against direct sunlight or
heat sources.
Height difference
Wrench
Height difference
Right bolt
Avoid a damp setup location. Remove water and
dirt with a soft rag.
Be sure to leave at least 10 cm of space around the
appliance. When installing the appliance in an
enclosed area, leave at least 25 cm of space on the
sides and 5 cm on the top and back.
Door adjustment
If the freezer compartment door is lower than that of the
refrigerator compartment, insert the wrench in the groove
of the left screw and turn it in the direction of the arrow
until both doors are the same height.
If the freezer compartment door is lower than that of the
refrigerator compartment, insert the wrench in the groove
of the left screw and turn it in the direction of the arrow
until both doors are the same height.
Wrench
Caution: Keep fingers and objects away from the dispenser.
Spacing