Assembly instructions, Face shield assembly – Harbor Freight Tools 55525 User Manual
Page 11
for technical questions, please call 1-800-444-3353;
troubleshooting section at end of manual.
Page 11
SKU 55525
AssEMbLy InstRUCtIOns
WARnInG! Always turn off the Welder and unplug the unit from its electri-
cal outlet prior to performing any assembly, maintenance, or service.
tO AttACH tHE HAnDLE
Insert the Handle (4) into the Handle Sockets (3). Then attach the Handle Sockets
to the center top of Side Panel (1), using the four Screws provided.
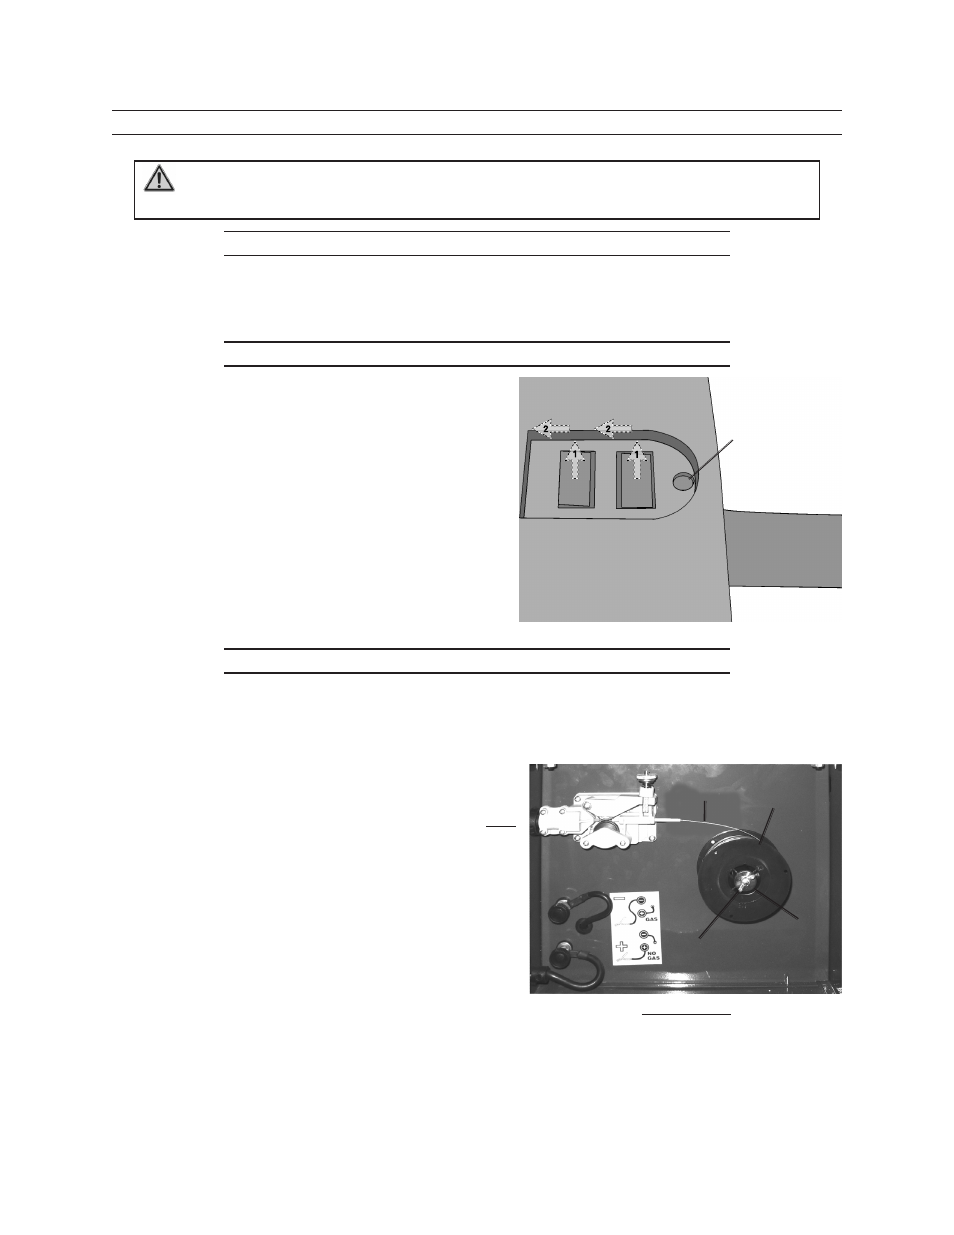
fACE sHIELD AssEMbLy
Attach the handle to the Face Shield by
lining up the two rectangular tabs on the
handle with the corresponding holes in the
face shield and
1) pressing it upwards
and then
2) pressing it forward from the back, lock-
ing the round tab in place.
See numbered steps in illustration to the
right.
tO InstALL A WIRE spOOL
Lift the Access Panel (12) of the Welder to expose the Wire Feed Assembly.
Unscrew and remove the Wing Nut (40) and Spool Knob (39).
Install a 2 lb. Spool (not included) onto
the Wire Spool Axle (9),
making sure
the Welding Wire unwinds from the top
(counterclockwise). Secure it to the shaft
using the spring underneath and the Knob
on top.
Tighten the Knob (39) until only slight
resistance is felt when turning the Spool.
Then, tighten the Wing Nut (40) up against
the Knob.
1.
2.
3.
4.
Handle
Face
Shield
Round
Tab
Handle
Face
Shield
Round
Tab
fIGURE C
spOOL
WInG
nUt (40)
WELDInG
WIRE
spOOL
KnOb (39)
fIGURE C
spOOL
WInG
nUt (40)
WELDInG
WIRE
spOOL
KnOb (39)