2 • installing the hanger bracket – Hunter Fan 41081-01 User Manual
Page 5
5
41081-01 • 08/04/09 • Hunter Fan Company
2 • Installing the Hanger Bracket
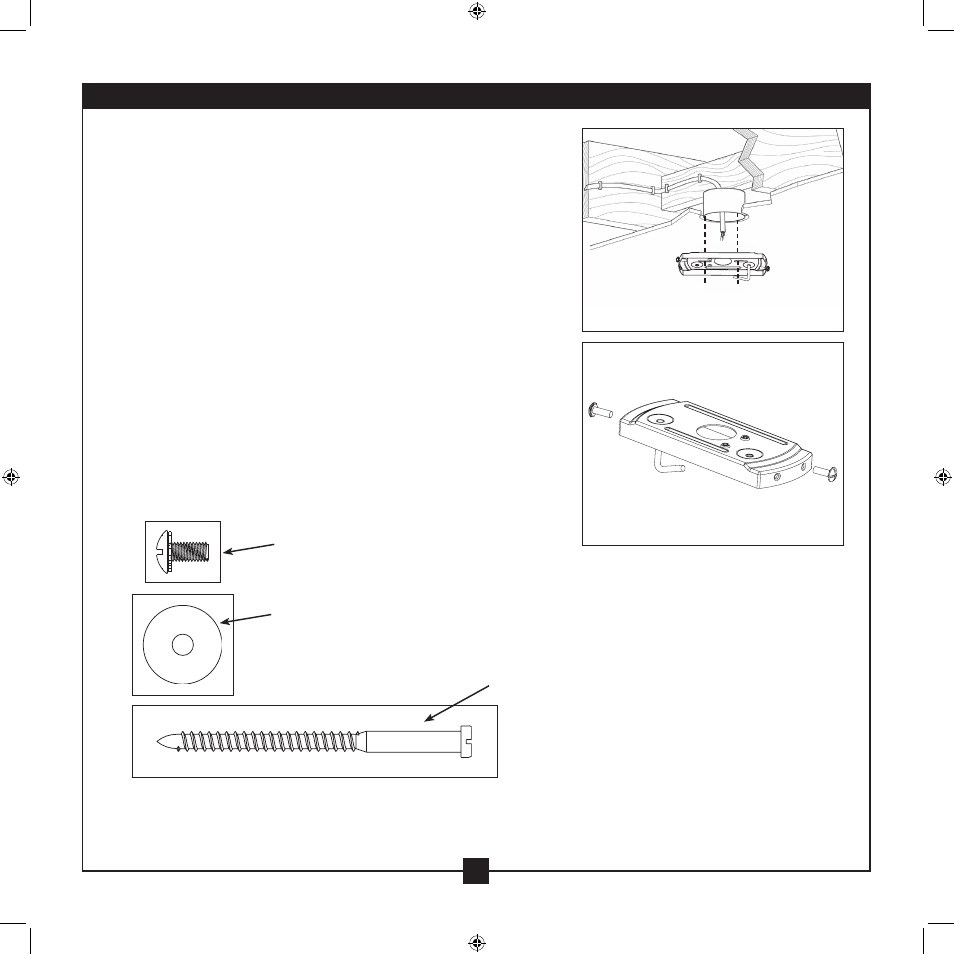
2-1. Drill two pilot holes into the wood support structure through
the outermost holes in the outlet box, using the ceiling plate as a
guide. The pilot holes should be 9/64” in diameter.
2-2. Install one canopy screw into each side of the ceiling plate as
shown.
2-3. Place a flat washer on each of the two 3” wood screws.
2-4. Thread the lead wires from the outlet box down through the hole
in the middle of the ceiling plate.
2-5. Align the slotted holes in the ceiling plate with the pilot holes you
drilled in the wood support structure.
2-6. Pass the wood screws through the slotted holes in the hanger
bracket into the pilot holes you drilled.
Tighten the wood screws into the 9/64” pilot holes; do not use
lubricants on the screws. Do not over tighten.
Flat Washer
3” Wood Screw
Step 2-2
Step 2-1
Canopy Screw
- 23483 (4 pages)
- 21585 (2 pages)
- 28425 (4 pages)
- Type 7 Models (16 pages)
- 41753-01 (15 pages)
- 28343 (2 pages)
- 41844-01 (9 pages)
- 28439 (2 pages)
- 28487 (2 pages)
- 28544 (2 pages)
- 20810 (2 pages)
- Type T Models (13 pages)
- 20490 (2 pages)
- 23971 (2 pages)
- 22562 (4 pages)
- 23867 (4 pages)
- 20400 (2 pages)
- 28876 (4 pages)
- 22793 (4 pages)
- 22068 (4 pages)
- Type B Models (15 pages)
- 28872 (2 pages)
- 28608 (2 pages)
- 23683 (2 pages)
- 20081013 (24 pages)
- 20406 (2 pages)
- 21575 (4 pages)
- 28522 (4 pages)
- 23864 (2 pages)
- 21977 (1 page)
- 22540 (4 pages)
- 20543 (2 pages)
- 23972 (4 pages)
- 20347 (4 pages)
- 28448 (3 pages)
- 23785 (4 pages)
- 41615-01 (4 pages)
- 20534 (2 pages)
- 23264 (2 pages)
- 28153 (2 pages)
- 28081 (4 pages)
- 21190 (2 pages)
- 23782 (4 pages)
- 21580 (2 pages)