Caution, D. zero clearance trim support instructions – Hearth and Home Technologies Castile Insert Pellet CASTINS-CWL User Manual
Page 17
R
September 1, 2008
250-7251F
Page 17
Castile Pellet Insert
C. Outside Air Kit Instructions
Parts Included in Kit: 1 piece of 2 inch x 3 ft. flex hose, 2
hose clamps, 1 collar assembly, 1 termination cap assem-
bly, 1 trim ring, fasteners.
1. Attach collar assembly to appliance. Figure 17.1.
Measure distance from floor to air vent opening in
appliance and mark location on wall.
3. Use saw to cut opening in wall. Cut a 2-1/2 to 3 inch
(64-76mm) opening on inside wall and a 3 to 3-1/2
inch (76-89mm) opening on outside of house.
4. Use hose clamp to secure flex pipe to collar assem-
bly.
5. Slide trim ring over flex pipe and run pipe through
pre-cut hole in back of appliance and through the
wall.
6. Attach hose to outside termination cap with second
hose clamp.
7. Secure termination cap to outside surface.
8. Secure trim ring to interior wall.
Tools Needed: Phillips head screwdriver; wire cutters;
hole saw or jig saw.
CAUTION
Never draw outside combustion air from:
• Wall, floor or ceiling cavity
• Enclosed space such as an attic or garage
Figure 17.1
Figure 17.3
1
2
3
4
5
6
7
8
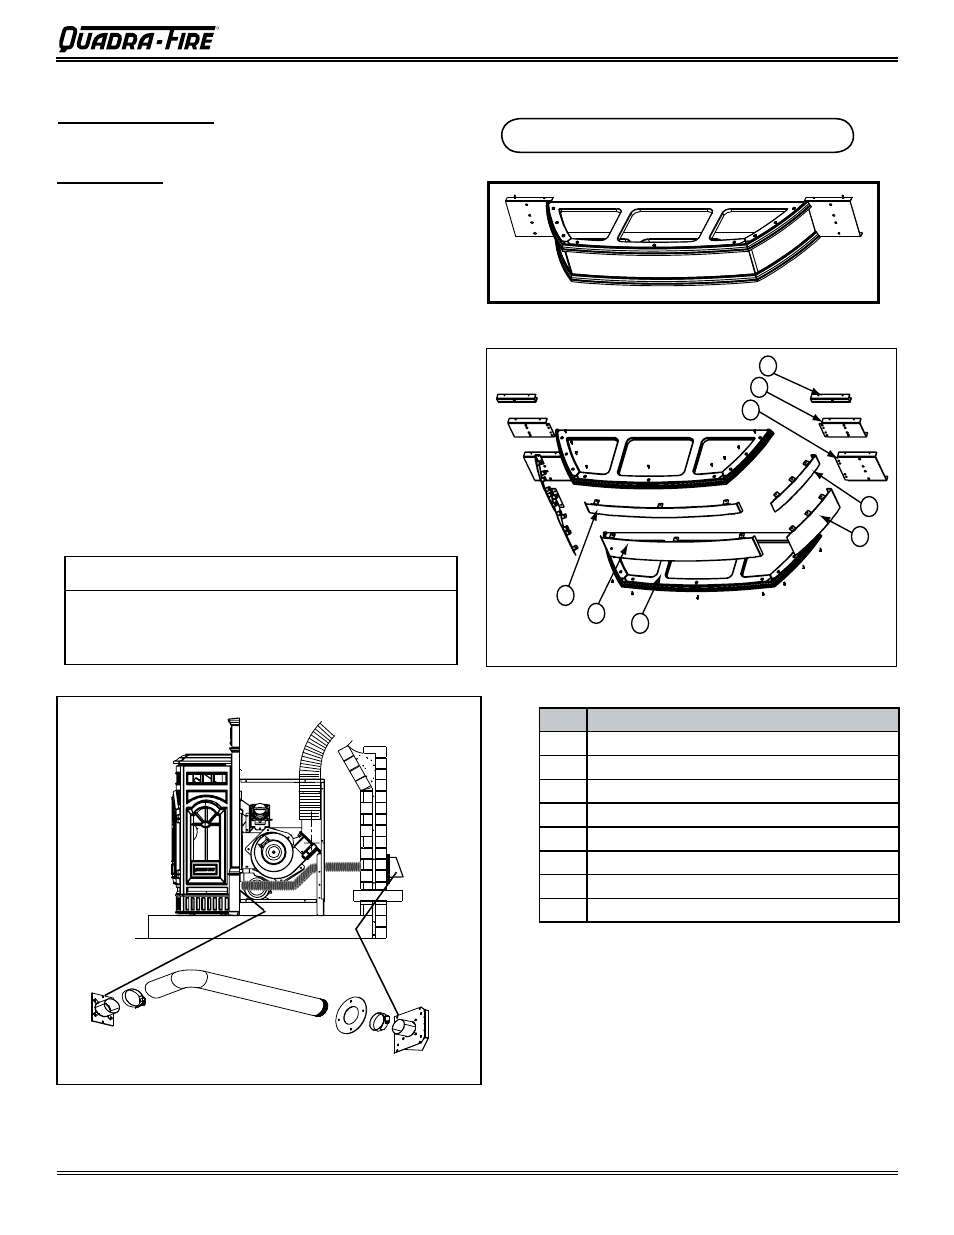
D. Zero Clearance Trim Support Instructions
Figure 17.2 - Assembled View
Item
Description
1
Front, 3 inch
2
Front, 5 inch
3
Cast Ring, Top & Bottom, Interchangeable
4
Side, 5 inch
5
Side, 3 inch
6
Panel Extension, 5 inch
7
Panel Extension, 3 inch
8
Panel Extension, Base Plate Only
NOTE: Only for use on small size panels.
Flex Hose
Hose Clamp
Collar
Assembly
Trim Ring
Termination
Cap Assembly
Hose Clamp