Epson ActionScanner II User Manual
Page 6
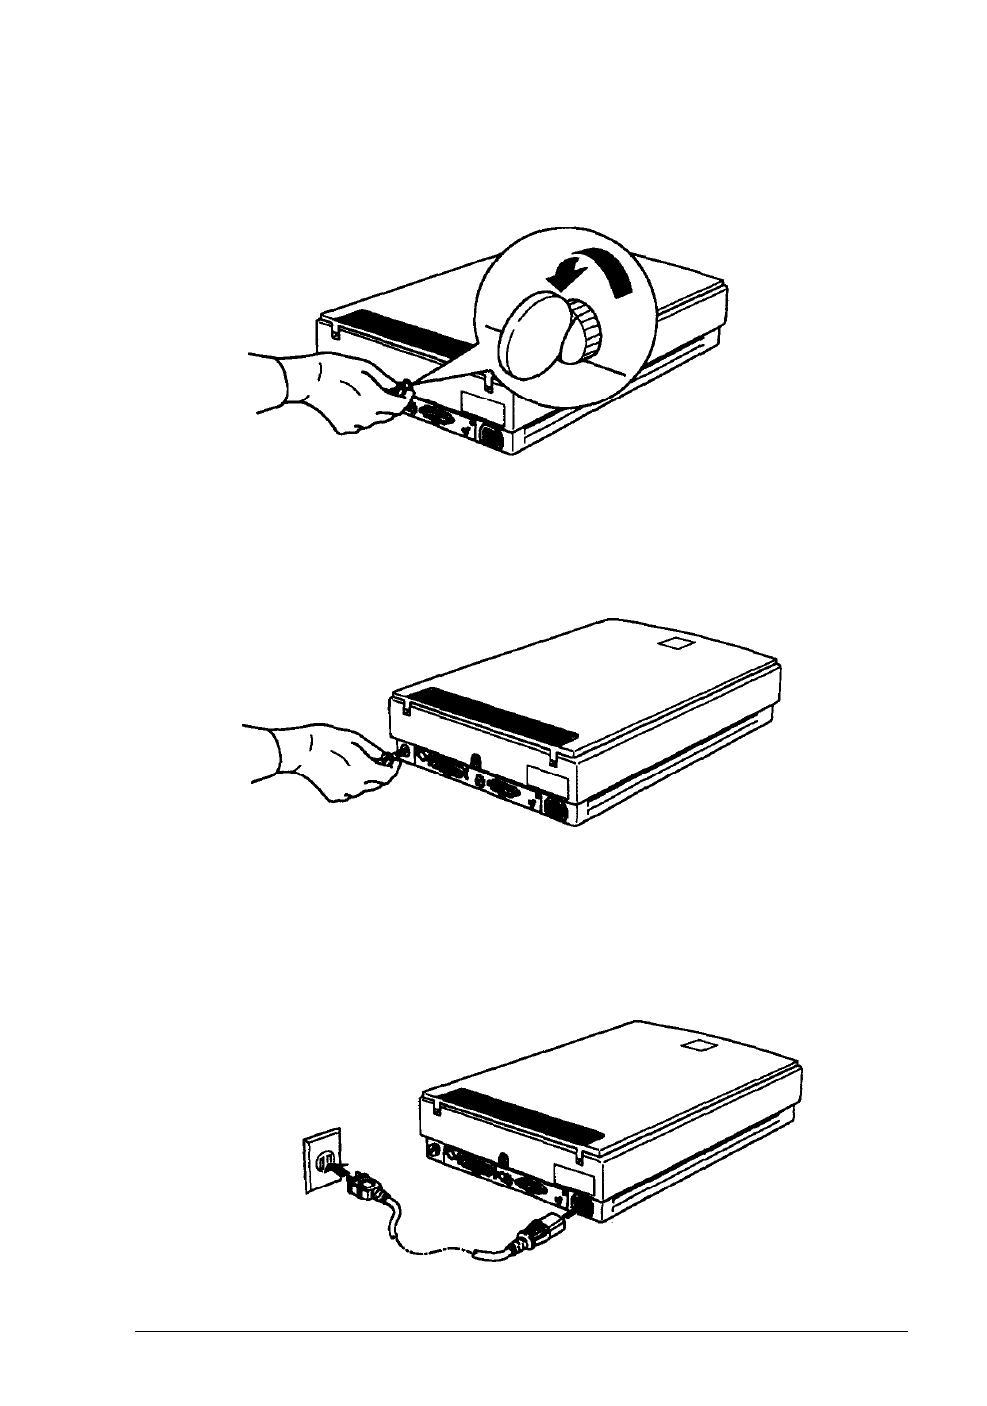
3. Locate the round screw in the middle of the rear panel and
turn it counterclockwise. If necessary, use a coin to loosen it.
4. Remove the screw and push it into the storage hole marked
STOCK;
do not screw it in.
5. Connect one end of the power cable to the power inlet on
the rear of the scanner and plug the other end into an
appropriately grounded electrical outlet as shown below.
See also other documents in the category Epson Scanners:
- PERFECTION V600 PHOTO (164 pages)
- PERFECTION V600 PHOTO (2 pages)
- Perfection V500 (240 pages)
- Perfection V500 (2 pages)
- GT-30000 (140 pages)
- GT-30000 (21 pages)
- GT-30000 (148 pages)
- Perfection V330 Photo (2 pages)
- PERFECTION 4990 PRO (8 pages)
- Perfection V200 Photo (9 pages)
- Expression 836XL (4 pages)
- Expression 10000XL- Photo E10000XL-PH (36 pages)
- GT 8000 (11 pages)
- ES-600C (8 pages)
- Grayscale Scanner (16 pages)
- Perfection V100 Photo (8 pages)
- CaptureOne 90DPM (2 pages)
- PSB.2003.04.004 (8 pages)
- 10000XL (96 pages)
- V750 (10 pages)
- Perfection 1650 (2 pages)
- Perfection 1250 (3 pages)
- STYLUS PHOTO 875DC (12 pages)
- II (13 pages)
- PERFECTION 2450 (5 pages)
- Perfection 636 (6 pages)
- GT-5500 (64 pages)
- PERFECTION V350 (10 pages)
- 4870 (6 pages)
- PERFECTION 4870 PRO (8 pages)
- 4990 Pro (8 pages)
- Perfection Photo 2400 (8 pages)
- V350 (10 pages)
- V350 (4 pages)
- Perfection Photo Scaner 1670 (8 pages)
- H6440 (2 pages)
- 1650 (5 pages)
- 1650 (2 pages)
- TM-S1000 (58 pages)
- 1640XL (167 pages)
- 836XL (120 pages)
- GT-20000 (2 pages)
- CX7800 (8 pages)
- EXPRESSION 10000XL (8 pages)
- 1680 (159 pages)