DJI Action 2 Front Touchscreen Module User Manual
Page 16
DJI Action 2 User Manual
©
2021 DJI OSMO All Rights Reserved.
13
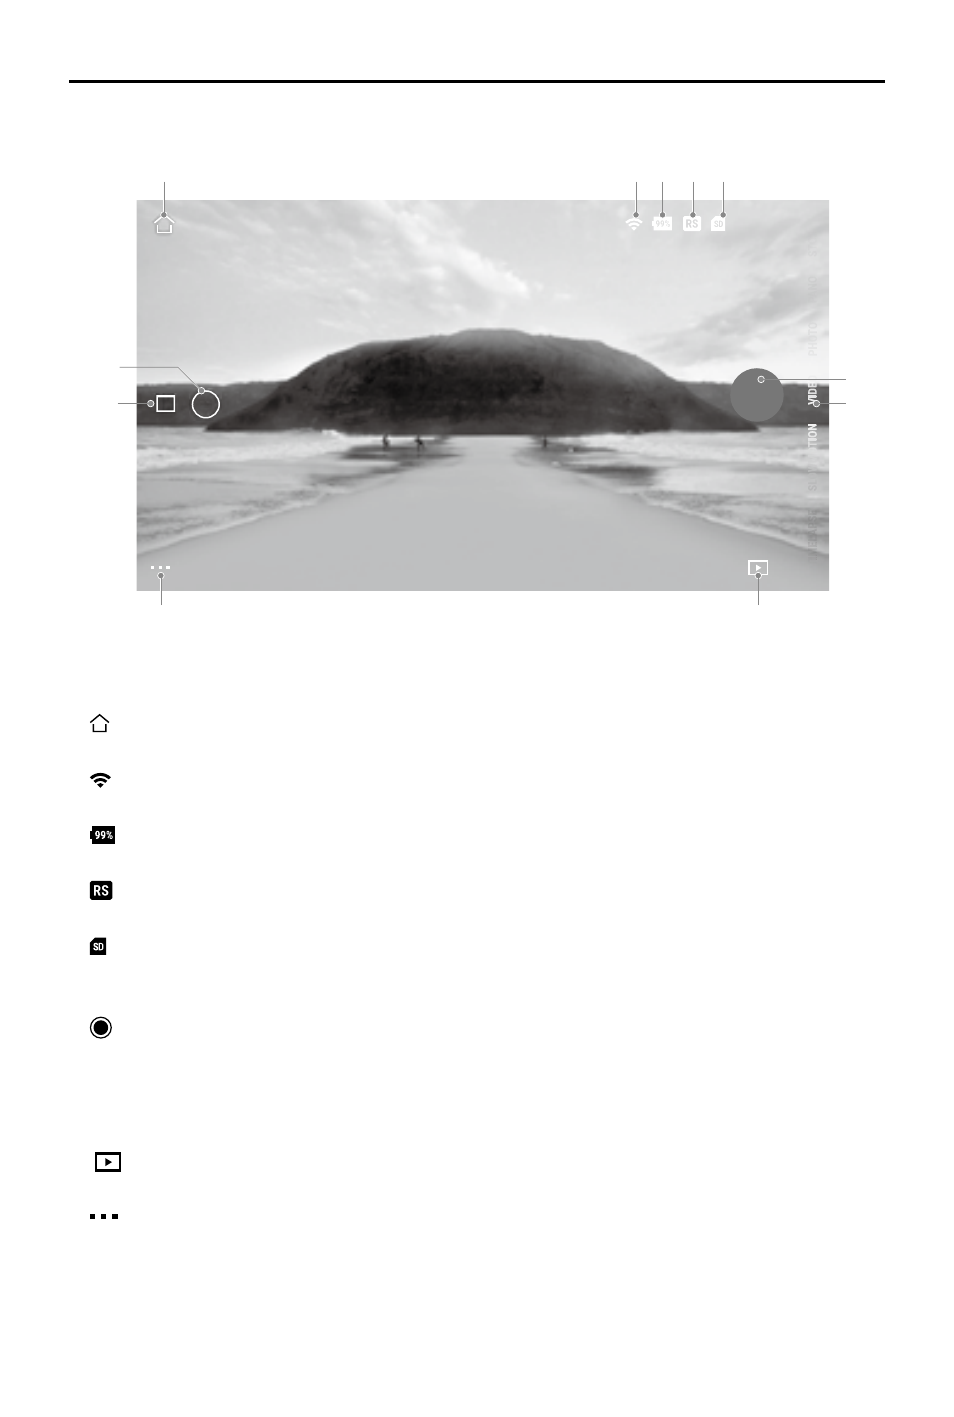
The camera view display may differ depending on the shooting mode. This display is for reference only.
1. Home:
: tap to return to the home screen.
2. Wi-Fi
: displays Wi-Fi connection.
3. Battery Level
: displays current battery level of DJI Action 2.
4. EIS
: displays the current electronic image stabilization.
5. microSD Card Information
11:38
: displays either the remaining number of photos that can be taken or the duration of video
that can be recorded according to the current shooting mode.
6. Shutter/Record Button
: tap to take a photo or to start or stop recording video.
7. Shooting Mode
Scroll to select the shooting mode. Choose between Timelapse, Slow Motion, Video, QuickClip, and
Photo.
8. Playback
: tap to preview photos and videos as soon as they are captured.
9. Setting
: choose Basic or Pro mode for the selected shooting mode. Various parameters can be set
when using different shooting modes. Video mode is used as an example below:
a. Video Settings
Basic: Loop Recording, FOV, EIS, and Grid are available.
Pro: More settings are available once Pro is enabled including Format, Exposure, and White
Balance.
Camera View
11:38
16:9
16MP
1.0x
1.0x
11:38
1
2 3 4 5
6
7
8
9
10
11