6 auto leveling – Creality Ender-3 S1 FDM 3D Printer User Manual
Page 6
1.
Connect the nozzle to the 24pin port as shown in the figure.
2.
Connect the X and Z axis stepper motors
according to the yellow label on 6pin (4 wires) port.
3.
Connect the X-axis limit switch as indicated by the
yellow label on the 3pin (2 wires) port.
4.
Connect 3pin (3 wires) 2.0 port to the keysets, and 3pin (3 wires)
2.54 port to the filament detector.
Note
●
Please ensure the correct position for the power supply switch and mains before supply connection, in order to
avoid damage to the device.
●
If the mains between 200V and 240V, please select the 230V for the power supply switch (default is 230V).
●
If the mains between 100V and 120V, please select the 115V for the power supply switch.
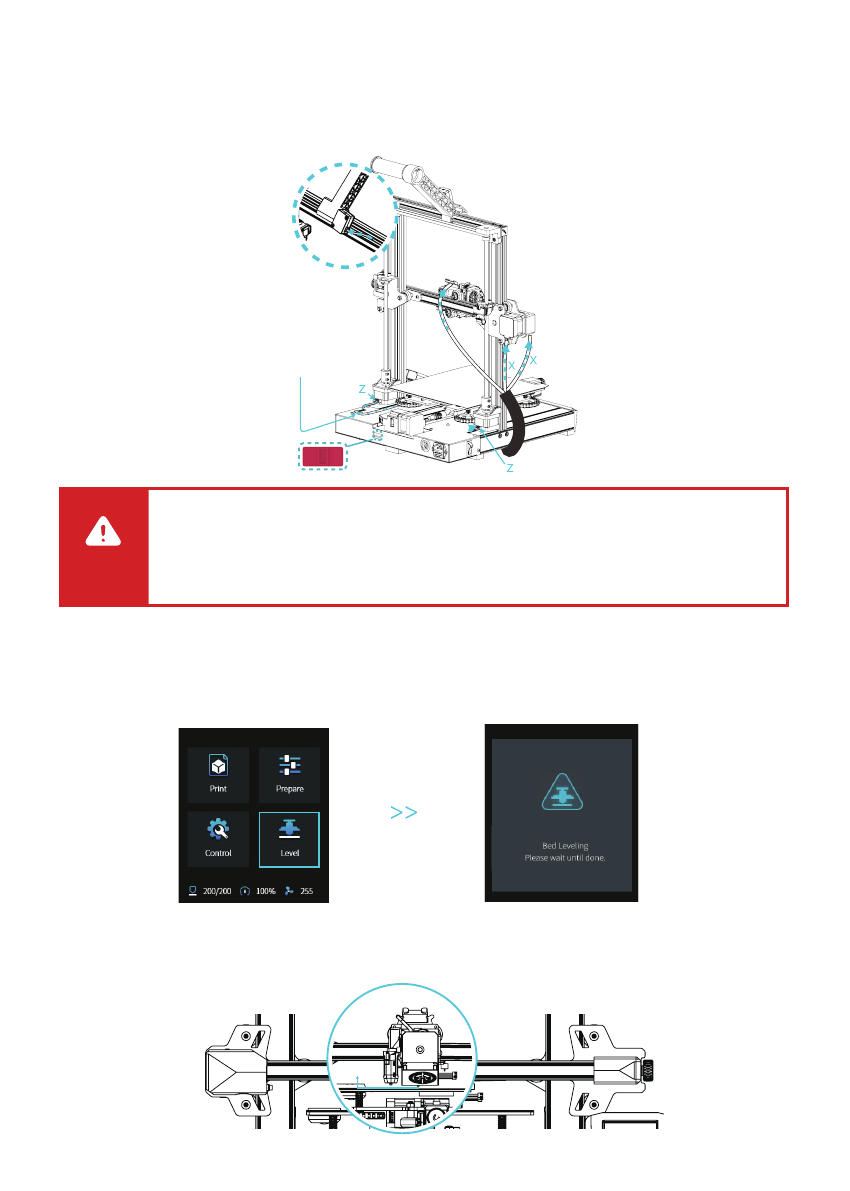
6 Auto Leveling
1.
Turn on the equipment and select “Level”.
Default operation: The printer first automatically returns to home for automatic calibration of 16 points, and then
returns to home again to complete the leveling.
2.
Enter “prepare→Z-offset”, adjust the Z-axis compensation value so that the height from the nozzle to
the printing platform is about the thickness of a piece of A4 paper (0.08-0.1mm), click the knob to
confirm, and complete the setting of Z-axis compensation value.
0.08-0.1MM
(Please use CR-Touch auto-leveling first. If CR-Touch is damaged, please install Z-axis limit and manually level
the bed. For details, please refer to the instructions stored in the SD card.)
Filament detector wiring
Filament detector wiring
115V
230V