5 product installation – Creality Ender-3 S1 FDM 3D Printer User Manual
Page 4
5 Product installation
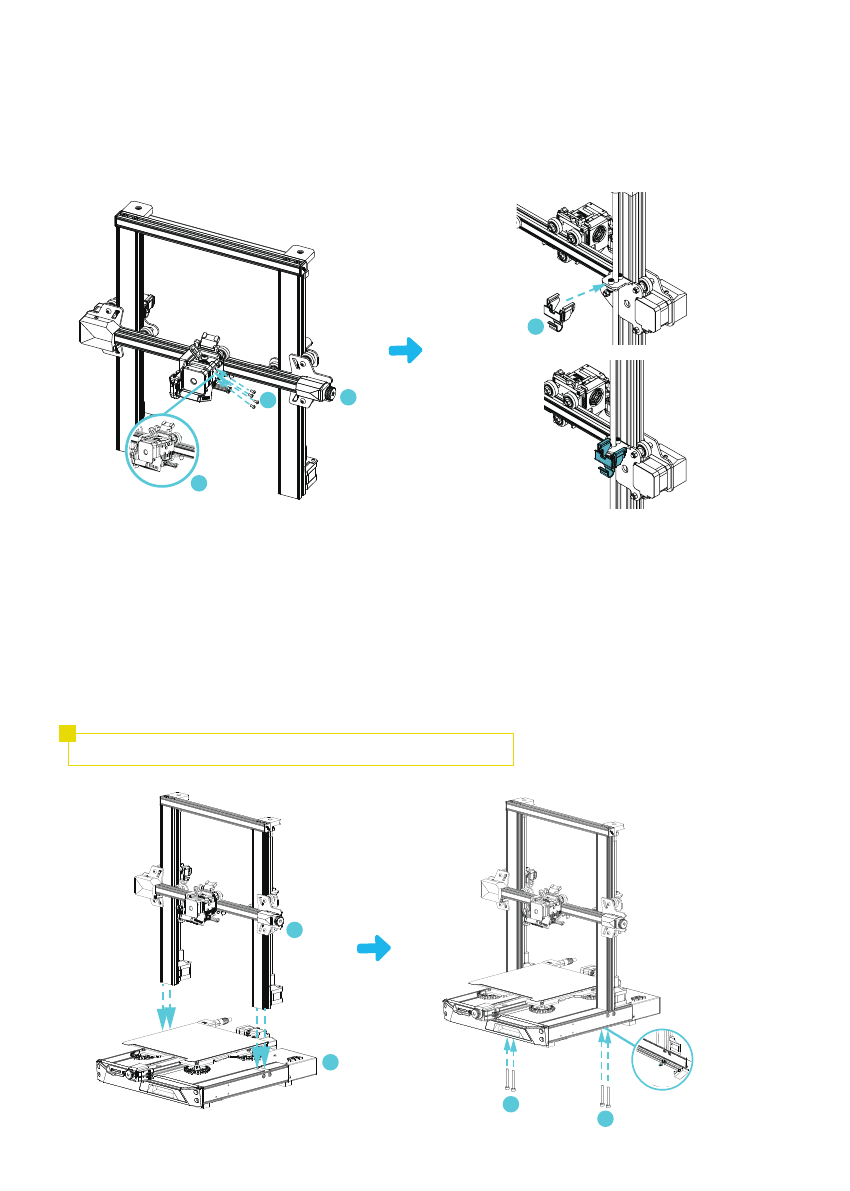
5.1 Nozzle assembly and wire clamp installation
5.2 Gantry frame installation
A.
Move the right profile of the bottom component out of the desktop about 35mm, and expose the installation
holes.
B.
Place the gantry frame in the slot of the base, and pre-lock with two M5x45 hexagon socket head spring
washer combination screws from the bottom to the top on the hole.
C.
Rotate the bottom assembly by 180° to ensure that the profiles on both sides are leveled up and down.
Pre-lock with two M5x45 hexagon socket head spring washer combination screws on the left hole, and then
tighten to fix it.
D.
Rotate the bottom assembly by 180°, and tighten the screw on the right side.
A.
Place the nozzle assembly on the mounting back panel of the extruder, pre-lock with four M3x6 hexagon
socket head cap screw, and then tighten to fix it.
B.
Clip the wire clamp to the back panel of the X-axis motor.
When tightening the screws, use the short side of the wrench.
3
3
Bottom view
1
17
17
5
5
19
2