Removing the stand arm for wall mount – Acer Predator X35 BMIPHZX 21:9 180 Hz Curved NVIDIA G-SYNC VA Gaming Monitor User Manual
Page 11
EN-2
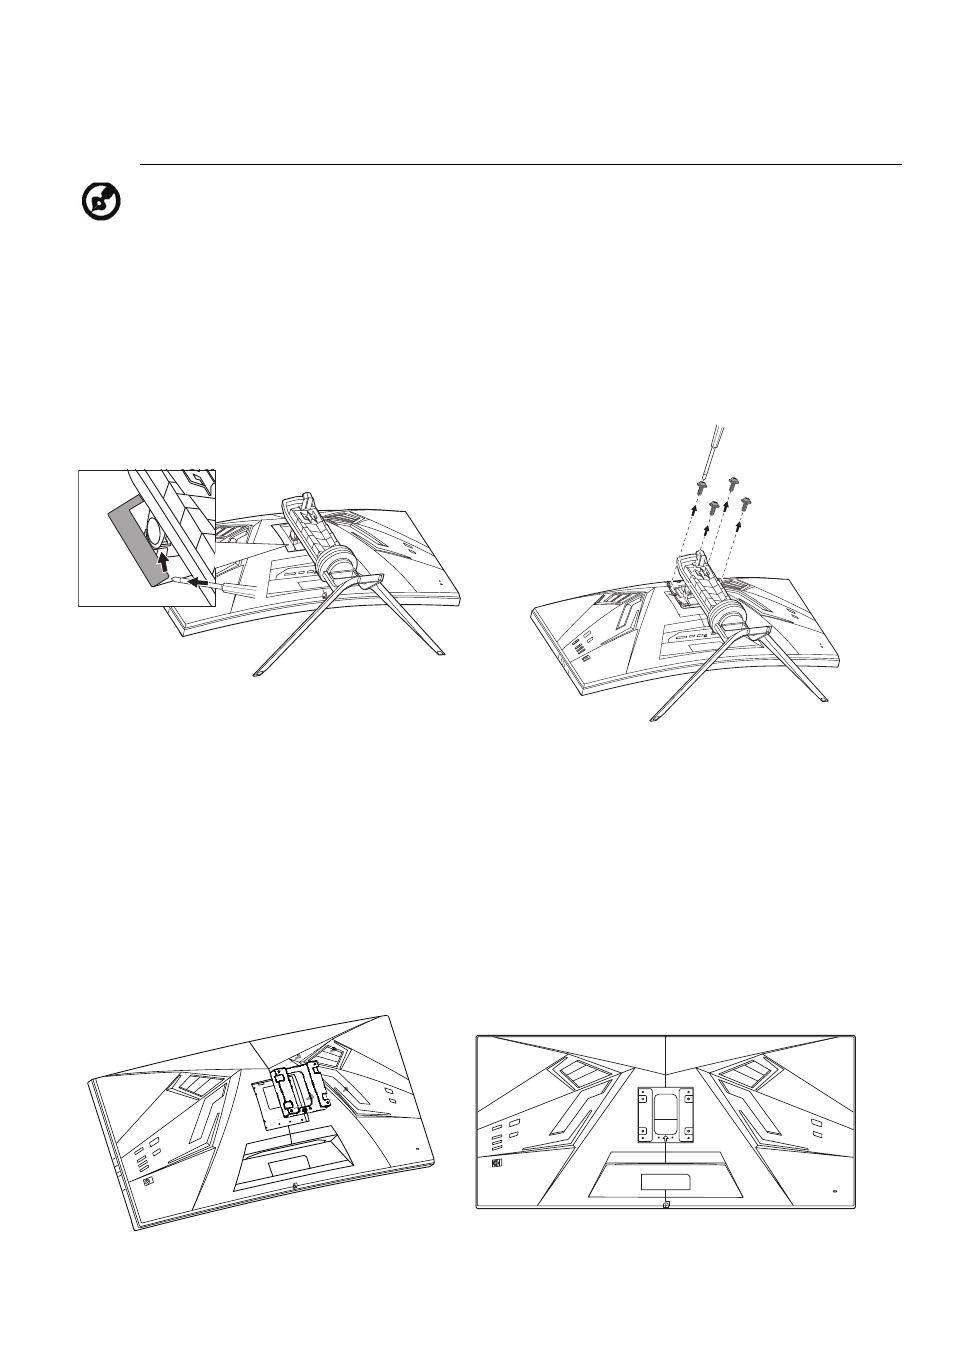
REMOVING THE STAND ARM FOR WALL MOUNT
Note: Carefully place the monitor face-down on a stable surface -- use
a cloth to avoid scratching the screen.
1.
Detach and remove the VESA covers
with a flathead screwdriver.
2.
Loosen and remove the screws with a
Phillips screwdriver, then lift and remove
the stand arm.
3.
Install the wall mounting kit with a
Phillips screwdriver. Align the
arrows on the back of the monitor
and on the wall mounting kit to
ensure proper installation. Make
sure it is screwed tight to the
monitor.
4.
Your monitor is ready for wall mount.
See also other documents in the category Acer Monitors:
- S240HL (2 pages)
- S242HL (27 pages)
- P226HQV (2 pages)
- P216H (23 pages)
- S212HL (28 pages)
- S211HL (2 pages)
- S211HL (27 pages)
- P186HV (2 pages)
- P186HV (23 pages)
- P186H (2 pages)
- P196HQV (23 pages)
- X163W (23 pages)
- X163W (3 pages)
- V223W (28 pages)
- V233H (26 pages)
- P235H (24 pages)
- P201W (2 pages)
- AL1917X (11 pages)
- 3230 (100 pages)
- AL1713bm (11 pages)
- ADEY (24 pages)
- X233HZ (3 pages)
- X243HQ (51 pages)
- X233HZ (26 pages)
- AL1751 (20 pages)
- AL2021 (130 pages)
- AL1917C (10 pages)
- 41L1500-786-1A (20 pages)
- AL2032 (9 pages)
- X243W (21 pages)
- AL2017 (11 pages)
- 41L1700-786-7A (20 pages)
- AL1917T (16 pages)
- X263W (24 pages)
- AL1703 (9 pages)
- AL1731 (3 pages)
- al200 (19 pages)
- AL1911 (10 pages)
- AF 707 (5 pages)
- AL1712 (10 pages)
- AC 711 (7 pages)
- AL1502 (17 pages)
- AL1932 (10 pages)
- X223W (26 pages)
- X223W (25 pages)