Printing a nozzle check – Epson 480SX User Manual
Page 26
22
Printing a Nozzle Check
Follow these steps to run the Nozzle Check utility:
1. Make sure the printer is plugged in
but not printing.
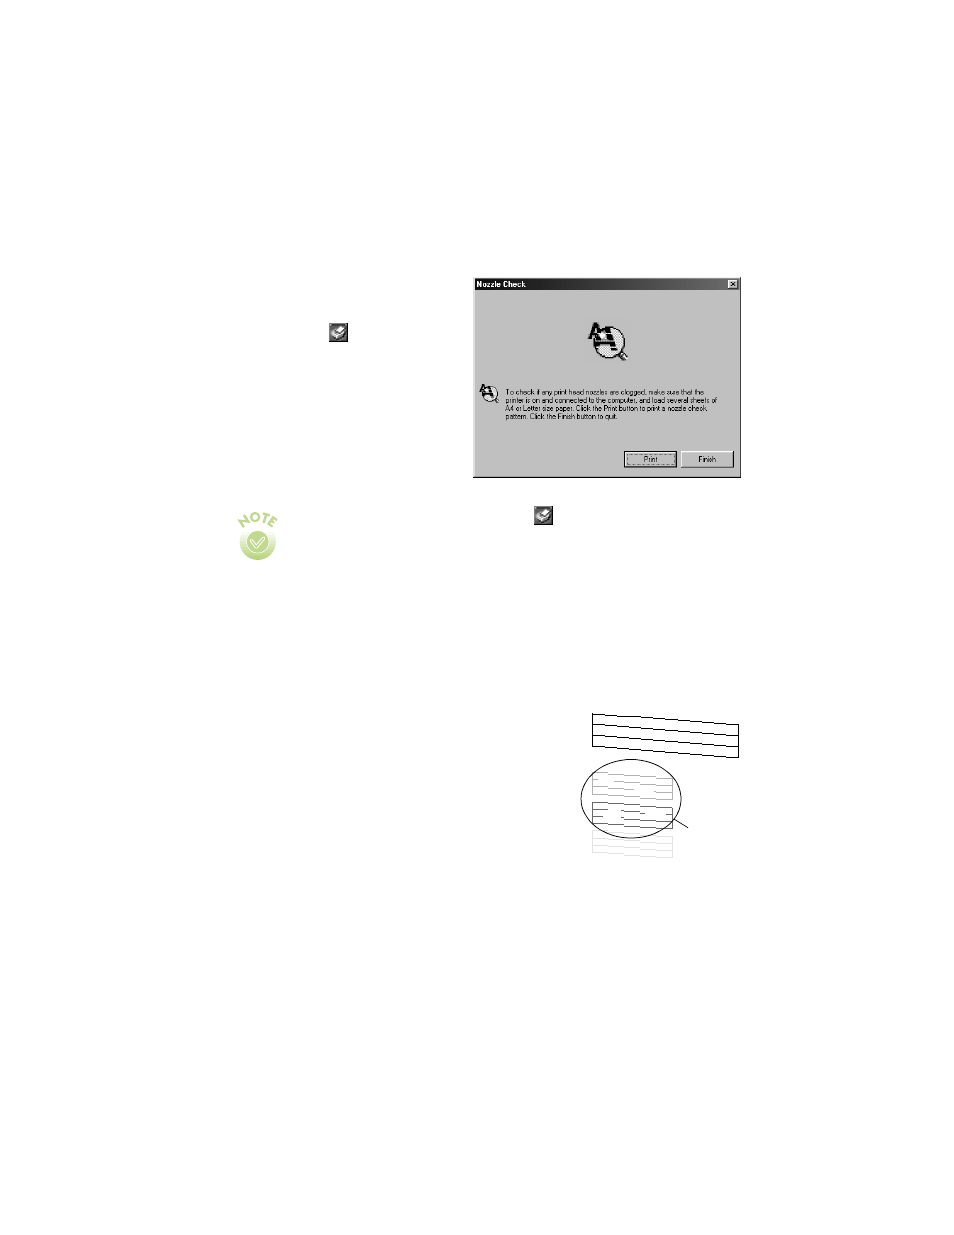
2. Right-click the
Status
Monitor 3 icon on your Windows
taskbar, then select
Nozzle Check
in the menu that appears. You see
this window:
3. Make sure letter-size or larger paper is loaded in the printer and click
to
print a nozzle check pattern.
4. Examine the nozzle check pattern you print.
Each staggered horizontal and straight vertical line
should be complete, with no gaps in the dot
pattern.
5. If your printout looks okay, click
Finish
.
If any dots are missing, as shown here, click
Clean
and follow the instructions on the screen to clean
the print head again. (The actual test prints the
lower pattern in color.)
If you don’t see any improvement after cleaning three or four times, check the
solutions in “Problems Getting Good Print Quality” on page 36. You can also
turn the printer off and wait overnight—this allows any dried ink to soften—and
then try cleaning the print head again.
To right-click, place your cursor on the
Status Monitor 3 icon and
click the right mouse button.
If you have an application running, you can also run the utility by
accessing the printer settings dialog box as described on page 10. Click
the Utilities tab, then click the Nozzle Check button.
missing
dots