3 chassis installation and rack mounting – PLANET VF-102-KIT User Manual
Page 13
13
Step 4: VF-102-R (Receiver): Connect coaxial cable from
monitor / DVR to Video BNC port of the VF-102-R.
Step 5: Connect the 5VDC power adapter to the VF-102-T / VF-
102-R and verify that the Power LED lights up.
Step 6: Turn on the power of the analog camera / monitor; the
VIDEO LED (Green) should light when all cables are
attached.
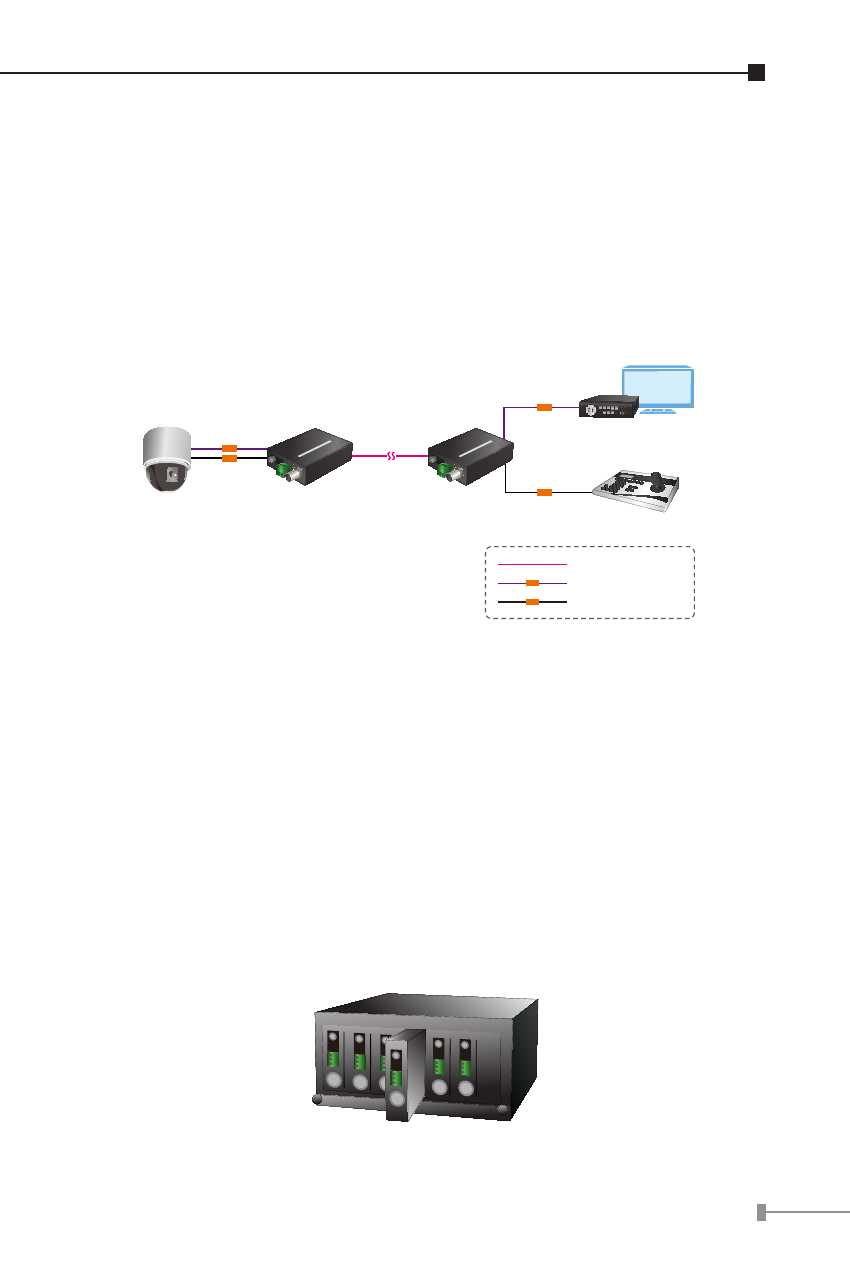
Speed Dome
DVR / Monitor
Control Keyboard
Fiber-optic
Audio Line / Video Line
A/V
Serial Line (RS-485)
|O|O|
A/V
|O|O|
A/V
|O|O|
A/V
A/V
Up to 20km
Coax
Coax
VF-102-T
Transmitter
VF-102-R
Receiver
Figure 3-1 VF-102-T / VF-102-R stand alone installation
3.3 Chassis Installation and Rack Mounting
To install the Video over fiber Converter in a 10-inch or
19-inch Converter Chassis with standard rack, follow the
instructions described below.
Step 1: Place your Converter Chassis on a hard flat surface,
with the front panel positioned towards your front side.
Step 2: Carefully slide in the VF module until it is fully and
firmly fitted into the slot of the converter chassis.
Figure 3-2 Insert a video over fiber converter into an available slot