Storage features – Electrolux 241940002 User Manual
Page 22
22
Storage Features
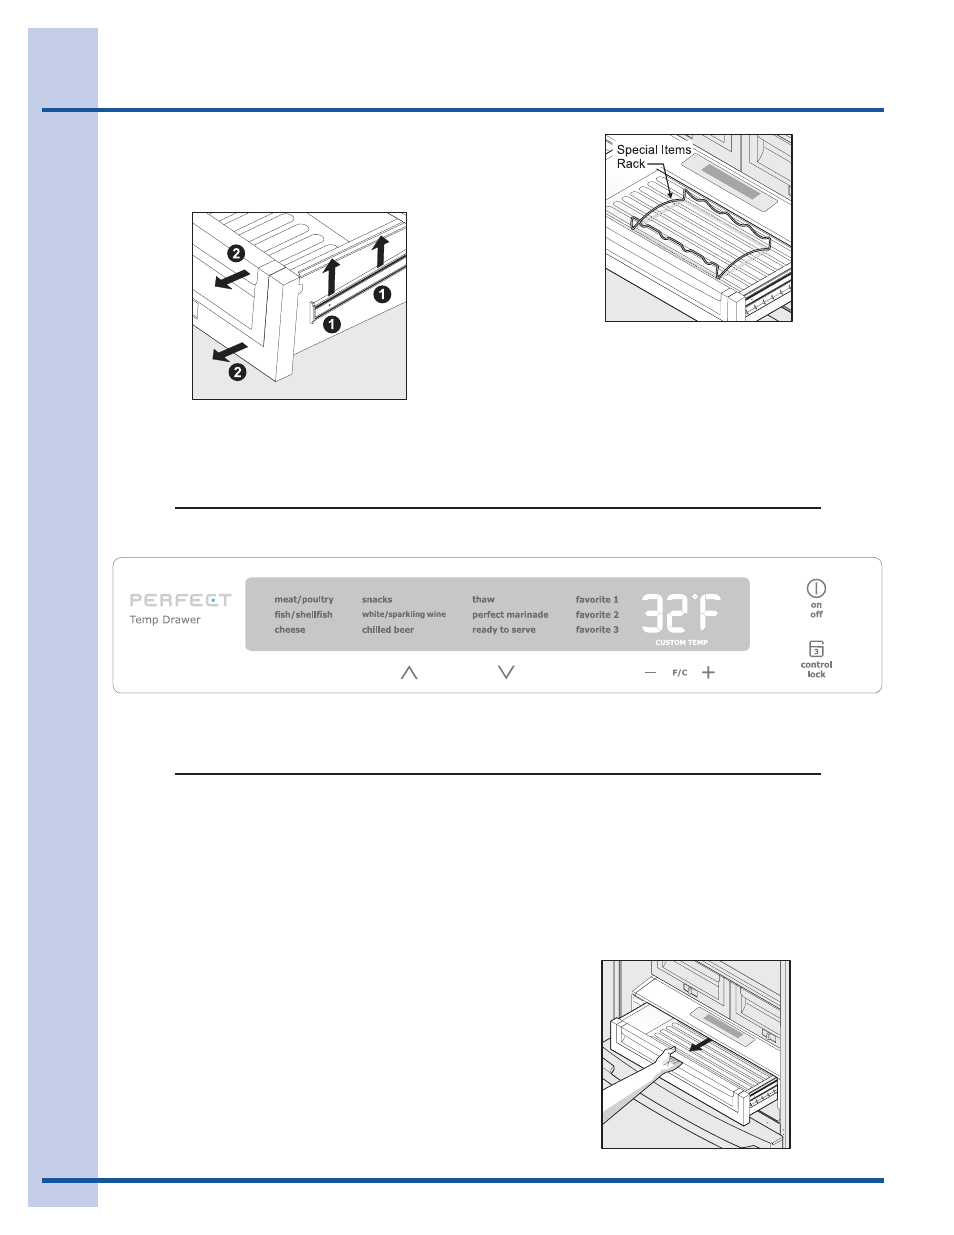
Special items rack (select models)
The innovative design of the special items rack allows
you to store four (4) bottles of wine or soft drink bottles.
Removing Crisper Drawer
To remove the Crisper Drawer for cleaning:
1 Pull the drawer out until it stops.
2 Lift the front slightly and remove the drawer.
Deli keeper (select models)
Some models are equipped with a meat keeper drawer
for short-term storage of bulk meat items. This drawer
includes sliding controls for adjusting the humidity
inside.
Any meat to be kept longer than two (2) days should be
frozen. If you store fruits or vegetables in this drawer,
set it to a higher humidity.
The Perfect Temp
TM
Drawer is designed to keep food items at a precise temperature whether cooler, warmer, or
the same as the fresh food section of the refrigerator. The thaw setting holds a temperature for thawing frozen
foods for 12 hours. At the end of that time, it then switches to the mixed items setting to store the thawed food.
Perfect Temp
TM
Drawer (select models)
To operate:
1 To turn on and off, press the drawer’s On/Off
button. The numeric display will show a temperature
between “
28°F and 42°F” when on and “OFF” when
off.
2 Press F/C if you prefer to display Fahrenheit “F,”
or Celsius “
C”.
3 Press either the up ∧ or down ∨ scroll buttons to
illuminate the desired item.
4 Once an option is selected, the drawer will adjust
and maintain the temperature for the setting
selected.
5 When turned off, the Perfect Temp
TM
Drawer
functions as a standard meat pan. The Perfect
Temp
TM
Drawer is best used for packaged food
products. Leafy vegetables and unpackaged
fruits are best kept in one of the crisper drawers.
6 The three favorite selections provide flexibility to
Opening the Drawer
set and store personal temperature selections.
The temperature is adjusted up by pressing the
+ or – buttons. The drawer will store the selected
temperature setting until it is changed.
7 The control buttons can be locked to prevent
accidental changes by pressing the
control
lock button for three (3)seconds. Deactivate by
pressing for three (3)seconds again.