Assembly instructions, You are now ready to play – Medal Sports YSLSUIG3003/AC25800 User Manual
Page 13
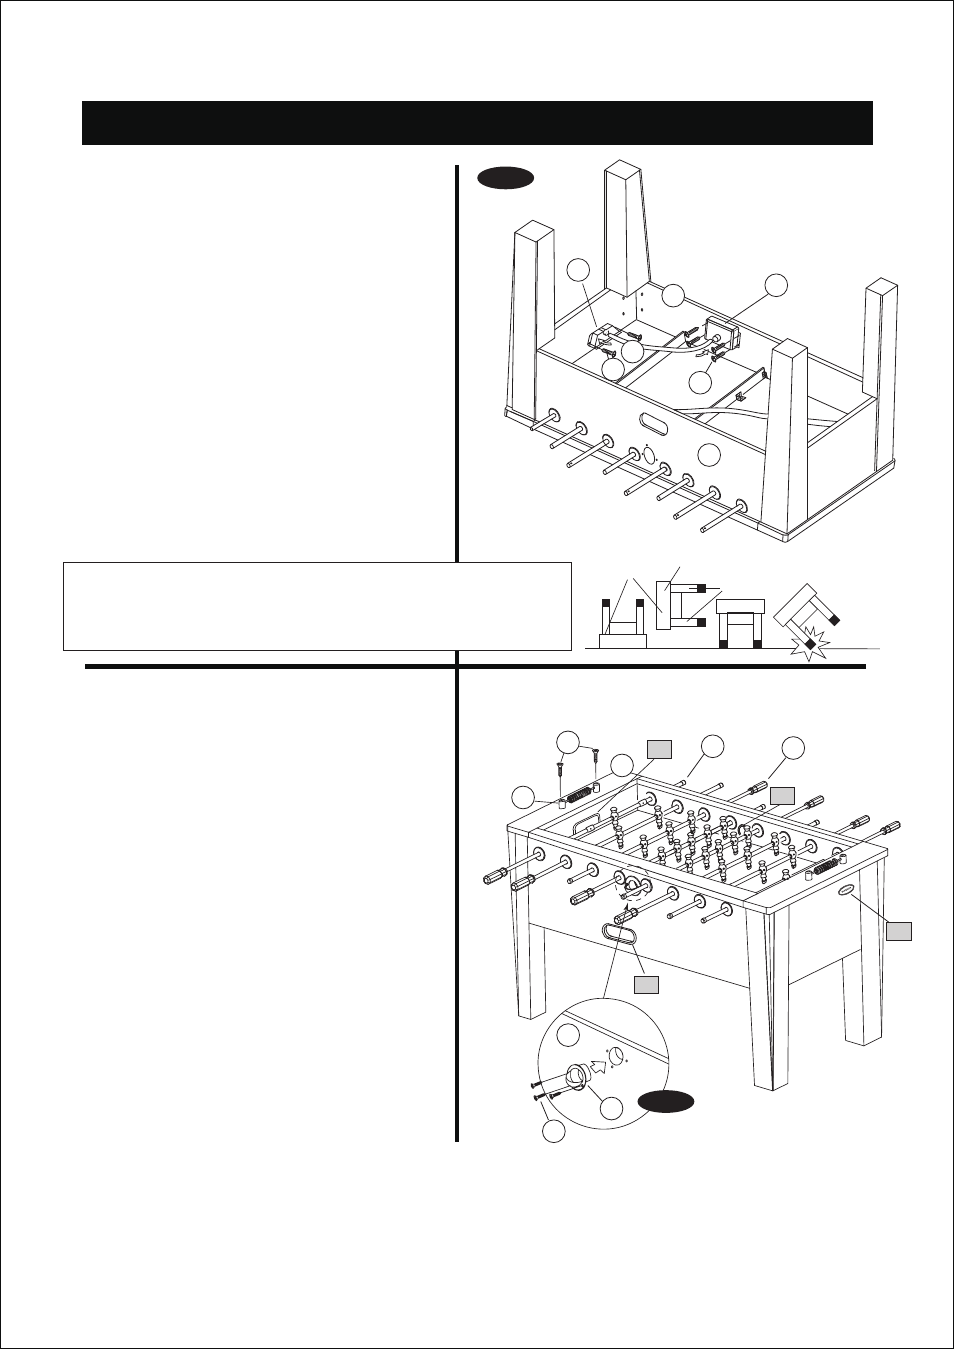
20. Attach the Goal Boxes (#15) to the Goal Box
Supports (#10) using two Screws (#39) per Goal
Box.
21. Attach the Ball Catchers (#16) to the Side
Aprons (#1) using four Screws (#39) per Ball
Catcher.
22. Install one end of the Ball Return Channel (#12)
onto the Ball Catcher (#16) and the other end
onto the Goal Box (#15) as shown in FIG.10.
Repeat for the other Ball Return Channel (#12).
23. Lift the table assembly from the floor with two
strong adults. Turn the table over and set it
down on the legs.
Go back and make sure that
all connections are tight.
Step 11:
16
25
1
29
37
30
11
44
39
15
12
39
HOLD TABLE
CABINET
DO NOT
HOLD THE
LEGS
DO NOT LEAN THE
TABLE ON ITS LEGS!
24. Attach the Handles (#11) onto the Rod ends
which have a hole. And then place the Rod End
Caps (#30) onto the other side of the Rods.
25. Attach the Scorer (#29) to the End Top Rails
(#4) using two Screws (#37) per Scorer.
26. Attach the Ball Entry Cups (#25) to the Side
Aprons (#1) using three Screws (#44) per Ball
Entry Cup.
See FIG.12A.
Assembly Instructions
Step 12:
12
YOU ARE NOW READY TO PLAY!
FIG.11
FIG.12A
4
31
32
34
1
1
28
Two strong adults are required to turn the table over as shown.
CAUTION:
1. Lift the table off the ground.
2. Turn the table over.
3. Place it on all four feet at the same time on the ground.