Fig.1 fig.2 – Sealey 200XTD User Manual
Page 4
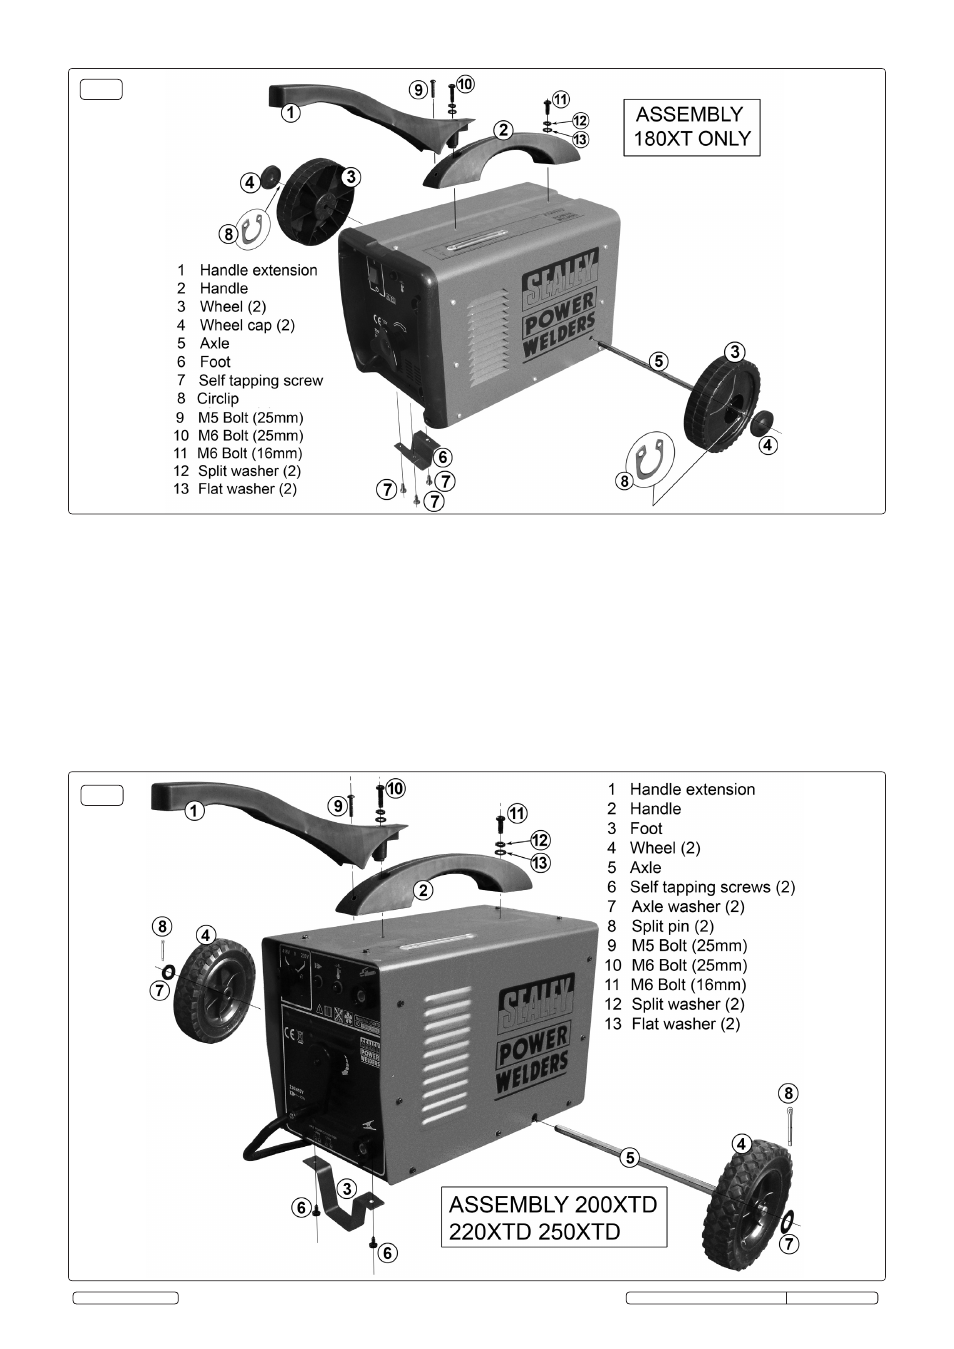
3.2.
Assembly, 200XTD, 220XTD, 250XTD: (Refer to fig.2)
3.2.1 Lay a protective covering such as some cardboard packaging onto the floor and, with the help of another person, carefully turn the
welder upside down onto it. Place the bent metal foot (3) onto the bottom of the casing just behind the front panel and fix it in place
using two self tapping screws (6).
3.2.2 Assemble the wheels and axle as follows. Slide a wheel (4) onto one end of the axle (5) followed by a large flat washer (7). Insert a
split pin (8) through the hole in the end of the axle (5) and bend the ends over. Insert the free end of the axle/wheel assembly into the
hole in the side of the casing as shown in fig.2 and guide it through the casing to emerge from the hole on the far side of the casing.
Slide the other wheel (4) onto the axle and retain it with a large flat washer (7) and a split pin (8). Bend the ends of the split pin over to
retain the assembly.
3.2.3 Attach the handle extension to the handle as follows. Take the handle extension (1) and push the large recessed spigot on its
underside into the matching hole in the handle (2) as shown in fig.2. Secure the two parts together using the 25mm M5 bolt (9)
provided.
3.2.4 Place the handle assembly onto the top of the casing and align it with the fixing holes. Secure the back end of the handle using an M6
16mm bolt (11), a split washer (12) and a flat washer (13) as shown in fig.2. Secure the front end of the handle using an M6
25mm bolt (10), a split washer (12) and a flat washer (13) as shown in fig.2.
Original Language Version
180XT, 200XTD, 220XTD, 250XTD Issue: 1 - 01/06/12
© Jack Sealey Limited
fig.1
fig.2