Sealey GSS2323 User Manual
Page 11
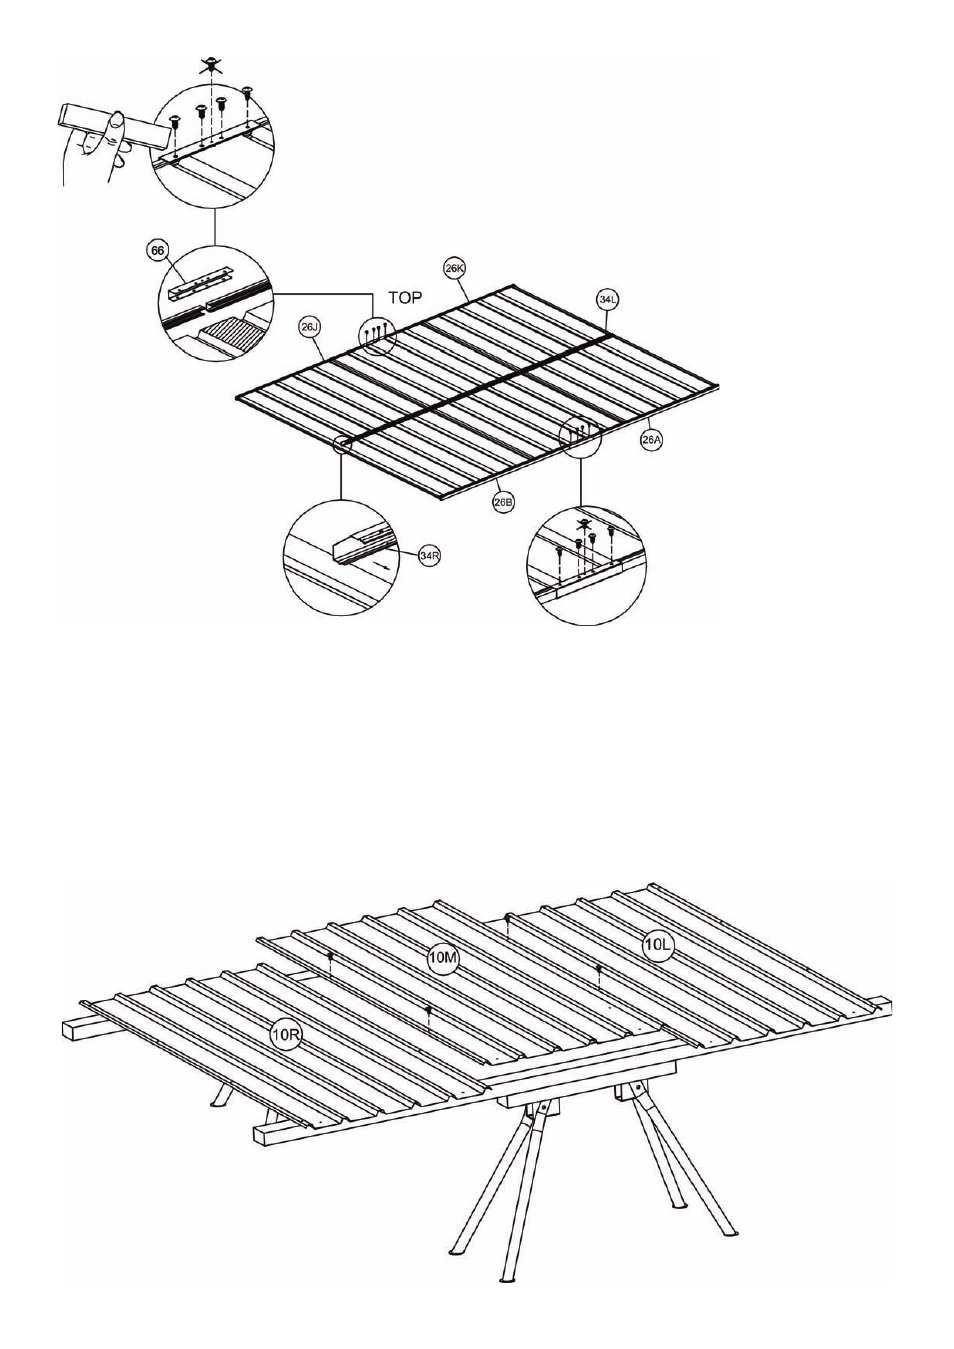
Place a block under the shadowed area when screwing as a support and the screw with cross
mark must not be fixed in this stage. Repeat the same steps for the other side wall.
Step 4: Assemble the roof panel.
Place 10R, 10M and 10L the sheeting on your work table and join together with the self tapping
screws per the diagram.
This manual is related to the following products:
See also other documents in the category Sealey Equipment:
- SA0615 (7 pages)
- SAC2203B (8 pages)
- SAC2203B (6 pages)
- SAC2203B (6 pages)
- SSC12710D (14 pages)
- SAC0610E (4 pages)
- SAC10030 (4 pages)
- SSC11003 (9 pages)
- SAc3503B (6 pages)
- SSQC2409 (4 pages)
- SSQC2409 (4 pages)
- SSQC2409 (5 pages)
- SA1565 (5 pages)
- SA5055 (4 pages)
- SAC3203B3PH (6 pages)
- SAC72775BLN (6 pages)
- SAC55075B (5 pages)
- SAC03290 (3 pages)
- SAC05020 (4 pages)
- SAC106B (3 pages)
- SAC2203BLN (6 pages)
- ADB3000 (2 pages)
- SAC89025VLN (6 pages)
- CBOX2212V (1 page)
- PW2000 (5 pages)
- PW1712 (3 pages)
- PW4000 (4 pages)
- PW2500 (5 pages)
- PW5000 (5 pages)
- PWM1300 (7 pages)
- PWM2500SP (6 pages)
- LC300ST (2 pages)
- LC800ST (2 pages)
- LS1050V (4 pages)
- LS575VH (3 pages)
- LS520H (3 pages)
- LS450H (2 pages)
- LSH180V (2 pages)
- TP16 (1 page)
- TR3000 (2 pages)
- TP17 (2 pages)
- AK460DX (3 pages)
- AK466D (2 pages)
- TP69 (2 pages)
- TP6906 (3 pages)