Sealey SL1D User Manual
Page 2
NOTE: It is our policy to continually improve products and as such we reserve the right to alter data, specifications and component parts without prior notice.
IMPORTANT: No liability is accepted for incorrect use of this product.
WARRANTY: Guarantee is 12 months from purchase date, proof of which will be required for any claim.
INFORMATION: For a copy of our latest catalogue and promotions call us on 01284 757525 and leave your full name and address, including postcode.
01284 757500
01284 703534
Sole UK Distributor, Sealey Group,
Kempson Way, Suffolk Business
Park
, Bury St. Edmunds, Suffolk,
IP32 7AR
www.sealey.co.uk
Web
Original Language Version
SL1D.V2, SL2D.V2, SL4D.V2 Issue: 1 - 13/08/13
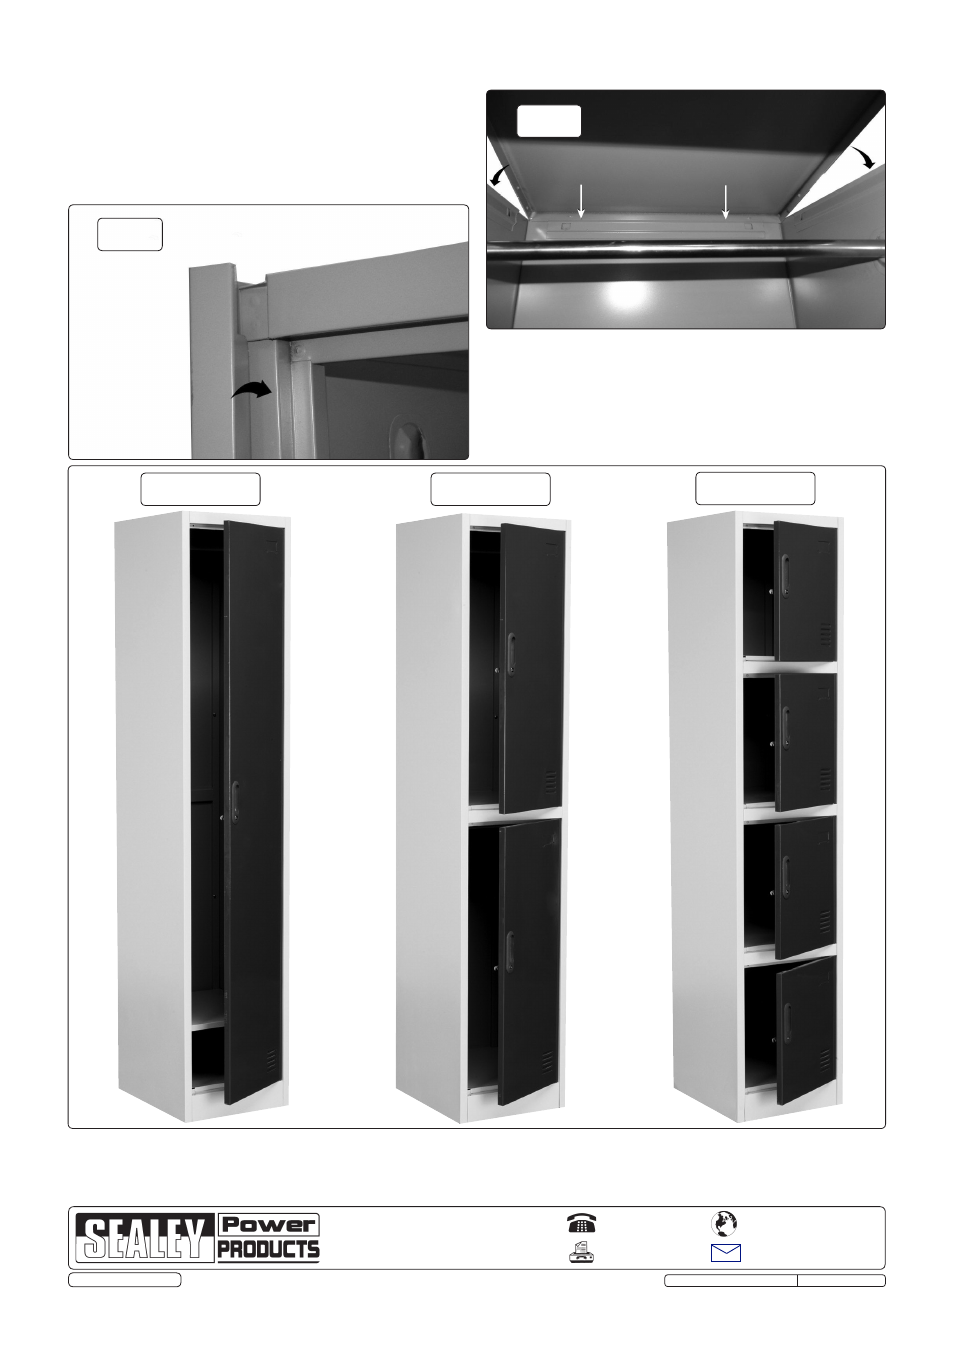
3.6. Fit the shelves into the locker following the same procedure
as for the locker top.
3.7. Place hanging bar in position (SL1D and SL2D only) by
pushing it into position (fig.4) and fit the mirror in its position
inside the door.
fig.3
SL1D
SL2D
SL4D
fig.4
3.4. Fit the door frame panel into the unit from the inside, locating
the frame with the side panels at the top (fig.3) and bottom.
Once located push fit them together until they lock into place.
3.5. Fit the locker top from the top, ensuring that the three lips
locate within the brackets at the back and sides, when they are
lined up, apply pressure and lock the top into place (fig.4).
NOTE: the shelves and top are identical.
© Jack Sealey Limited