Fig.6 fig.5 fig.1, Set-up, Operation – Sealey PW1600 User Manual
Page 3
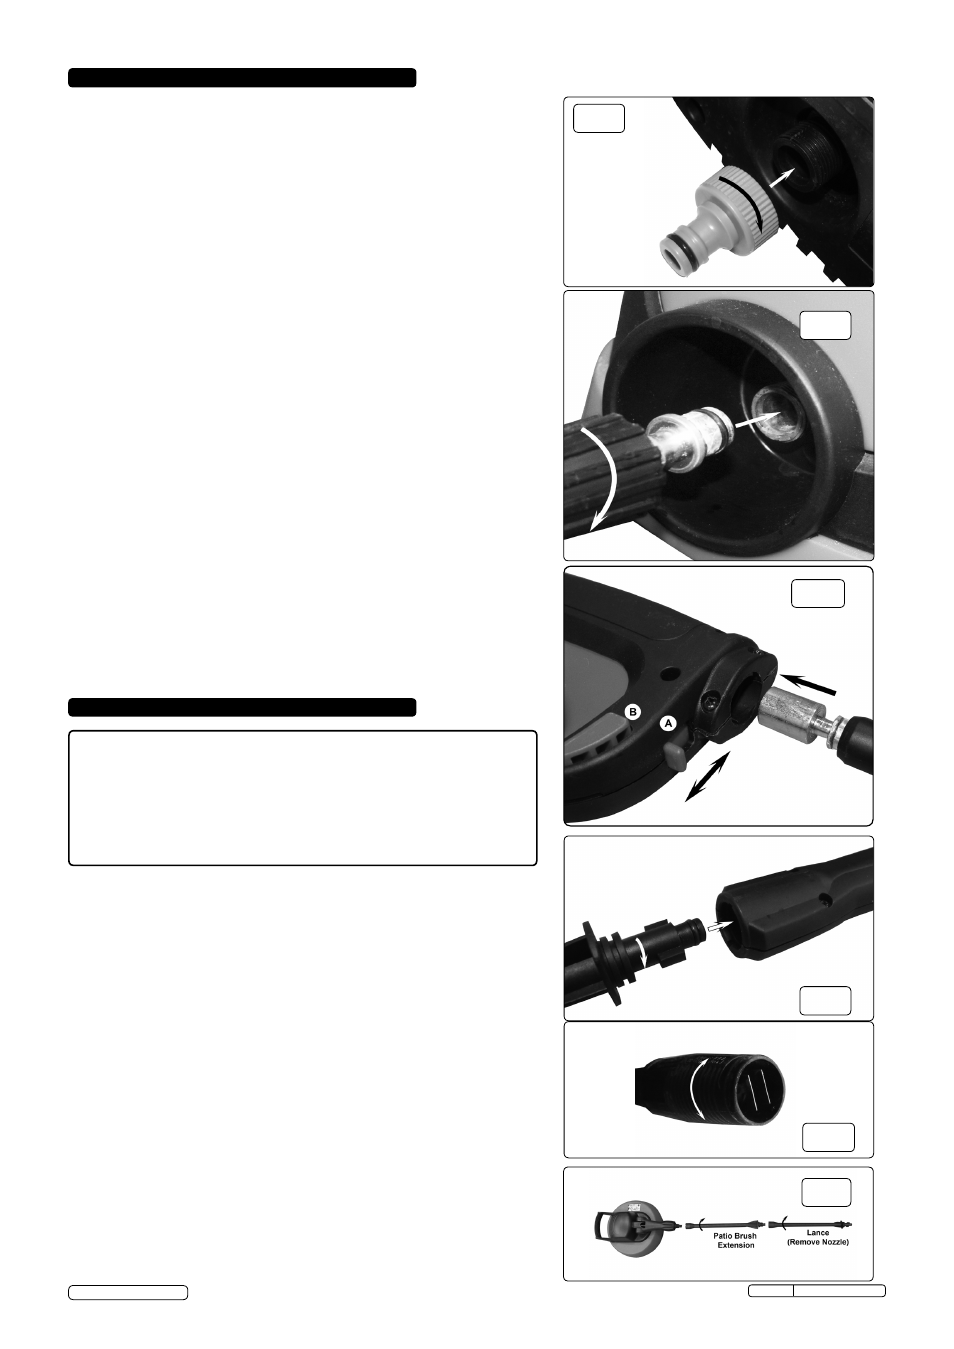
4. SET-UP
WARNING! Do not use the 'Patio Brush Extension' with any attachment
other than the patio brush.
Using the 'Patio Brush Extension' with other attachments will cause
damage to the extension and attachments.
4.1. Connecting the water supply.
Use a reinforced hose pipe with an internal diameter of 1/2” and connect
to the mains water supply.
Before attaching the hose to the pressure washer flush the hose through
with some clean water to remove any foreign matter from within the hose.
Conect
¾" BSP female fitting to inlet on the rear of the machine (Fig.1)
4.2. Connecting the high pressure hose.
Attach the high pressure hose as in fig.2, ensuring the connector is tight.
Attach the other end to the gun (fig.3). To attach the hose, slide the red
catch (fig.3 'A') down, then press the hose end fitting into the gun. When
pushed home fully, slide the catch back up towards the hose to lock.
4.3. Assembling the lance and nozzle.
Push the nozzle into the gun as shown in fig.4 and turn 90
° until it locks
into place.
WARNING! Ensure the nozzle is locked into position, failure to ensure
this could result in the nozzle being ejected under high pressure when
operating the gun.
4.4.
Fitting the Fixed or Rotating brush.
If you require either the fixed or rotating brush, fit in the same manner as
assembling the lance in fig.4.
4.5.
Fitting patio brush.
To fit the patio brush, unscrew nozzle from either turbo or fan-jet lance
and screw the lance onto the patio brush (fig.6). Assemble lance with gun
as in
fig.4. The patio brush can be used with both the extenion and lance
or with just the extension fitted into the gun directly, as required.
4.6.
Connecting to electrical supply.
WARNING! Ensure the On/Off switch is in the 'Off' position.
Using an RCD plugged into a 13A mains socket,
DO NOT turn the power
on.
DO NOT touch the plug with wet hands.
Original Language Version
PW1600 Issue: 1- 10./01/13
5. OPERATION
WARNING! Ensure you read, understand and apply Section 1 safety
instructions.
WARNING! Dry running can seriously damage the unit.
WARNING! Use washer on a flat, level surface, in an upright
position. Failure to do so will invalidate your warranty. Never lay the
washer down during use.
WARNING! DO NOT leave washer switched on for more than 15
minutes without operating trigger.
fig.2
fig.3
fig.4
fig.5
fig.5
© Jack Sealey Ltd
fig.6
fig.5
fig.1
Important! The washer motor will stop as soon as the gun trigger is released
and will restart when the trigger is squeezed. Always allow at least 5 seconds
between releasing the trigger and restarting.
5.1.
Primary checks.
Check that the inlet filter is clean; pump delivery and pressure will be
reduced if blocked. Never use the machine without a filter (which is fitted
inside inlet connector). Ensure that the water supply, high pressure hose
and gun are correctly connected, and that air can freely circulate around
the washer.
5.2.
Operation of safety catch.
To prevent inadvertent operation of the unit the safety catch should
always be engaged when the gun is not in use. Slide the catch (fig.3.'B')
to the left to lock; right to release.
5.3.
Bleeding The Gun
It is very important to bleed the gun before using the pressure washer.
Squeeze the trigger
BEFORE turning the electrical supply on. This allows
any air trapped inside the pressure washer and gun to be removed before
using the unit. Continue holding the trigger for approximately one
minute to allow any excess air out of the unit. Water will flow through the
gun at low pressure during this procedure.