Securing ladder to rack, Fig.2 fig.3 – Sealey SLC2 User Manual
Page 2
.
4.
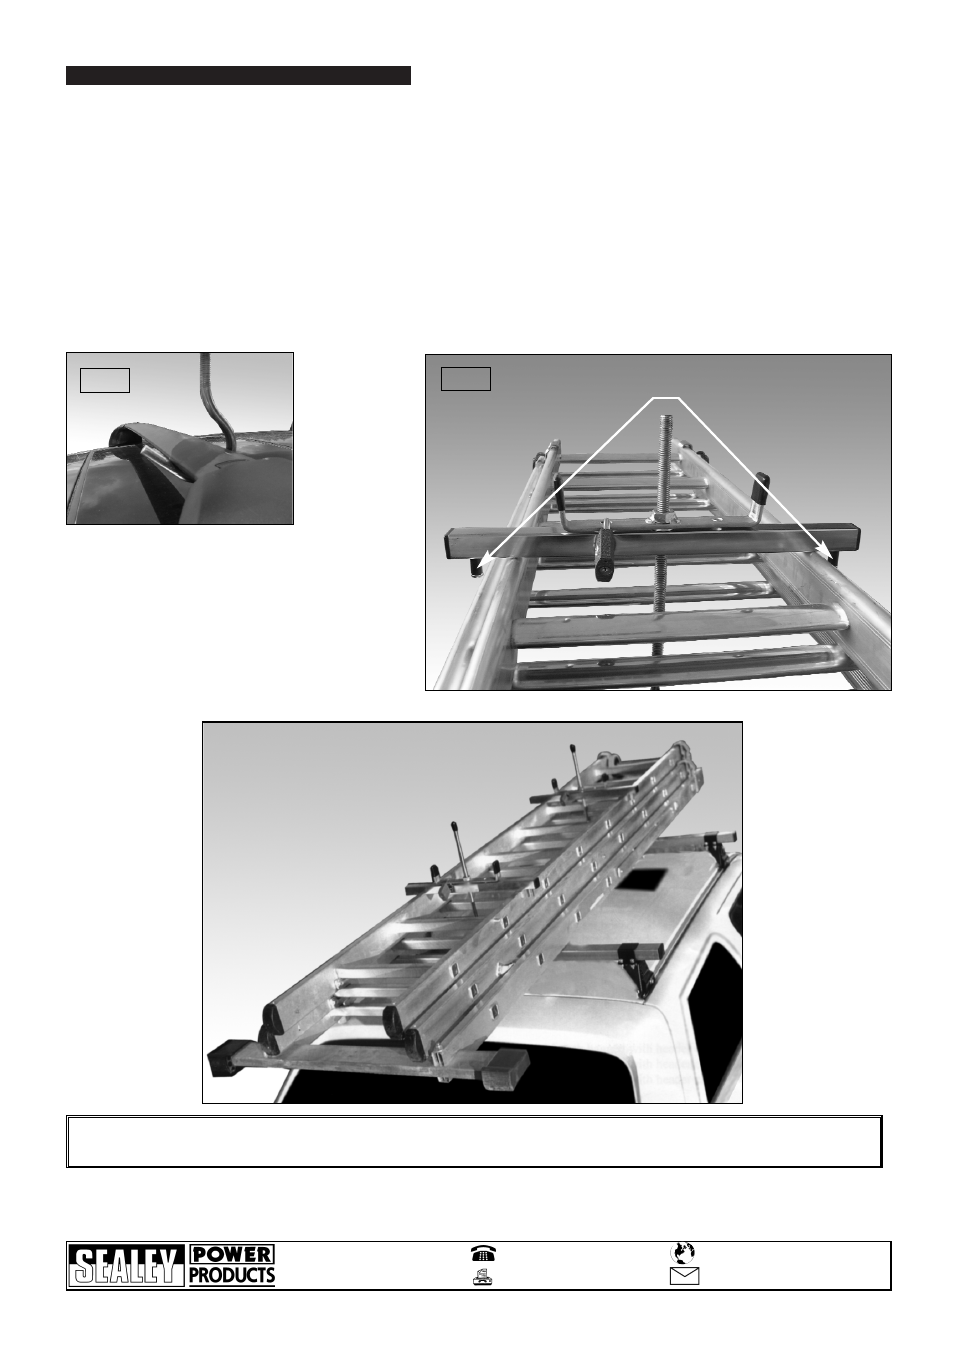
SECURING LADDER TO RACK
SLC2 - 1 - 060707
NOTE: It is our policy to continually improve products and as such we reserve the right to alter data, specifications and component parts without
prior notice. IMPORTANT: No liability is accepted for incorrect use of this equipment. WARRANTY: Guarantee is 12 months from purchase date,
proof of which will be required for any claim. INFORMATION: For a copy of our latest catalogue and promotions call us on 01284 757525 and
leave your full name and address, including postcode.
4.1
SECURE LADDER TO RACK.
4.1.1
Inspect your roof bars/rack to ensure they are correctly fitted according to the vehicle manufacturer’s guidelines and in a serviceable
condition.
4.1.2
Place your ladder on the roof bars; depending on the weight and/or length of the ladder this may require two people.
4.1.3
Ensure that you do not have to much overhang at either end of your vehicle.
4.1.4
Pass the roof bar hook through the ladder and under one of the bars (fig.2).
4.1.5
Wind the lock bar down onto the clamp bar as in fig.3 until the ladder is firmly held ensuring that the ladder stops are on either side
of the ladder (fig.3).
Caution! Do not use to much force or you may damage the ladder and/or roof bars.
4.1.6
When the ladder is secured pass the padlock through the lock down bar and the clamp bar (fig.3). This will ensure that the load
remains secure.
$
WARNING! Remember the driver of the vehicle is responsible for the security and safety of the load carried.
Check the security of the ladder frequently during your journey
LADDER STOPS
fig.2
fig.3
01284 757500
01284 703534
Sole UK Distributor
Sealey Group,
Bury St. Edmunds, Suffolk.
www.sealey.co.uk
Web
Parts support is available for this product. To obtain a parts listing and/or diagram, please log on to www.sealey.co.uk,
email [email protected] or phone 01284 757500.