Maintenance – Sealey ATL13 User Manual
Page 2
5. MAINTENANCE
5.1 Periodically check that all fixings are tight and secure.
5.2 Check that the treads are in good condition and are not worn.
5.3 Check that the treads are clean and free from oil or similar substances.
5.4 When not in use, store in a clean, dry, childproof environment.
ATL07, ATL09, ATL11, ATL13 Issue: 1 - 08/12/11
01284 757500
01284 703534
Sole UK Distributor, Sealey Group,
Kempson Way, Suffolk Business Park
,
Bury St. Edmunds, Suffolk,
IP32 7AR
www.sealey.co.uk
Web
NOTE: It is our policy to continually improve products and as such we reserve the right to alter data, specifications and component parts without prior notice.
IMPORTANT: No liability is accepted for incorrect use of this product.
WARRANTY: Guarantee is 12 months from purchase date, proof of which will be required for any claim.
INFORMATION: For a copy of our latest catalogue and promotions call us on 01284 757525 and leave your full name and address, including postcode.
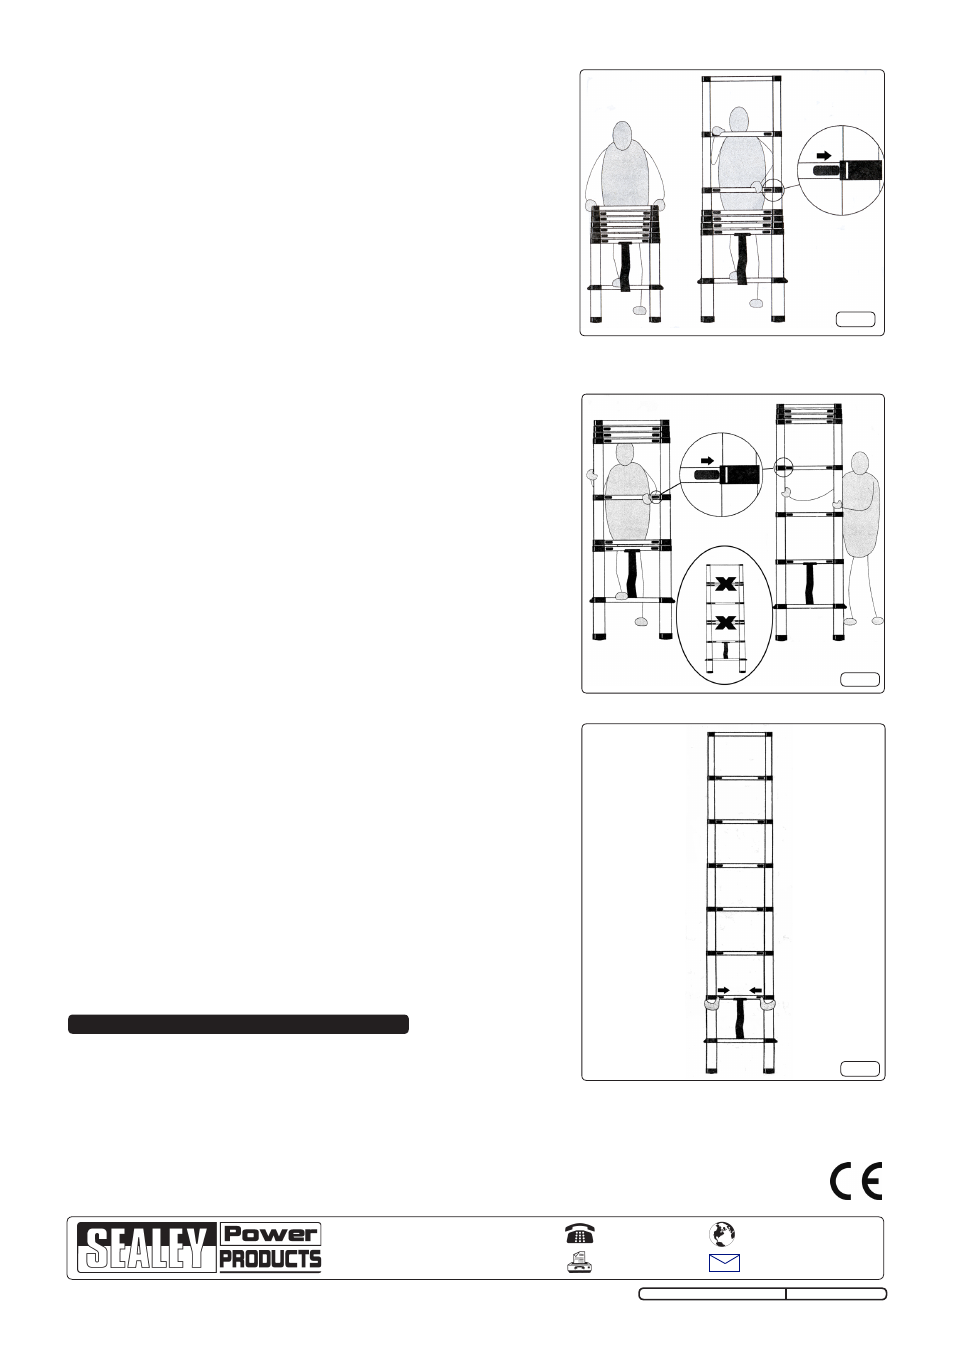
4.2 Fully Extending the Ladder (Fig.2)
4.2.1 Place the ladder on a firm level surface and unclip the securing strap. Place one
foot on the lower rung to stabilize the ladder.
4.2.2 To extend the ladder to its full height, start by gripping the top rung with both
hands and fully extending the top section until the locking mechanism is
activated. Extend the next section and continue until the ladder is fully opened.
Always ensure that the locking mechanism has actived and locked after
extending each section.
Fig.2
Fig.3
4.3 Partially Extending the Ladder (Fig.3)
4.3.1 Place the ladder on a firm level surface and unclip the securing strap. Place one
foot on the lower rung to stabilize the ladder.
4.3.2 To extend the ladder to a partial height, start by gripping the chosen top rung with
both hands and fully extending this section until the locking mechanism is
activated. Extend the next section and continue until the ladder is opened to the
required height. Always ensure that the locking mechanism has actived and
locked after extending each section.
4.3.3 Ensure that only the uppermost sections are closed when partially extending the
ladder.
DO NOT leave sections in the middle of the ladder closed (inset Fig.3).
4.4 Retracting the Ladder (Fig.4)
4.4.1 Ensure that the finger guards are raised before retracting the ladder.
4.4.2 Hold the ladder in the upright position with both hands on the lowest section and
position the thumbs on the locking levers.
4.4.3 Push the levers towards the centre of the ladder and the section will start to
descend. Release the thumbs from the locking levers and allow the sections to
descend under their own weight. Continue retracting each section until the ladder
is fully closed. Take care not to trap the hands between the rungs when the
sections are descending.
4.4.4 Once the ladder has been fully retracted, secure with the securing strap.
Fig.4