Epson EL 486UC User Manual
Page 77
6.
7.
8.
9.
10
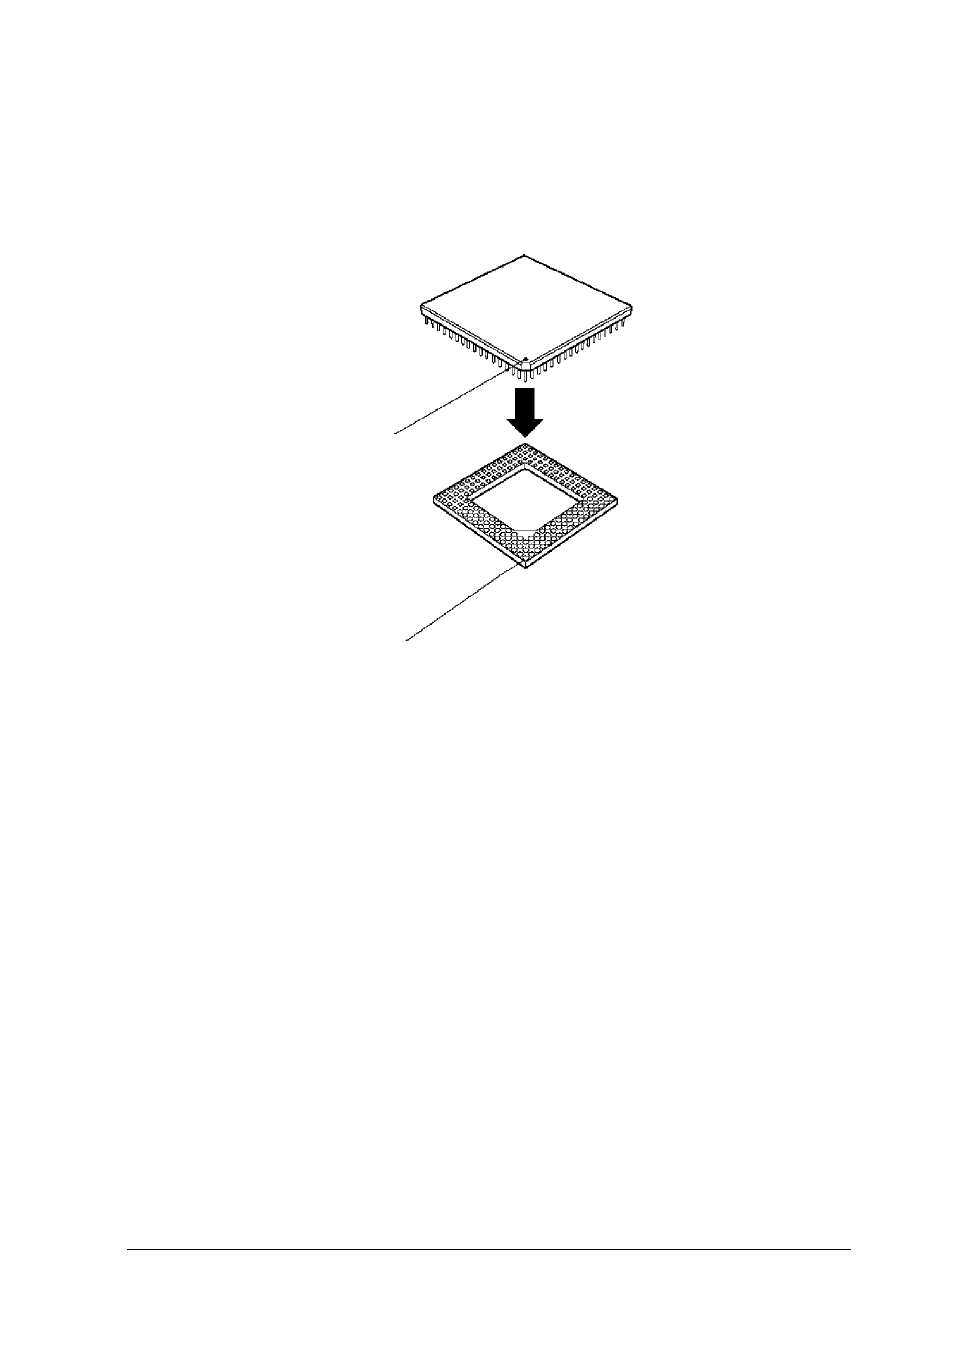
Position the processor chip over the socket, aligning the
notched edge of the chip (marked with a dot) with pin 1 on
the socket, as shown below. A corresponding notch is
drawn on the circuit board under the socket.
d o t
pin 1
Make sure the pins in the processor chip are directly over the
holes in the socket. Then gently push the microprocessor
straight into the socket, pressing evenly on all sides.
If you are upgrading from a 486SX processor to a DX or DX2
processor, you need to change the jumper settings of 521
and 522. If you are upgrading to a CPU with a different
clock speed, you may need to change the setting of jumper
J15. See the tables on pages 4-7 and 4-8 for the correct
jumper settings.
If you are upgrading to a DX or DX2 processor, you must
install a heat sink or heat sink/ fan assembly. Follow the
instructions included with the heat sink.
See page 4-20 for instructions on replacing the option card
connector board. Then replace your option cards.
Installing and Removing Options
4-29