Kichler 300006 User Manual
Page 10
9
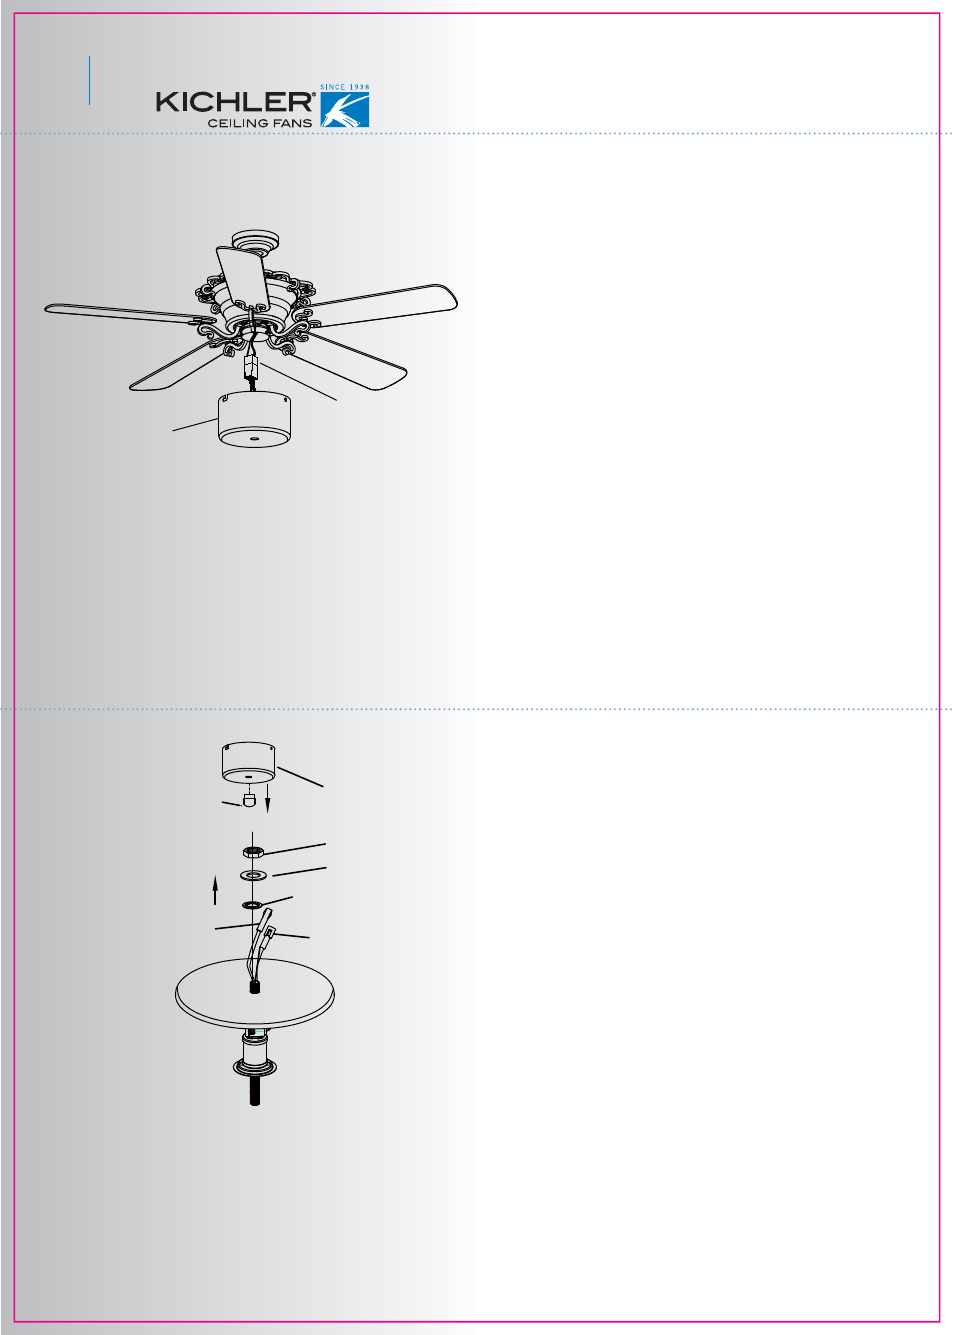
Fig. 20
Fig. 19
Switch housing
Plastic nut
Hexnut
Metal washer
Molex connection
(small)
Lock washer
Molex connection
(big)
Switch housing
AMP connnection
12. INSTALLING THE LIGHT KIT
11. INSTALLING THE SWITCH HOUSING
Step 1. Loosen the 3 screws on the switch
housing mounting plate.
Step 2. The square plastic wiring connector
from the ceiling fan and the switch housing
will only fit together one way. Match up the
color on the side of the connector, then push
them together until the snap engages.
Step 3. Tuck the connections neatly into the
switch housing. Align the key holes on the
switch housing with the screws on the
mounting plate. Turn the switch housing until
it locks in place at the narrow end of the key
holes. Tighten all 3 screws previously loos-
ened. (Fig. 19)
NOTE: The wire connectors in this step will
only fit together “One Way”. Make sure the
connectors are properly aligned.
Step 1. Locate the switch housing that came
with your ceiling fan, then push out the plastic
plug located in the center of the switch hous-
ing. See Fig 20.
Step 2. Remove the mounting nut / lock
washer / metal washer from the light fixture
mounting stem.
Step 3. Pass the molex connectors through
the bottom hole of switch housing (starting
with the larger connector first). Threaded the
light kit onto the switch housing and make it
snug. Add the nut / lock washer / metal
washer and tighten securely.
Step 4. Match the smaller connection of light
kit to the bigger one of switch housing and
push them together until the snap engages.
Follow the same procedure for the other
connector. (Fig. 20)