Installing and removing a bit and a drill (fig 3), Removal / insertion of battery (fig. 4) – Powerplus POWX0058BAG DRILL/SCREWDRIVER 18V 2 BATT EN User Manual
Page 8
POWX0058BAG
EN
Copyright © 2014 VARO
P a g e
| 8
www.varo.com
7.2
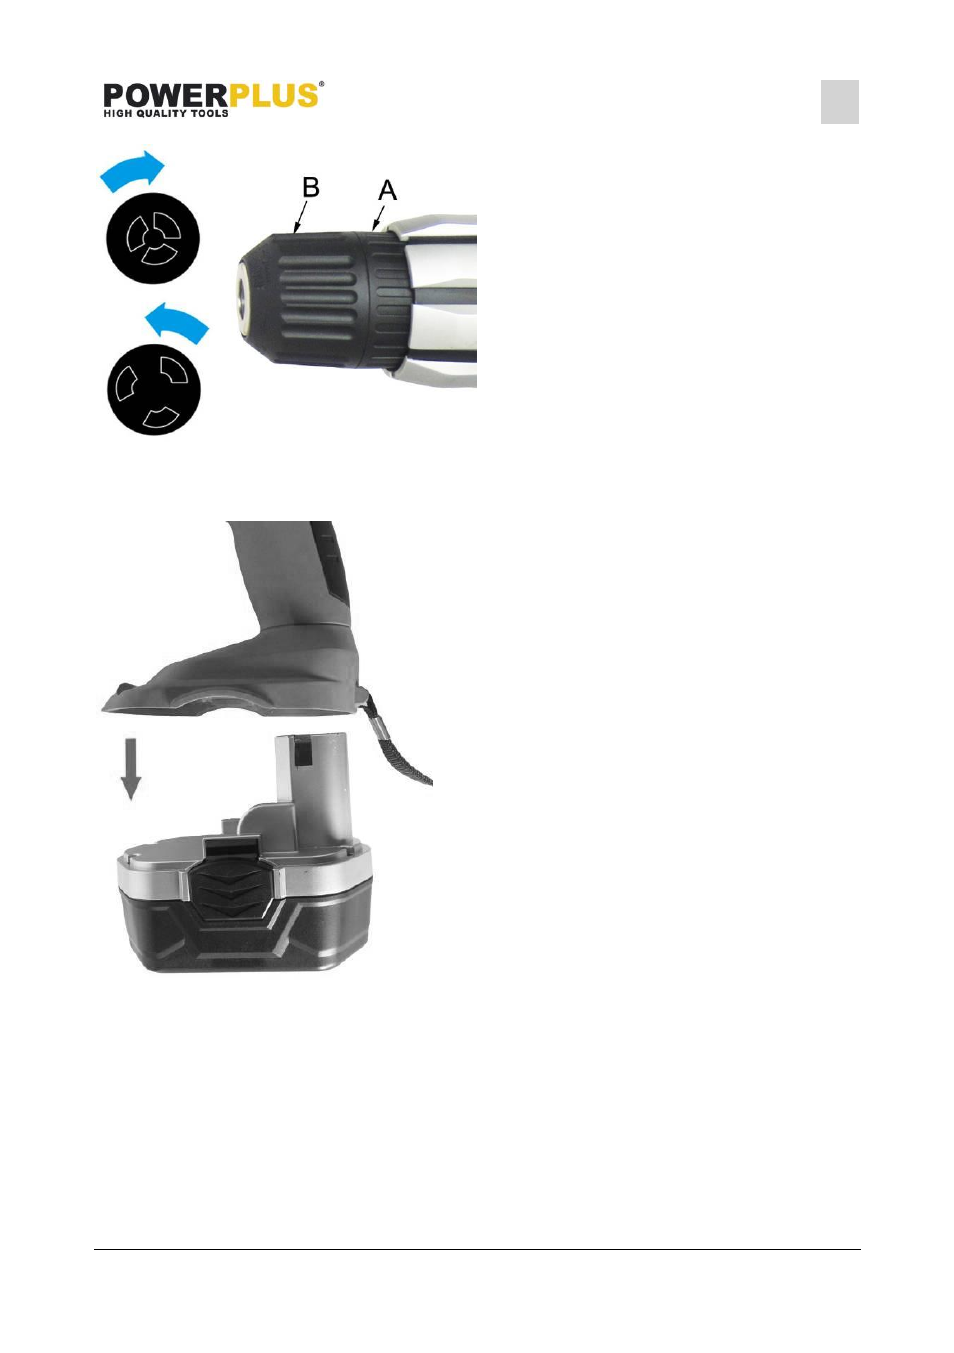
Installing and Removing a Bit and a Drill (fig 3)
Fig. 3
This drill has a keyless chuck (1) to prevent
the bit or drill from loosening.
1
Hold ring A of the drill chuck tight with
one hand.
2
Turn upper ring B anticlockwise with
the other hand until the drill chuck
opening is large enough to accept the
tool.
3
3 Insert the drill or the screwdriver bit
into the drill chuck.
4
Turn ring B clockwise until the tool is
clamped tightly.
Remove the tool in the opposite way.
7.3
Removal / insertion of battery (Fig. 4)
Fig. 4
WARNING: Before making any adjustments
ensure the drill is switched off with the
direction of rotation selector (6) in the center
position.
1
Hold the drill with one hand and the
battery pack (11) with the other.
2
To install: pull and slide battery pack
into battery port, make sure the latch
(10) on the both side of the battery
snap into place and battery is secure
before begging operation.
3
To remove: use your thumb and
fingers, press the battery release
latches in and pull the battery pack off
at the same time.