Using presentation draw, To start up presentation draw, To exit presentation draw – Casio Presentation Draw User Manual
Page 6: Function menu
6
Using Presentation Draw
Before trying to perform any of the operations described in this section, you should first charge the
pointer (see “Setup” in the Interactive Pointer User’s Guide), and establish a connection (RGB and
USB) between your computer and the projector. Also, the projector should be projecting the screen of
the computer where you have Presentation Draw installed.
To start up Presentation Draw
Double-click the
icon on your computer desktop or use your computer’s Start menu to select [All
Programs] - [CASIO] - [Presentation Draw].
z
will be displayed in the task tray while Presentation Draw is running.
z Draw mode (page 5) is the initial default startup mode. The functions (Draw 1, Add Figure, Freehand,
Zoom) that were enabled the last time you used Presentation Draw will still be enabled.
To exit Presentation Draw
Right-click
in the task tray. On the menu that appears, select “Exit”.
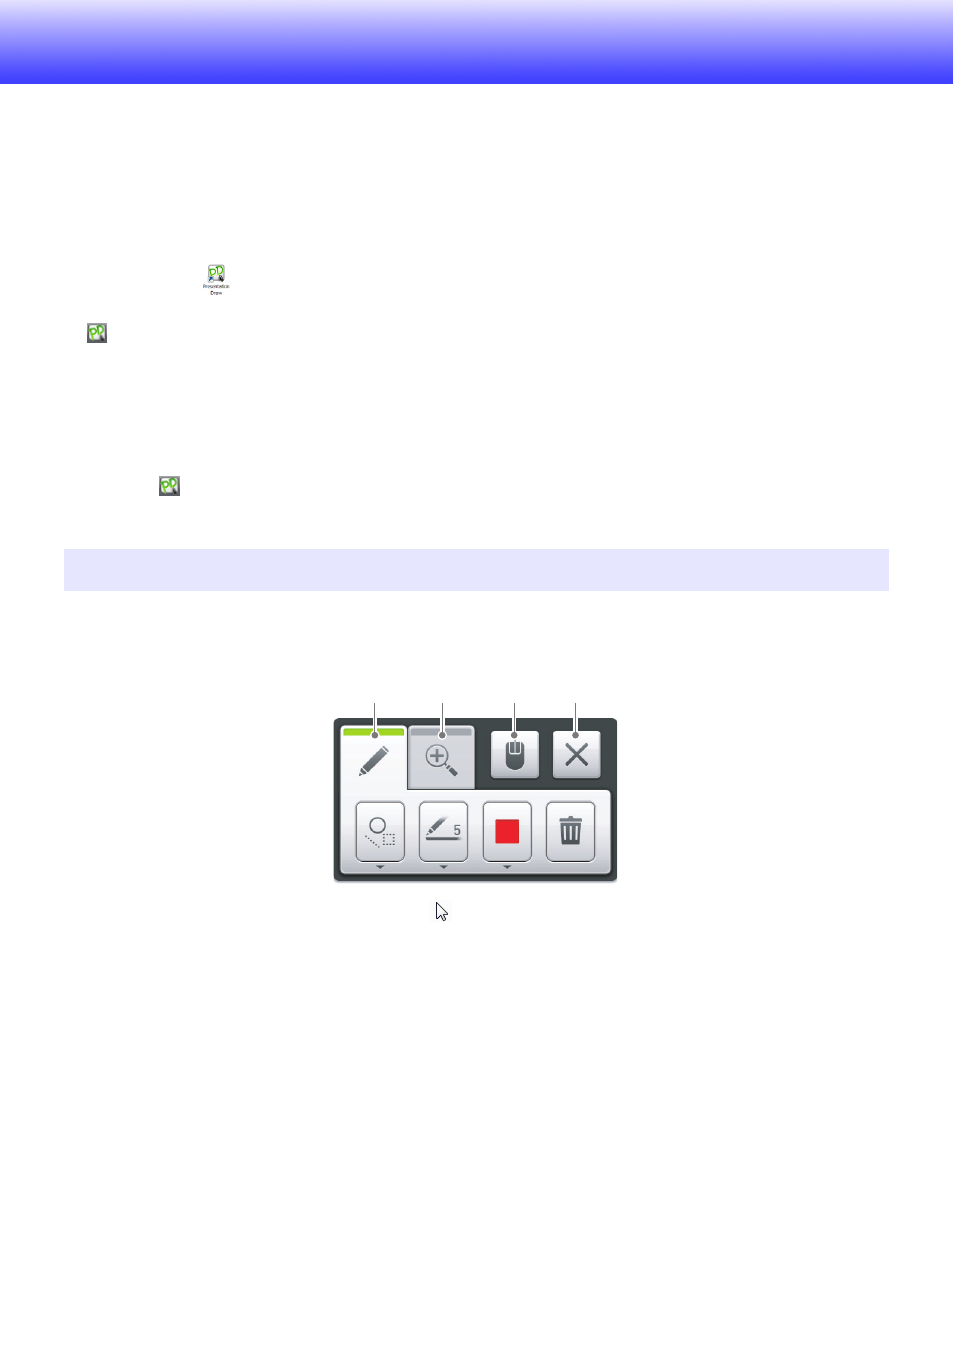
To select a function while using Presentation Draw, switch to draw mode (page 5) and then press the
pointer right mouse button (or click your computer’s right mouse button). This will display a function
menu like the one shown below.
To use the function menu, move the pointer (
) to one of the buttons along the top of the menu and
then press the pointer left mouse button or click with your computer’s mouse. The following explains
what each of the buttons does.
Function Menu
1 Use this button to select the draw function. The buttons that appear can be used to specify the
draw method, line thickness, and line color. For details, see “Using the Draw Function” (page 7).
2 Use this button to select the zoom function. The buttons that appear can be used to specify the
zoom ratio. For details, see “Using the Zoom Function” (page 10).
3 Use this button to switch from draw mode to mouse mode.
4 Closes the function menu.
1
2
3
4