Using the camera for presentations, Getting pictures into your computer, Connecting to a windows pc – Epson 700 User Manual
Page 7
EPSON PhotoPC 700
5/98
EPSON PhotoPC 700
- 7
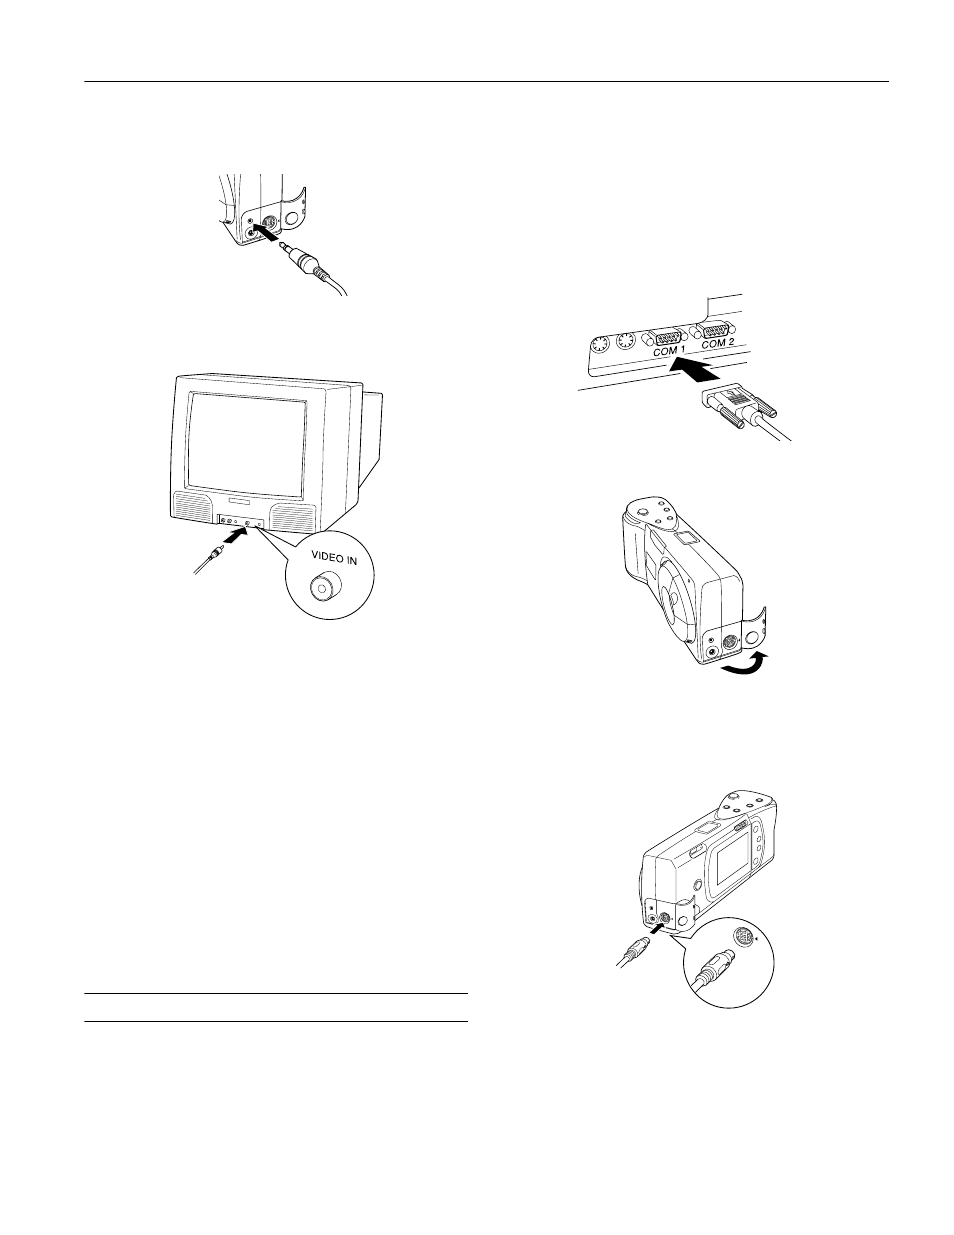
2. Open the camera’s connector cover and connect the black
end of the video cable to the
VIDEO OUT
port as shown:
3. Connect the yellow end of the cable to the
VIDEO IN
port
on the television or VCR:
4. Turn on the TV (and VCR) and switch to the correct video
mode.
5. Slide the screen switch on your camera to
Playback
. The
last picture you took appears on the TV screen. You can use
all of the camera’s playback features when your pictures are
displayed on TV.
Using the Camera for Presentations
You can connect your camera to a multimedia projector or
television and show not just photos, but also text and graphics.
The EPSON Photo File Uploader lets you transfer images
from your computer to your camera. Anything you can
display on your computer screen can be captured, converted,
and uploaded. You can create and show a presentation
without printing overhead transparencies or slides, and
without a laptop computer.
Getting Pictures into Your Computer
When you’re finished taking pictures, you can connect the
camera to your computer and transfer the images.
Connecting to a Windows PC
Before you start, turn off the camera, LCD screen, and your
computer. Then follow these steps:
1. Locate a serial port on the back of your computer.
2. Line up the serial connector on the cable with one of the
serial ports on your computer, and insert the connector.
Then tighten the screws.
3. Open the connector cover on the side of the camera.
.
4. Depending on the type of cable you have, line up either the
arrow or the flat side of the cable connector with the mark
on the camera’s serial port. Then insert the connector.
5. Turn on the camera and your computer system.