Edelbrock 33505 User Manual
Page 2
Step 4 Removal of rear shock
Step 6 Disassembly of rear coil springs from shock
4(a) Loosen upper and lower nuts.
4(b) In order to remove bolts, they may need a little
gentle persuasion with a pry bar. Bolt should
come out by hand (see Fig. 3).
4(c) Shock will now come out through the top.
Step 5 Disassembly of front coil springs from
shocks
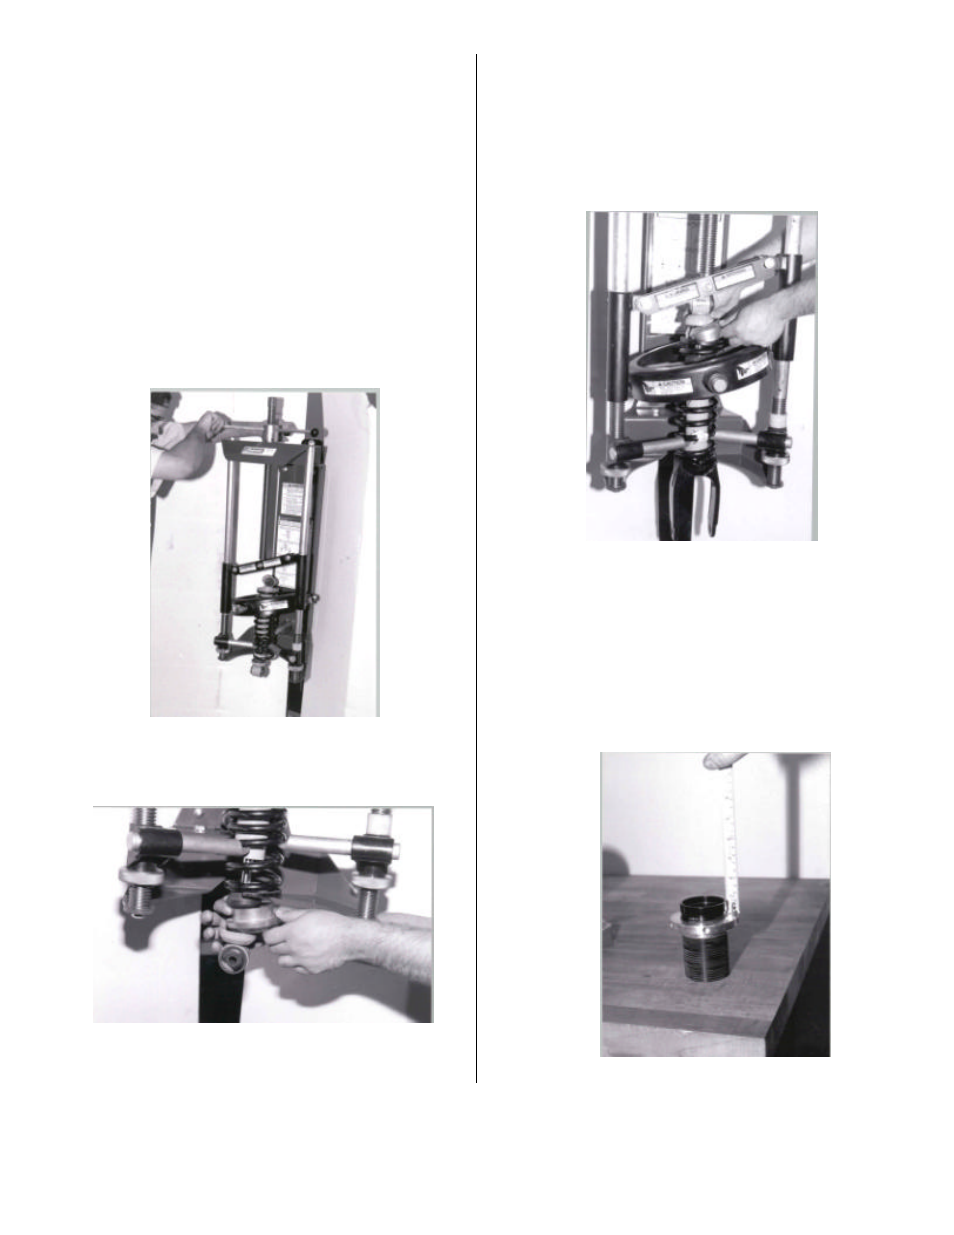
6(a) Compress coil spring (see Fig. 6).
6(b) Move bump rubber down in order to remove
spring seat retainer (see Fig. 6).
6(c) Release coil spring compressor carefully.
Fig. 6
A coil spring compressor is required to remove the
springs from shocks. All proper safety precautions must
be followed. Consult spring compressor manufacturer
recommended instructions before starting.
5(a) Compress coil spring (see Fig. 4).
Fig. 4
5(b) Move bump rubber up shaft in order to remove
spring seat retainer (see Fig. 5).
Fig. 5
5(c) Release coil spring compressor carefully.
Step 7 Assembly of IAS shocks (Note: Apply anti-
seize compound to threaded collars)
7(a) Adjust all four threaded spring collars
(see Fig. 7).
2 front topped out
2 rear = 5/8” from top of threaded
collar.
Fig. 7