Rt (130), English – Elektra Beckum TKHS 315 (AUS) User Manual
Page 12
12
ENGLISH
3.
Fit other end of the suction hose to
the dust extraction port (133) on the
chipcase.
4.
Hook the suction hose into the hose
carrier (132).
5.
Connect the saw's dust extraction
port at the chipcase to a suitable
dust collector (see "Dust collector" in
chapter "Operation").
Scale installation
1.
Fasten scale (135) with three pan-
head tapping screws (134) and
washers to the recess of the saw
table – do not yet tighten: the scale
still needs to be adjusted according
position and thickness of the saw
blade.
2.
Place a straightedge against the
right-hand side of the saw blade.
3
Note:
As the saw blade's teeth are
alternately bent outwards (= set of the
saw teeth), make sure the straightedge
does not touch any of the teeth set to the
right. Otherwise the straightedge is not
exactly parallel with the saw blade.
3.
Scale adjustment: the "0" mark of
the scale must coincide exactly with
the left edge of the straightedge.
4.
Carefully tighten the pan head tap-
ping screws, then remove the
straightedge.
Installation on the rip fence guide
extrusion
The guide extrusion for the rip fence is
fitted to the front of the saw table.
1.
Slide the head of the saucer-head
screws (138) into the guide extru-
sion (139).
2.
Put distance sleeves (137) on the
saucer-head screws.
3.
Fit saucer-head screws into the
holes provided at the front of the
saw table and secure with flange
nuts (136).
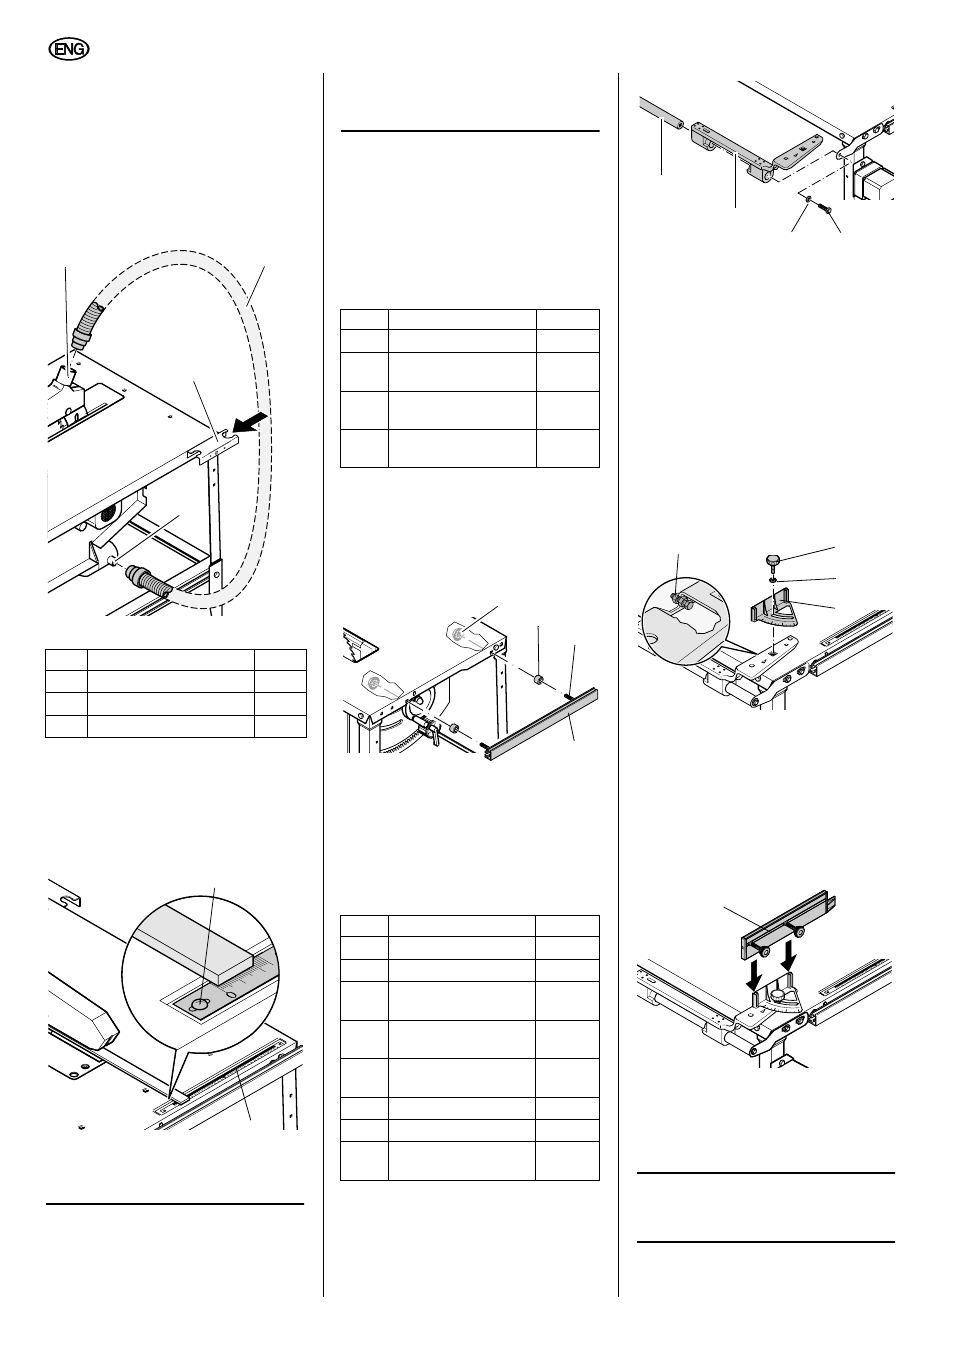
Mitre fence assembly
1.
Slide the lower fence carrier (141)
onto the guide bar (140) as illus-
trated.
2.
Install the guide bar between the
two guide bar brackets at the left
front and rear of the saw table, using
one each hexagen head screw
(143) and serrated lock washer
(142).
3.
Align guide bar exactly parallel with
the table top's edge.
4.
Tighten all screws of mounting
brackets and guide bar.
5.
Swing the lower fence carrier up.
6.
Install the upper fence carrier (147)
with washer (146) and star-knob
screw (145).
7.
Place the short fence extrusion
(148) on the carrier and secure in
position with the knurled nuts:
− the plastic nose of the fence
extrusion must point towards the
saw blade
− the washers must be positioned
between the fence carrier and the
knurled nuts
8.
By means of the set screw (144) the
fence extrusion can be set exactly
sqare to the saw blade. The set
screw (144) is accessible when the
mitre fence is swung down.
3
Note:
When the mitre fence is not
required swing it down, out of the way.
Item
Description
Qty.
Pan-head tapping screw
3
Scale
1
–
Washer 4.3/9
3
130
131
133
132
134
135
Item
Description
Qty.
Flange nut M8
2
Distance sleeve 8 x
16
2
Cup square neck
screw M8 x 30
2
Guide extrusion, rip
fence
1
Item
Description
Qty.
Guide bar
1
Fence carrier, lower
1
Serrated lock washer
8.4
2
Hexagon head screw
M8 x 16
4
Star-knob screw M8
x 23
1
Washer 8.4/17
1
Fence carrier, upper
1
Fence extrusion,
short
1
136
137
138
139
140
141
142
143
145
146
147
144
148