Installing fw-7525 on the wall – Lanner FW-7525 User Manual
Page 18
Installing FW-7525 on the Wall
FW-7525 can be mounted on the wall by using optional
mounting kit. The following will present steps of
wallmounting FW-7525.
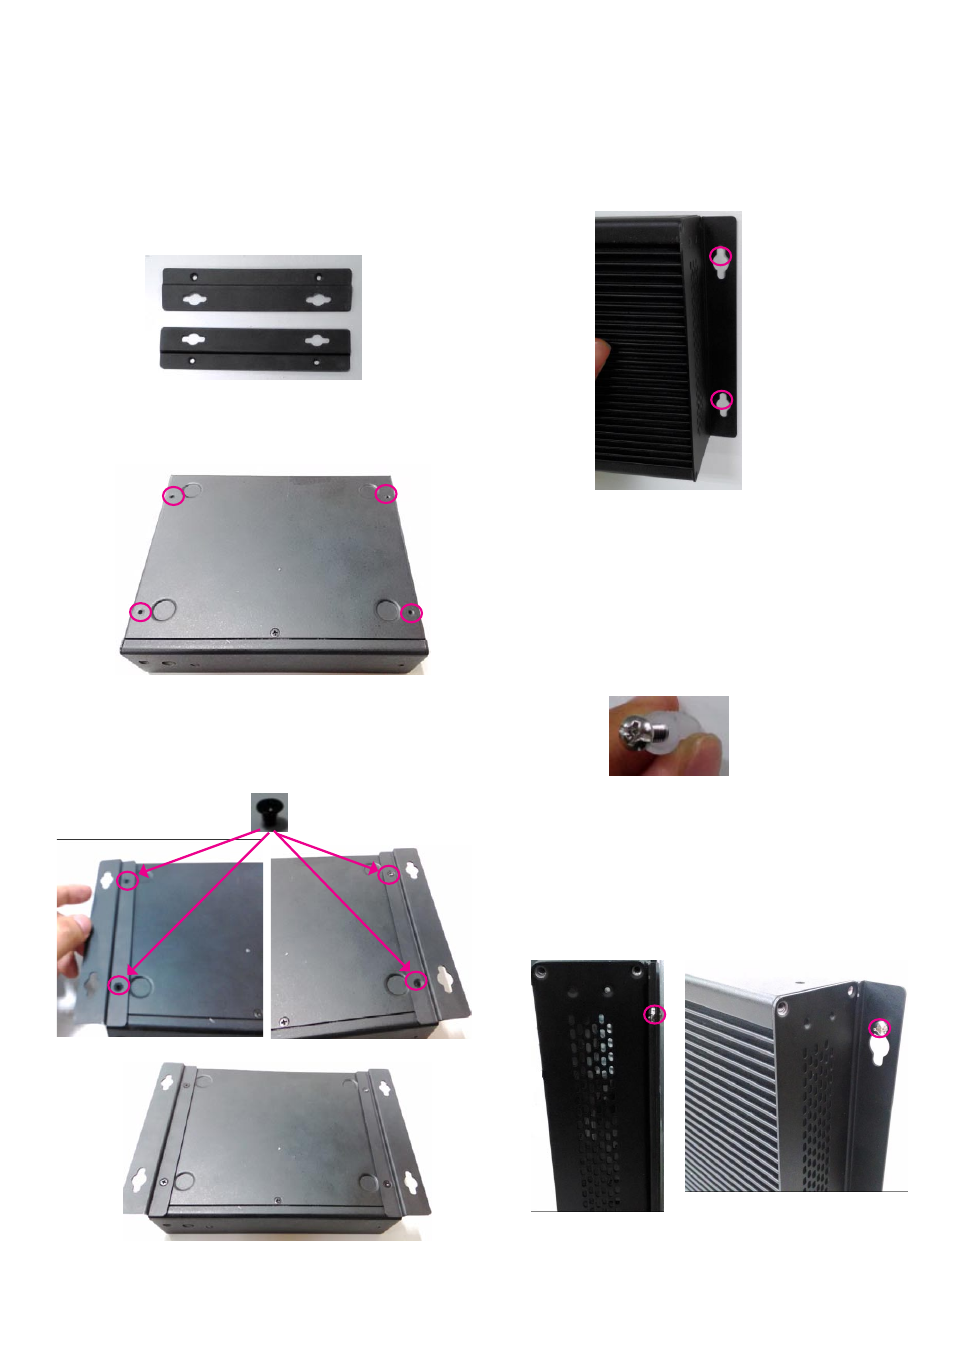
1. Prepare the pair of wallmounting brackets.
2. Turn the system upside down and locate the 4 screw
holes on each corner of the system.
3. Align the brackets on each side of the system.
Remember that the screw holes must be aligned. Then
insert screws to secure the brackets.
4. Place the system on where it will be mounted on
the wall.
You may draw marks for the circled screw holes as the
image below for applying wall anchors in later steps.
Do the same for both sides.
5. Apply the 4 white wall anchors designated in the
last step. You must have a drilling machine to perform
this step.
Then, insert threaded nails into the anchors. Do NOT
insert the nails totally into the anchor. Leave a tiny gap
enough to hang the wallmounting bracket.
6. Hang the system onto the wall as the image below.
Remember to match the brackets’ 4 screw holes with
the 4 threaded nails on the wall. You may screw the
nails tighter after you hang the system.