Chapter 5, Hardware setup, Installing the hard disk – Lanner LVC-5770 User Manual
Page 32: Connecting power, Lvc-5770
32
Hardware Setup
Chapter 5
Embedded and Industrial Computing
Installing the Hard Disk
The system can accommodate two Serial-ATA disk. Follow
these steps to install the hard disk into the system:
Place the HDD/SSD on the hard disk tray of the front
1.
panel and align the holes of the hard disk with the
mounting holes on the tray.
Fix the HDD/SSD on the hard disk tray by using 2
2.
mounting screws
Push the HDD/SSD into the hard disk slot and secure it
3.
in place with the thumb screws.
Note:
The system only supports 2.5” HDD/SSD.
1.
Make sure that you insert the HDD in
2.
the right orientation (shown as the
above picture) to prevent damage to the
connectors. Do not force the HDD into the
slot; it indicates wrong orientation if the
insertion is not smooth.
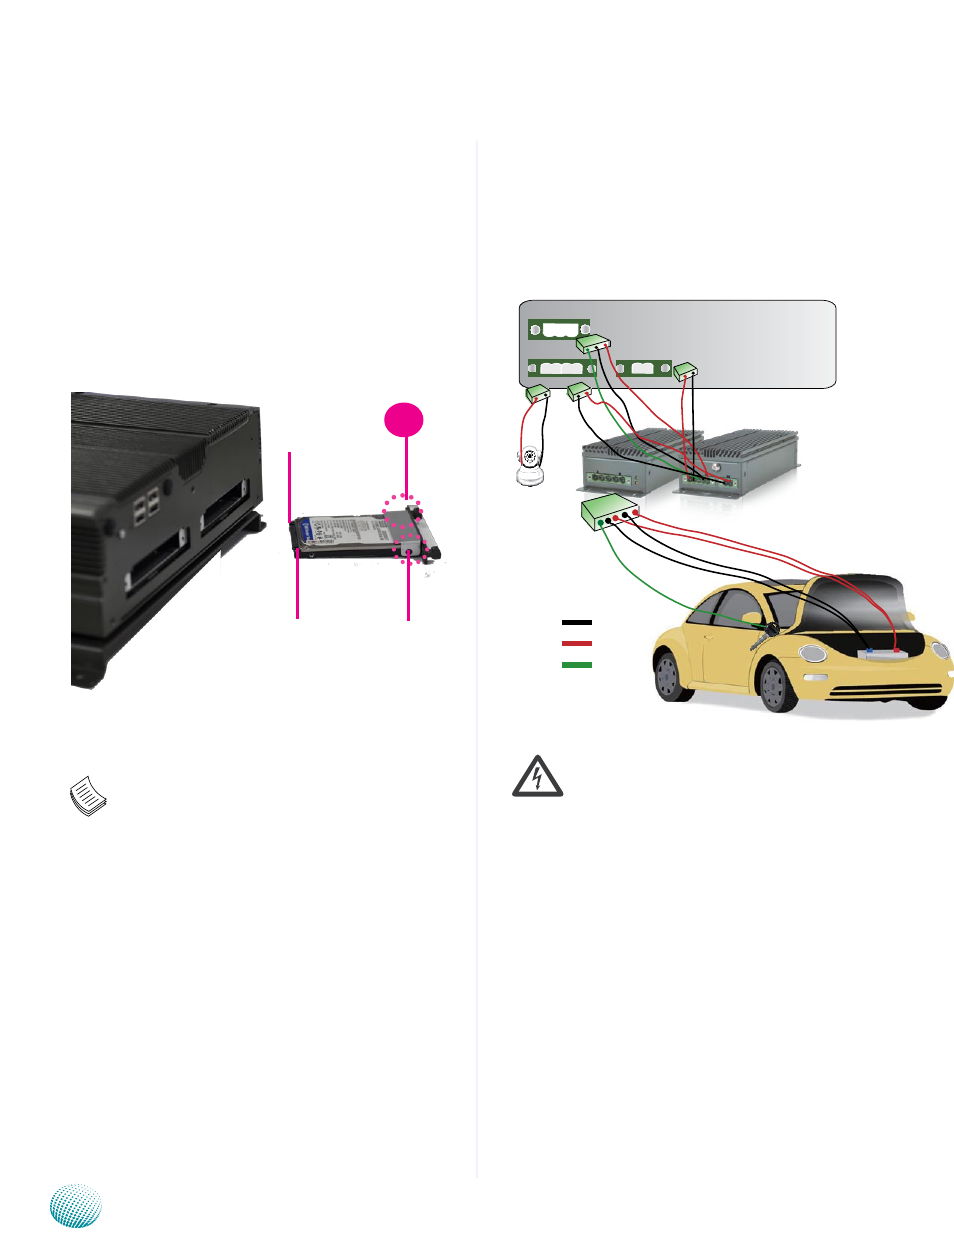
Connecting Power
Connect the LVC-5770 to a +12V or +24V vehicle battery.
The DC power-in connector comes with a 3-pin terminal
block for its Phoenix contact. This power socket can only
accept the power supply with the right pin contact so be
cautious when inserting power to the system.
Warning:
Connect the power to the DC-IN connector in the
right orientation or the LVC-5770 will be damaged.
1
DC_IN
IGNITION
DC_GND
IG - +
LVC-5770
PoE Power 48V
DC Input 9~36V
Ignition Gnd DC9~36V_in Gnd DC9~36V_in
48V_out Gnd Ignition Gnd DC9~36V_out
Gnd DC9~36V_out
+ -
OUT + - - + IN
DC Relay Bypass
Power Connector
Drive Connector
Silver plate