Torque value trouble shooting, Stroke adjustment – Jordan Valve Mark 66 Series – Air Loaded Pressure Regulator User Manual
Page 4
Torque Value
Trouble Shooting
Erratic Control
•
Oversizing causes cycling and hunting, and reduces
the rangeability of the regulator. Check sizing calcu-
lations to be sure that you have installed the proper
size valve.
•
Steam traps downstream may need attention and
could be causing erratic control.
•
Safety valve may be jammed open, disrupting the
system. Repair as necessary.
•
Excessive foreign matter on seats can cause er-
ratic operation of the MK66. Clean them as outlined
under Valve Seats.
•
Valve stroke may be out of adjustment. Readjust
stroke.
•
Valve disc may not be moving freely. Check disc
guide clearance, and clearance of the stem to the
bushings.
Will Not Operate
•
Diaphragm may be ruptured and needs
replacement.
5. Check the condition and clean all parts with solvent,
blow dry. Replace all defective parts.
6. Reassemble in reverse order. Follow the procedures
outlined under DIAPHRAGM REPLACEMENT and
VALVE SEATS for proper adjustment.
Stroke Adjustment
Note: the valve adjustment is determined by how far the
diaphragm assembly is screwed onto the stem.
1. a. 1/2” - 2” sizes: With the upper diaphragm case
off and the seats out of the body, hold the disc pin
with an open end wrench and screw the diaphragm
assembly onto the stem until the disc pin is cen-
tered in the body.
b. 2-1/2” - 6” sizes: With the upper diaphragm
case off and the seats out of the body, loosen the
stem locknut and move the disc pin to the center
of the threaded section on the stem. Hold the stem
lightly with pliers and screw the diaphragm assem-
bly onto the stem until the disc pin is centered in
the body. Tighten locknut.
2. Place plate and disc in body as outlined under
Valve Seats.
3. Push the diaphragm assembly down against the
body and check the orifice alignment of the disc
and plate. The orifices should be fully open and in
perfect alignment.
4. If the orifices are not in perfect alignment, rotate
the diaphragm assembly counterclockwise to lower
the disc and clockwise to rise the disc.
5. After the seats are in alignment, replace the upper
diaphragm case making certain it is centered with
the diaphragm in the body recess. If the diaphragm
is elastomer and the seats are in alignment, but the
diaphragm and the bolt holes are not aligned, turn
the diaphragm assembly counterclockwise to align
the holes.
6. Torque bolts per TORQUE PROCEDURE
-4-
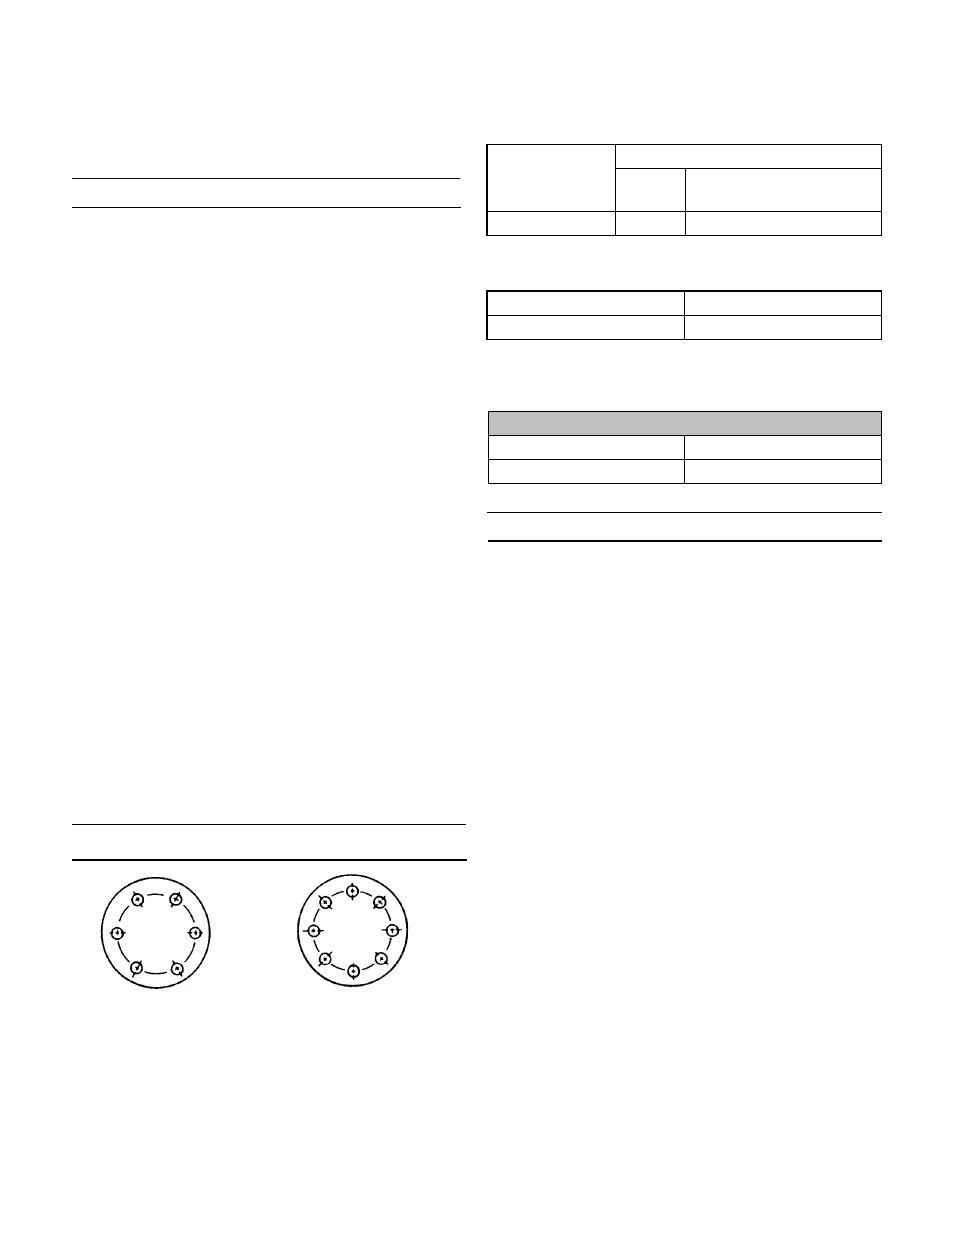
5
3
1
6
4
2
5
3
1
6 4
2
7
8
6 bolts
(or multiples)
8 bolts
(or multiples)
Torque for Bolts Connecting Cap to Body (in. - lbs.)
(1/2” - 2”)
Valve Size
Valve Body Material
Bronze
Ductile Iron, Carbon Steel,
or Stainless Steel
1/2” through 2”
140
200
Torque for Diaphragm Case Bolts
Valve Size
Torque (in. - lbs.)
1/2” through 2”
200
Torque for Bolts (ft. - lbs.) (2-1/2” - 6”)
Recommended Bolt Torque
Body to Cap
90 ft./lbs.
Diaphragm Case
85 ft./lbs.
1.
Install all bolts hand-tight.
2.
Torque the bolts in order of the bolt pattern to
a value equal to ¼ of the recommended torque
value.
3.
Re-torque each bolt to the recommended value
using the same bolt pattern as shown.