iSys iTerra Lite Color Inkjet Printer User Manual
Page 31
31
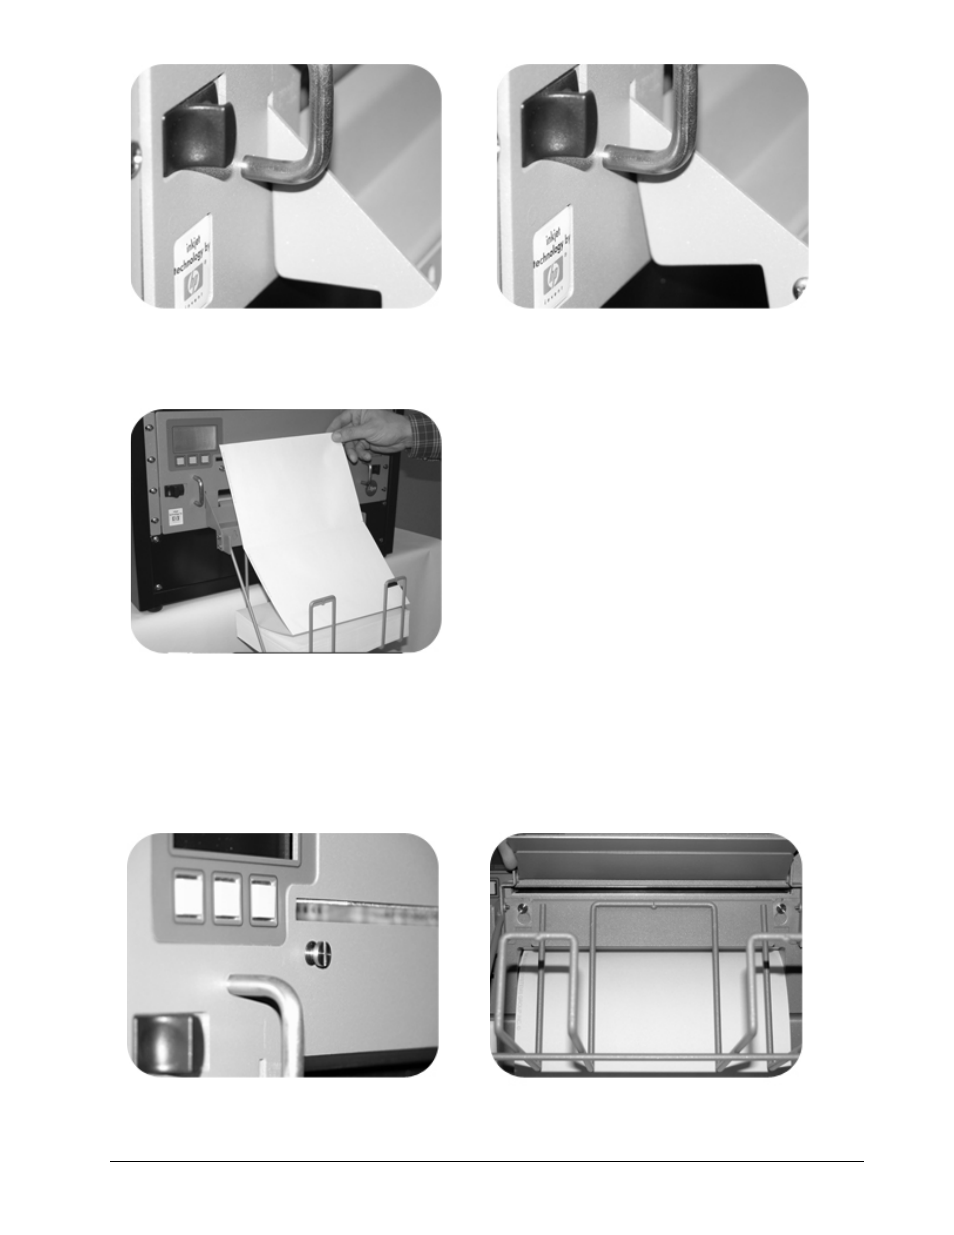
Figure # Install 16 - correct
Figure # Install 17 - incorrect
d) Once the tabs have been inserted into the printer, lower the tray in a downward motion until the
tray hangs from the printer as in figure ‘Install16’. An incorrect seating of the tabs in the printer
slots may look like that portrayed in figure ‘Install17’.
Figure # Install 18
e) Paper should be installed prior to attaching the output media tray. Place continuous paper in
input tray, with I-marks face up and on the right hand side (as in figure ‘Install18’). Ensuring
that the first sheet fed is a non I-mark sheet, slowly insert the sheet into the lower slot at the
front of the printer until resistance is felt (should be approximately eight inches). Press the
‘form feed’ button on the operator panel. The paper will move forward seeking out the first I-
mark and setting the top of form alignment.
RACK MOUNT OUTPUT TRAY INSTALLATION
Figure # Install 19
Figure # Install 20
c) Using a Phillips screwdriver remove the two screws on the front plate of the printer and replace
with the specialized screws found in the Output Tray Kit. The new screws will require a slotted