Configuring the ethernet/ip option card – Yaskawa CM092 User Manual
Page 18
Installation 1-13
Configuring the EtherNet/IP Option Card
1.
Select Configuration from the main web page.
2.
After the Configuration page has been displayed, select the method in which the EtherNet/IP Option Card will obtain its IP address.
2.1 User:
The
EtherNet/IP Option Card will use the network address as entered in the IP, Subnet and Gateway fields. Check
with the system schematic or network administrator to insure that the IP address is valid and unique and that the subnet mask
is correct.
2.1.1 The
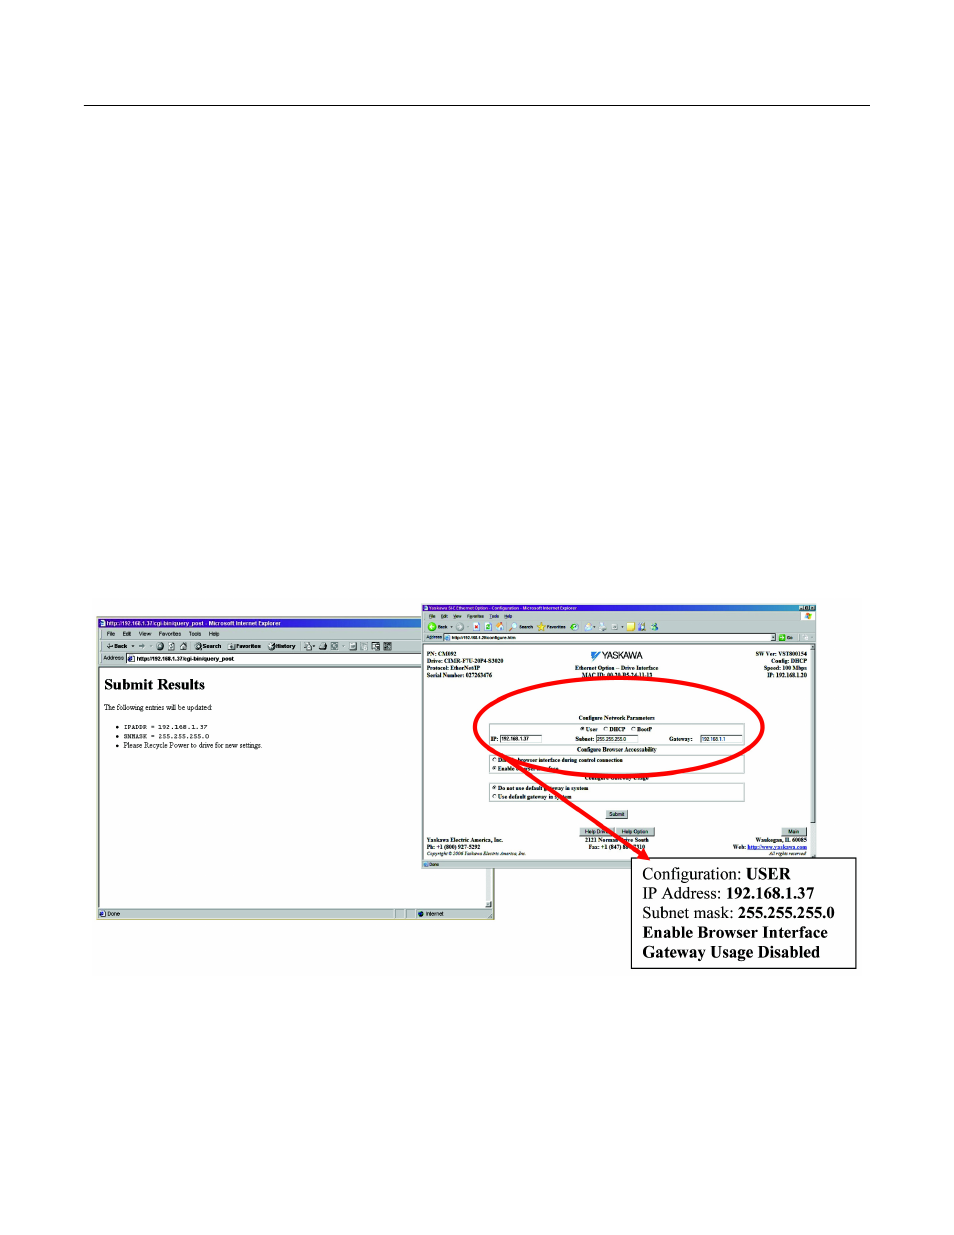
USER radio button is used in this example.
2.1.2
Enter the new IP address, 192.168.1.37 in this example.
2.2 DHCP:
The
EtherNet/IP Option Card will use the network address assigned to it by the DHCP server.
2.3 BOOTP:
The
EtherNet/IP Option Card will use the network address assigned to it by the BOOTP server.
3.
Select the Gateway Usage. Connectivity to the EtherNet/IP Option Card may be limited or nonfunctional if the gateway usage setting
and gateway address do not match the network infrastructure in which it is installed.
3.1
Do not use default gateway in system. Select this radio button to disable the gateway when there is no external gateway in
the system.
3.2
Do not use default gateway in system. Select this radio button to disable the gateway when there is no external gateway in
the system.
3.3
In all cases the Gateway field must contain a valid IP address and must not be blank.
4.
When the new configuration, IP address and subnet mask have been entered, click the Submit button.
5.
Verify that the information is correct on the Submit Results page.
6.
Power cycle the drive in order to store the new information on the EtherNet/IP Option Card.
Note: The IP address in the browser address bar will have to be changed to the drive's new IP address and the web page refreshed in order to
continue to communicate with the EtherNet/IP Option Card web pages.
Fig 1.6 – CM092 Option Web Configuration