Configuring a pc with a static ip address – Yaskawa CM092 User Manual
Page 17
Installation 1-12
Configuring a PC with a Static IP Address
1.
Select an existing connection or create a new network connection for communication with the EtherNet/IP Option Card.
1.1 Select
Start ==> Settings ==> Network Connections from the task bar in the Windows OS.
1.2 Select
the
network
connection to be used.
2.
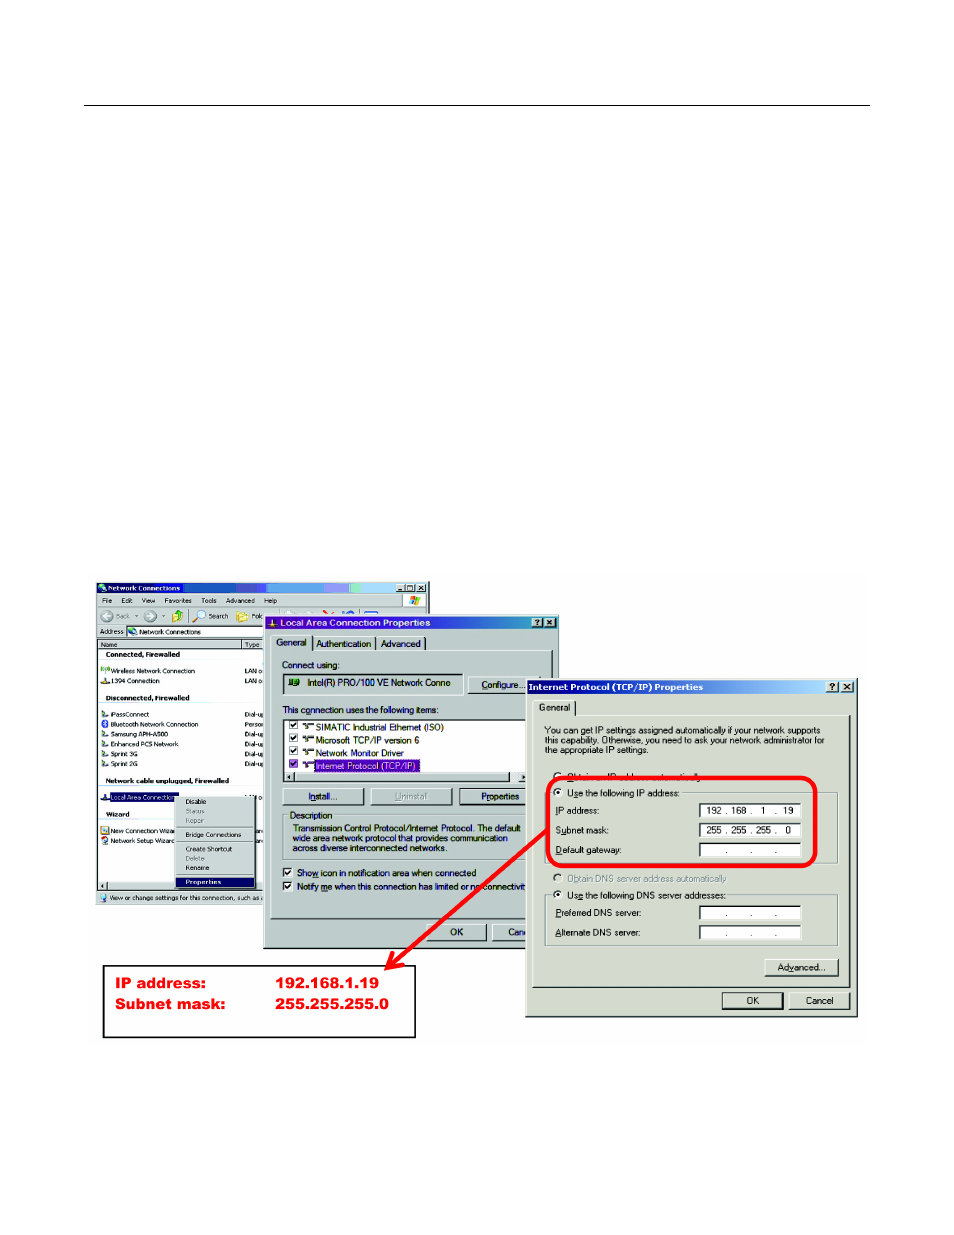
Right click on the network connection and select Properties from the drop down menu.
3.
Select Internet Protocol (TCP/IP) from the components displayed.
Note: If a TCP/IP selection is not available, it may be installed by selecting Install. Administrator access to the PC and the OS
operating system installation CD-ROMs may also be required.
3.1
Select Properties.
Note: If the PC is on a building or office network, disconnect it from that network before proceeding. Record the existing net-
work settings. If the network connection already has an IP address assigned on the EtherNet/IP Local network, ignore the follow-
ing instructions and just click on Cancel.
3.2
Select the Use the following IP address radio button.
3.3
Enter the IP address of a vacant IP address on the EtherNet/IP Local Network (192.168.1.19 in this example).
3.4
Enter the subnet mask for the EtherNet/IP Local Network (255.255.255.0 in this example).
3.5
Check the system network schematic or with your network administrator to ensure that the IP address does not already exist on
the network.
3.6 Once
the IP address and Subnet mask are entered, select OK.
Note: It may be necessary to reboot the PC in order for the changes to take effect.
Fig 1.5 – PC Network Settings