ShoreLand'r PS6X12 V.1 User Manual
Page 6
Midwest Industries, Inc.
Ida Grove, IA 51445
800.859.3028
www.shorelandr.com
0003905
Page 6
REV B 09/23/2008
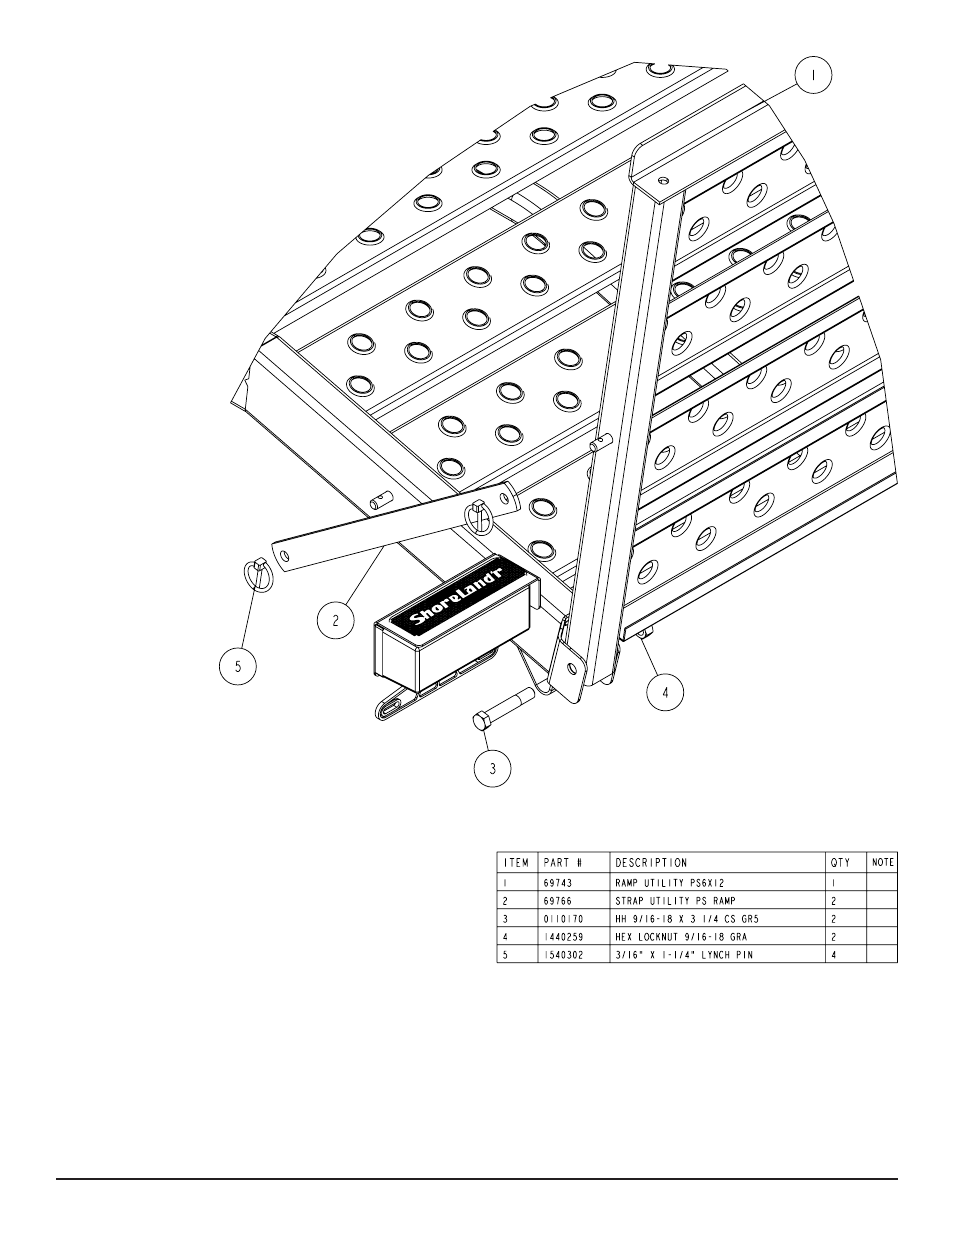
• Locate the hardware bag. Sort all items by size. Remove the
two steel straps.
• Position the rear tailgate as shown in the drawing. Align the
side tubes of the tailgate with the mounting brackets on the
rear of the trailer.
• Insert a 9/16” x 3 ¼” hex bolt through the outer hole in the
mounting bracket on the trailer frame and then through the
rear tailgate as shown in the assembly view on page
2. Push completely through the hole on the inside of the
mounting bracket.
• Secure in place with a 9/16” hex lock nut.
• Repeat the above two steps on the other end of the rear tail-
gate.
• Once both bolts and nuts are installed, tighten the nuts until
a minimum of two threads are exposed through the nuts. The
nuts can be tightened farther if desired making sure they are
not overtightened. The rear tailgate must be allowed to tilt.
• Locate the two metal straps. Align the hole in one end of the
steel straps with the attaching pin welded to the side frame
as shown in the assembly view on page 2. Slide the steel
strap onto the pin and secure in place using the 3/16” x 1 ¼”
lynch pins.
• Rotate the rear tailgate up into the transport position. Align
the hole in the other end of the steel straps with the pin on the
rear tailgate, then slide into position.
• Secure in place using a 3/16” x 1 ¼” lynch pin. Repeat on the
other strap.
• The rear tailgate is now in its transport postion.
• To lower the rear tailgate, remove the lynch pins securing the
steel straps to the rear tailgate, slide the steel straps off of the
pins and then lower to the ground. The rear tailgate is now in
the loading position.
• Installation is complete.