Material list for the ss1100 – ShoreLand'r PWC1512W User Manual
Page 4
Midwest Industries, Inc. Ida Grove, IA 51445
Made in the USA
Tel: (712) 364-3365
0002762
6/06/00
2001
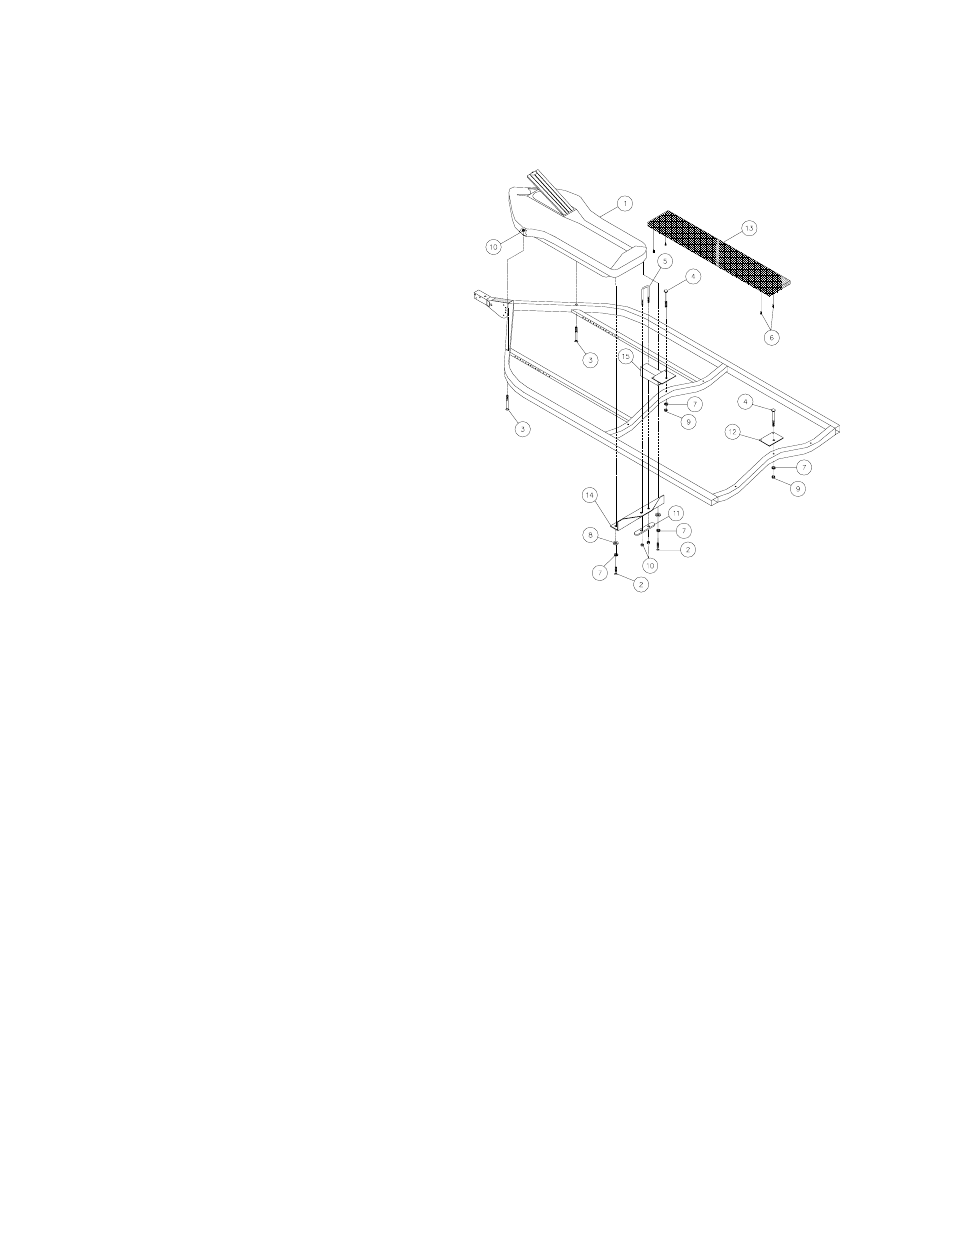
Material List for the SS1100
REF# PART#
DESCRIPTION
QTY
1
3510511
SHORELOCKR W/LID ......................... 1
2
0110038
3/8 X 3/4 HEX BOLT ........................... 2
3
0110064
3/8 X 5 HEX BOLT .............................. 2
4
0210129
3/8 X 3-1/2 CARRIAGE BOLT ............ 2
5
0310090
3/8 X 3-7/16 X 4-1/8 SUB .................. 1
6
0810920
#10 x 1-1/2 SCREW ............................. 4
7
1340030
3/8 MED S/T LOCK WASHER ............. 4
8
1340095
3/8 USS FLAT WASHER ...................... 2
9
1410109
3/8 HEX FINISH NUT .......................... 2
10
1440101
3/8 FLANGE LOCK NUT ..................... 4
11
6209210
WINCH MOUNTING STRAP ................ 1
12
6406910
BACK WALKBOARD PLATE ................. 1
13
64385
7 WALKBOARD .................................... 1
14
64482--
SHORELANDR MOUNTING BRKT .... 1
15
64483--
WALKBOARD MTG BRKT WLDMT ..... 1
Assembly Instructions for the SS1100 Storage Compartment
1. Remove the hardware and sort by size.
2. Remove the walk board that is currently on the trailer
if assembled.
3. Locate the 3/8 X 3/4 hex bolt. Place on a 3/8 lock
washer and 3/8 flat washer. Attach the storage com-
partment ShoreLockr mounting bracket to the rear of
the storage compartment wit the 3/8 X 3/4 hex bolt
and washers just assembled. Repeat on other bolt
supplied. Tighten.
4. Locate the walk board mounting bracket weldment.
Place it on the front side of the front cross member as
shown with the flat plate on the top of the cross
member. Secure it in place with a 3/8 X 3-1/2
carriage bolt and 3/8 lock washer and 3/8 hex nut.
5. Place the storage compartment into the trailer frame
so that the front is supported by the frame. Raise the
rear of the compartment up. Place the 3/8 X 3-7/16
X 4-1/8 SUB over the walk board mounting bracket
weldment just installed and down through the holes in
the support angle. Place the mounting strap onto the
SUB and secure with 3/8 flange lock nuts.
6. Position the storage compartment so it is properly
located in the frame. Tighten the nuts on the SUB just
installed. Locate the two (2) holes in the frame that
are now covered by the storage compartment. Using
the holes in the frame as a guide, drill a 3/8 hole into
the bottom of the storage compartment. Place a 3/8
X 5 hex bolt into the hole just drilled from the bottom
of the frame into the storage compartment. Secure
with a 3/8 flange lock nut. Repeat this process on the
other hole.
7. Place the walk board support on the rear cross
member. Secure with the 3/8 X 3-1/2 carriage bolt
provided. Tighten.
8. Place the walk board onto the support brackets.
Locate then attach to the bracket with four (4) No#10
X 1-1/2 screws provided.
9. Assembly is complete.