Orienting the pan arrows – Grass Valley 1-CCD CameraMan Rev.D1 User Manual
Page 7
Page 4
CameraMan® 1-CCD Camera Control Keypad Operations Manual
Orienting The Pan Arrows
You can configure your Camera Control Keypad to pan left and right according to your specific application. The following section
explains how to understand, configure, and control the camera’s panning motion.
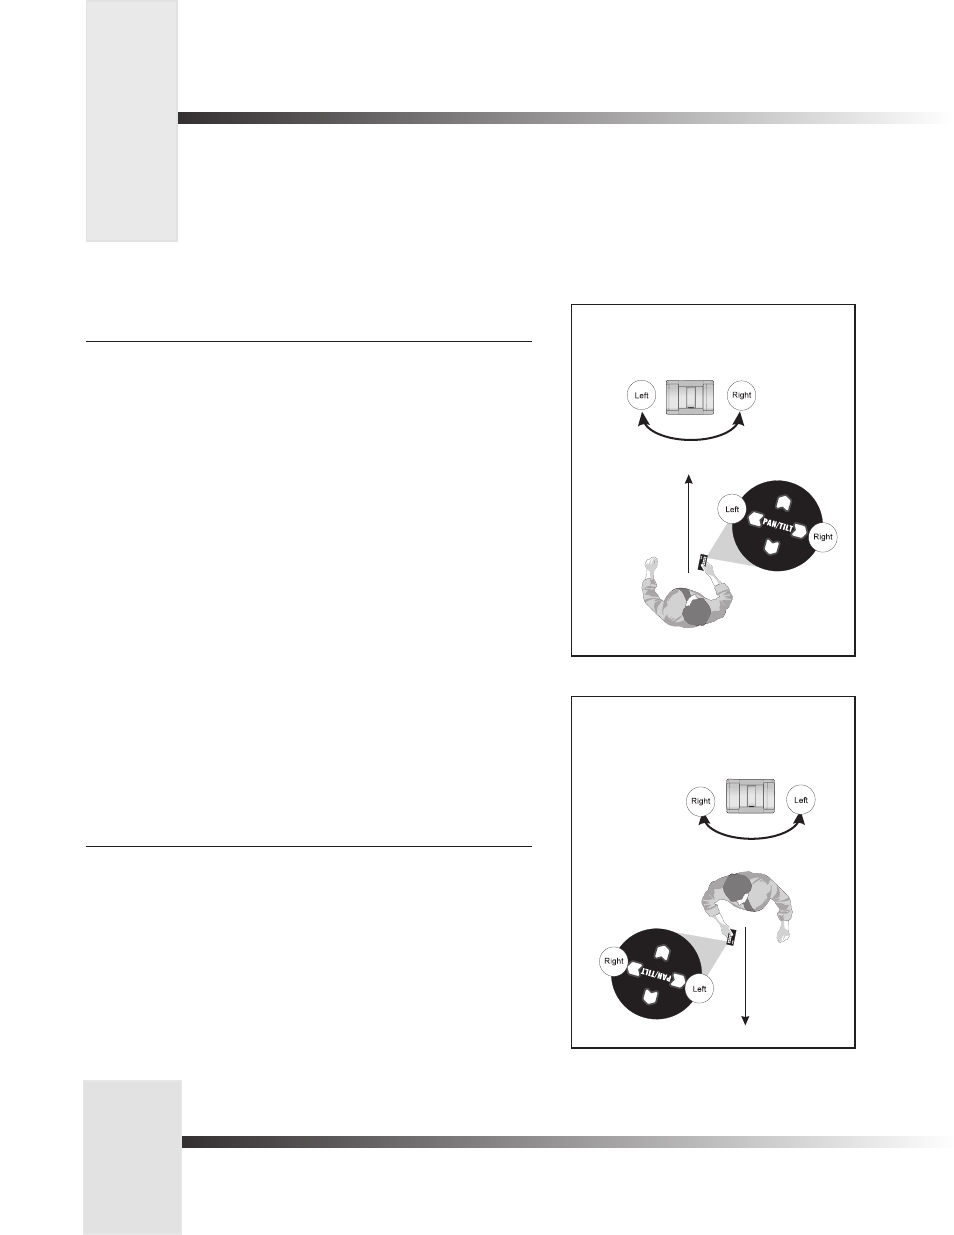
Understanding The Panning Motion
Examples 1 and 2 depict instances when you might want to re-configure the pan arrows on
your Camera Control Keypad.
The default setting, shown in Example 1, is designed to operate while you are facing the
CameraMan camera. Some examples of applications that would benefit from the default
settings are:
• Distance Learning where you are the instructor.
• Presentations where you are the presenter and the audience members are watching
you on a monitor.
• Videoconferences where you are an on-screen participant.
• Any other application where you, the camera controller, need to be on-camera.
There are applications, however, in which you do not need to face the camera (example 2). In
these situations, the default setting would work. These applications require that you re-orient
the PAN arrows (see below). Some examples of applications that might benefit from this
re-orientation are:
• Presentations where you are not the presenter, but are controlling the camera’s
movement.
• Videoconferences where you are a moderator, but not an on-screen participant.
• Applications where you are controlling the camera from a control room.
• Any other application where you, the camera controller, do not need to be on-camera.
Re-Orienting The Pan Arrows
To re-orient (reverse) the setting of the pan arrows on your Camera Control Keypad:
1. Select the camera you wish to re-orient (see page 6, Multiple Camera Keypad Usage).
2. Press and hold the ENTER and autoIMAGE buttons simultaneously.
3. Listen for a beep, indicating that the reversal is complete.
4. Release the buttons simultaneously.
5. Verify that the orientation has changed.
Example 1 (Default setting): Facing toward the
front of the camera
Your line of sight
Example 2: Facing away from the front of the camera
Your line of sight