Step 5: test system operation, Mounting through a suspended ceiling grid, Floor mounting – Electro-Voice 2.1P User Manual
Page 8
Electro-Voice
®
EVID 12.1P User Manual
6
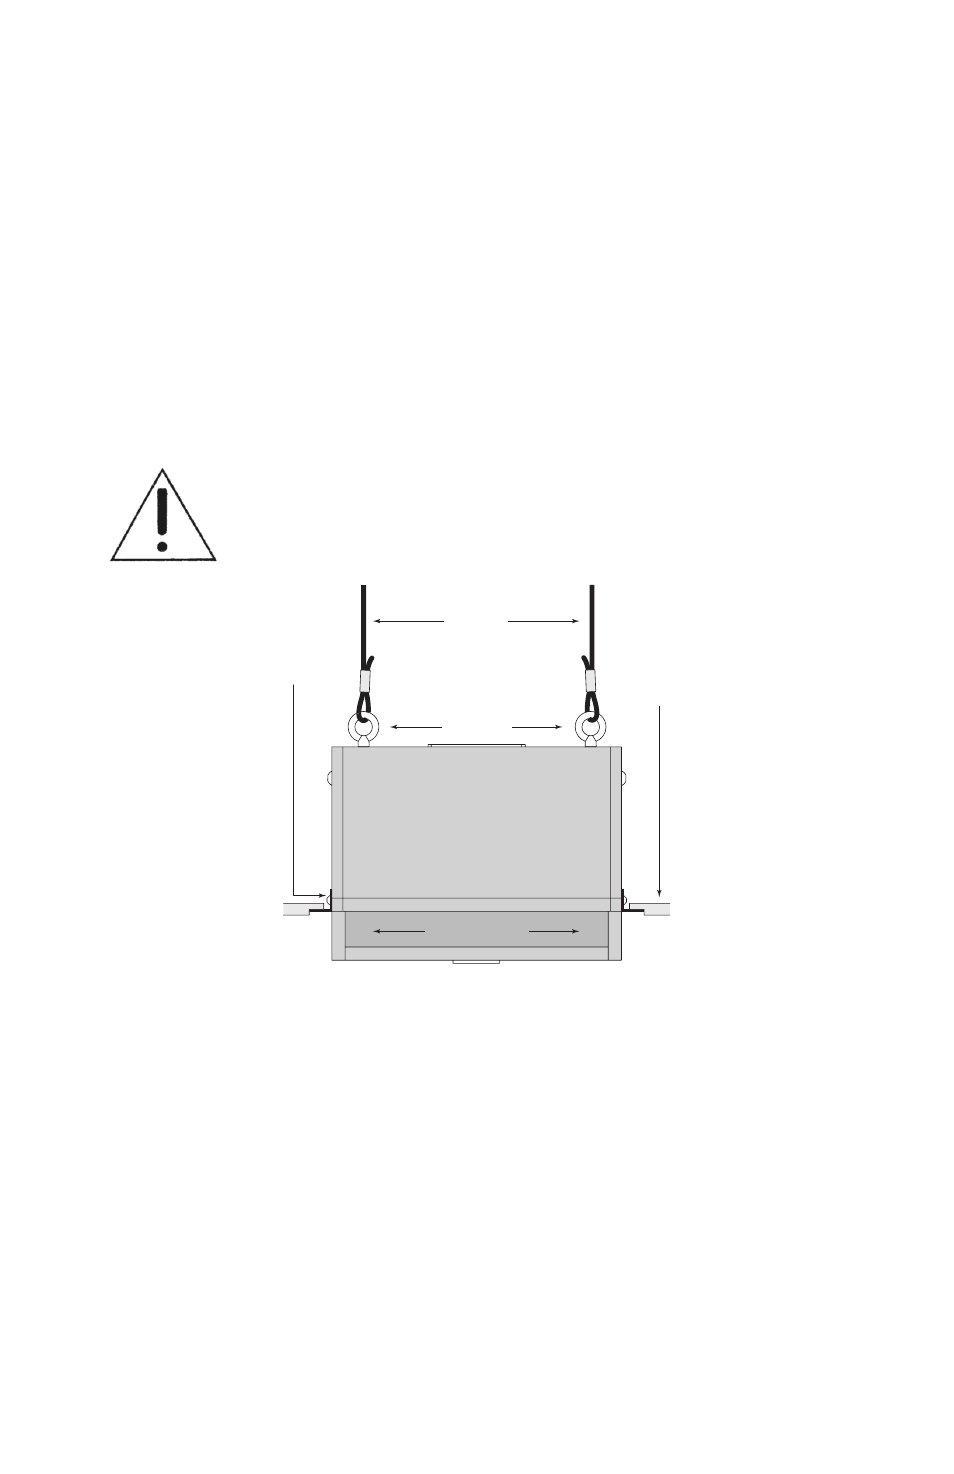
Mounting through a suspended ceiling grid
On the rear of the enclosure install and tighten two 3/8-16-thread forged
steel eyebolts (one is included) with a 3/8" flat washer under each. Cut
two pieces of ordinary drop ceiling L angle (wall track) 23 3/4" long and
screw them to the top and bottom of the enclosure with 3/4"-long sheet
metal screws, as shown in Figure 10. Connect all of the wires and
suspend the enclosure, face down, by the eyebolts in accordance with
accepted safe rigging practice. Adjust the length of the rigging cables so
the tips of the installed L angles just rest on the ceiling cross-tees. This
stabilizes the enclosure from rocking. Trim the ceiling panel to fit the new
opening(s) and drop into place. It is the installers responsibility to assure
that the chosen rigging points are strong enough to support the load.
Warning: Never try to install this speaker in a suspended
ceiling without proper rigging support!
Floor Mounting
The EVID 12.1P may be placed directly on the floor in a corner or on
its side along a straight wall by simply attaching the four rubber mounting
feet to the side that will sit on the floor.
Step 5: Test System Operation
After all connections are made test the complete system operation.
Appendix C on page 10 contains a troubleshooting guide to assist in
locating a variety of speaker related problems.
Figure 10: Attach L Angles to Speaker
L
angle
Ceiling
tile
Rigging
cables
Acoustic port
Eyebolts