For midwall mounting – Electro-Voice 2.1P User Manual
Page 7
Electro-Voice
®
EVID 12.1P User Manual
5
enclosure hangs from the top clip, always install the lower one to secure
against possible disengagement of the top clip. Straighten the EV® logo
and press firmly at its center to seat it securely into its mounting hole.
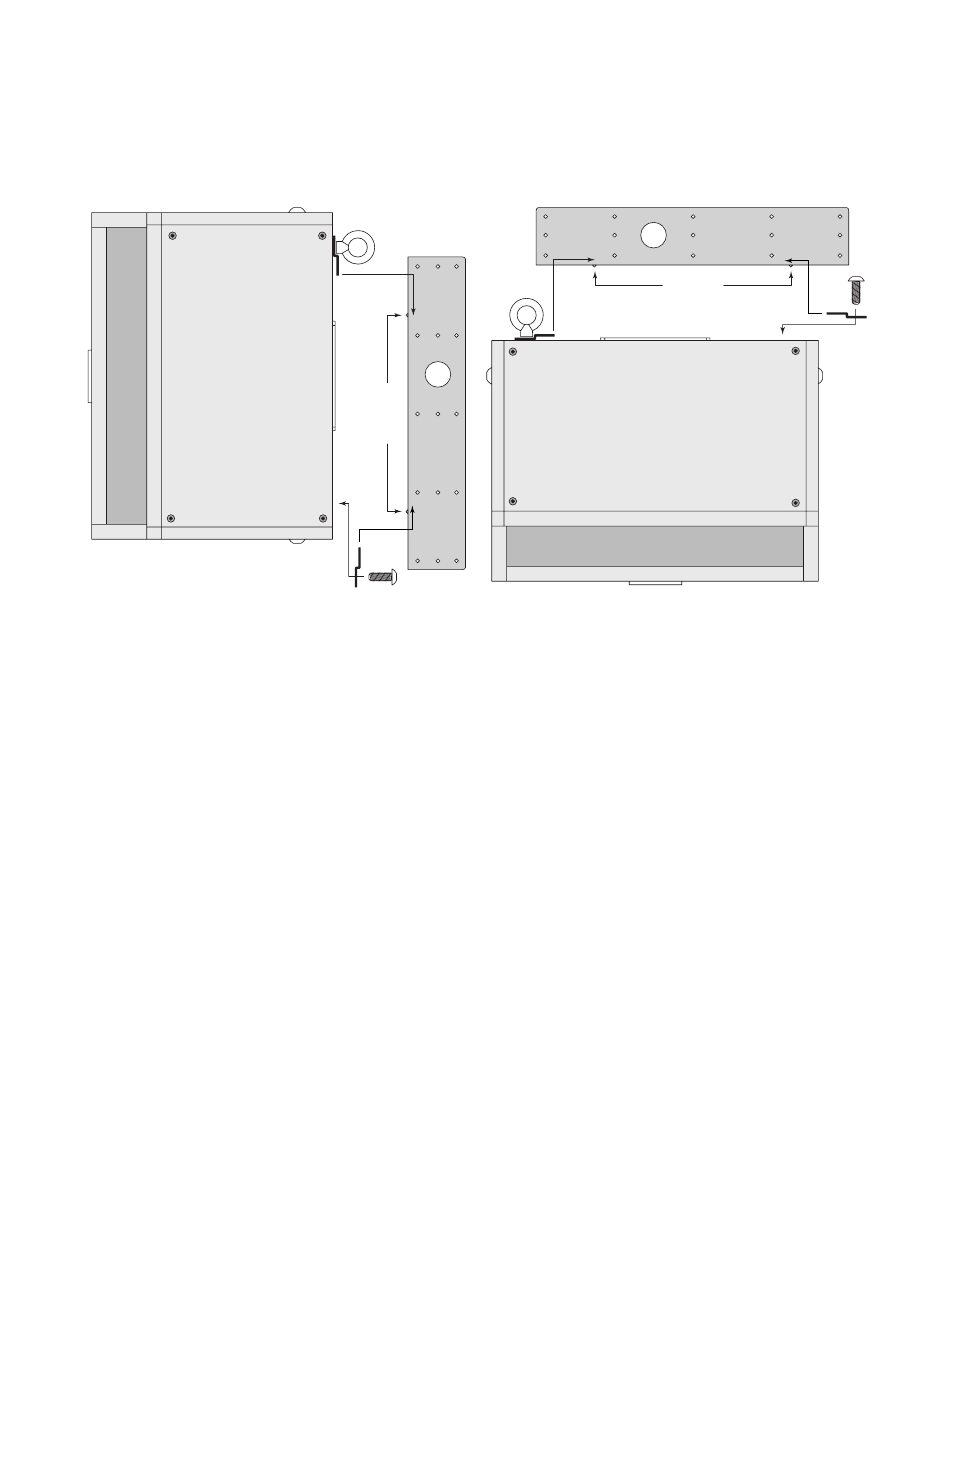
For midwall mounting
Attach the four rubber mounting feet inside the corners on the side of the
enclosure that will be against the wall and attach the safety line to the
eyebolt. Insert one of the 3/8-16-thread Phillips-head screws through the
remaining clip and keep it within arms reach. Lift the enclosure up to the
ceiling and bring its back into contact with the bracket rungs. Slide the
enclosure sideways to engage the clip over one bracket rung (1) and,
while holding it tight against both rungs, insert the 3/8-16-thread screw
with its clip into the remaining mounting hole so the clip engages the
remaining bracket rung (2, 3). Finger-tighten the screw and straighten
the clip. The enclosure may now be released. It will slide down the rungs
until the four rubber feet are snug against the wall. Using a #3 right-angle
Phillips screwdriver, securely tighten the second Phillips-head screw.
Gently rotate the EV® logo a quarter turn and press firmly at its center to
seat it securely into its mounting hole. See Figure 9.
Figure 8: Corner Mounting
Figure 9: Midwall Mounting
1
Rungs
3
2
1
3
2
Rungs
This side towards wall