5 synchronising the video signal – Eneo AVU-8/2EC User Manual
Page 9
9
CLOSE
SAVE
YES, NO
Reset: back to the main menu without saving
STANDARD
To set the standard settings, press the ”∨” and ”” keys
SETTINGS
simultaneously (Factory setting).
ChANNEL A
”AUTO” mode (sequential), 8 inputs (LEDs light up).
Interval time sec.
ChANNEL B
”AUTO” mode (sequential). In the LCD display, the channels -8 are
switched through, interval time s, full image.
ALARM
Deactivated, interval time s, duration 0sec,
Full image switch-over switched off
Configuration NC = Normal Closed
REMOTE CONTROL
Switched off
MAINS PhASE RELATION
Phase 0
SCREEN DISPLAY
Display of input number: of
Display of interval time: on
SELF TEST
hardware check: to activate the self test, press keys ”∨” and ”5”
simultaneously.
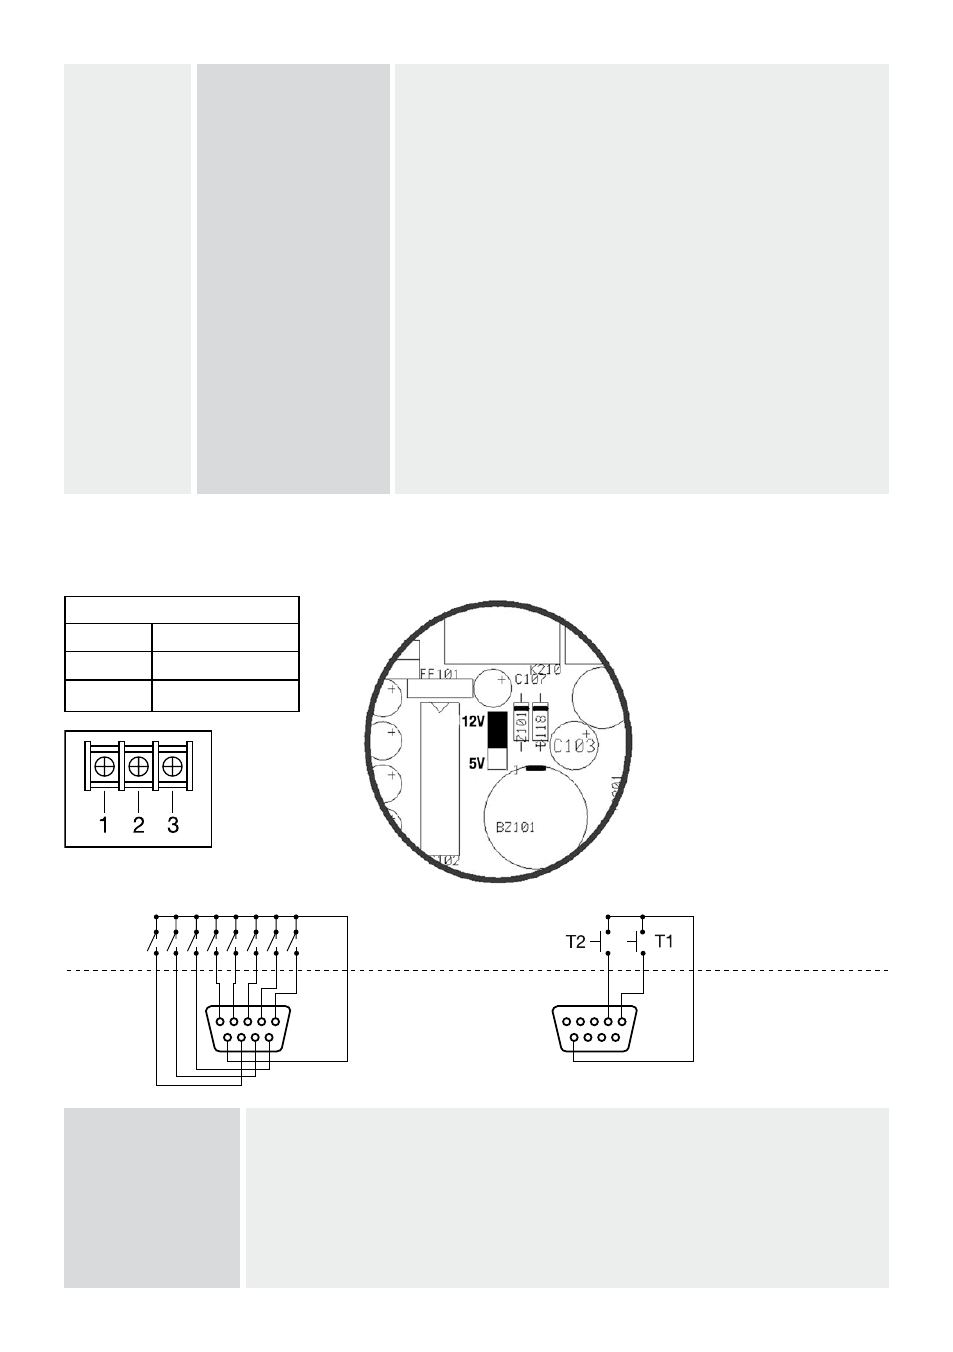
3.5 Synchronising the video signal
Contakt
ALARM OUTPUT
GROUND
3
VCR CLOCK
If the VCR CLOCK impulses
have an amplitude of 5V,
insert the plug bridge J0
into position 5V
(ex-works setting is at V)
Alarm switches (sensors)
External
Internal
Common lead (GND)
Remote control keys
Common lead (GND)
Notes
Negative alarm impulse: All alarm switches must normally be open and close on alarm.
Positive trigger impulse: All alarm switches must normally be closed and open on alarm.
VCR-CLOCK
The VCR-CLK connection is for synchronising the video signal and is a negatively triggered
connection
standard TTL input (V to 0V, can be changed to 5V)
Line
No rolling or flickering of the picture, by synchronising the mains phase relation of the
synchronisation
camera and the switcher. The synchronisation phase can be set in the menu in ± 7 steps
(± .ms)