ARM Electronics RT4CD User Manual
Page 29
26
Move the cursor to the “BACKUP”, and press ”ENTER”, then the screen will show the
following options.
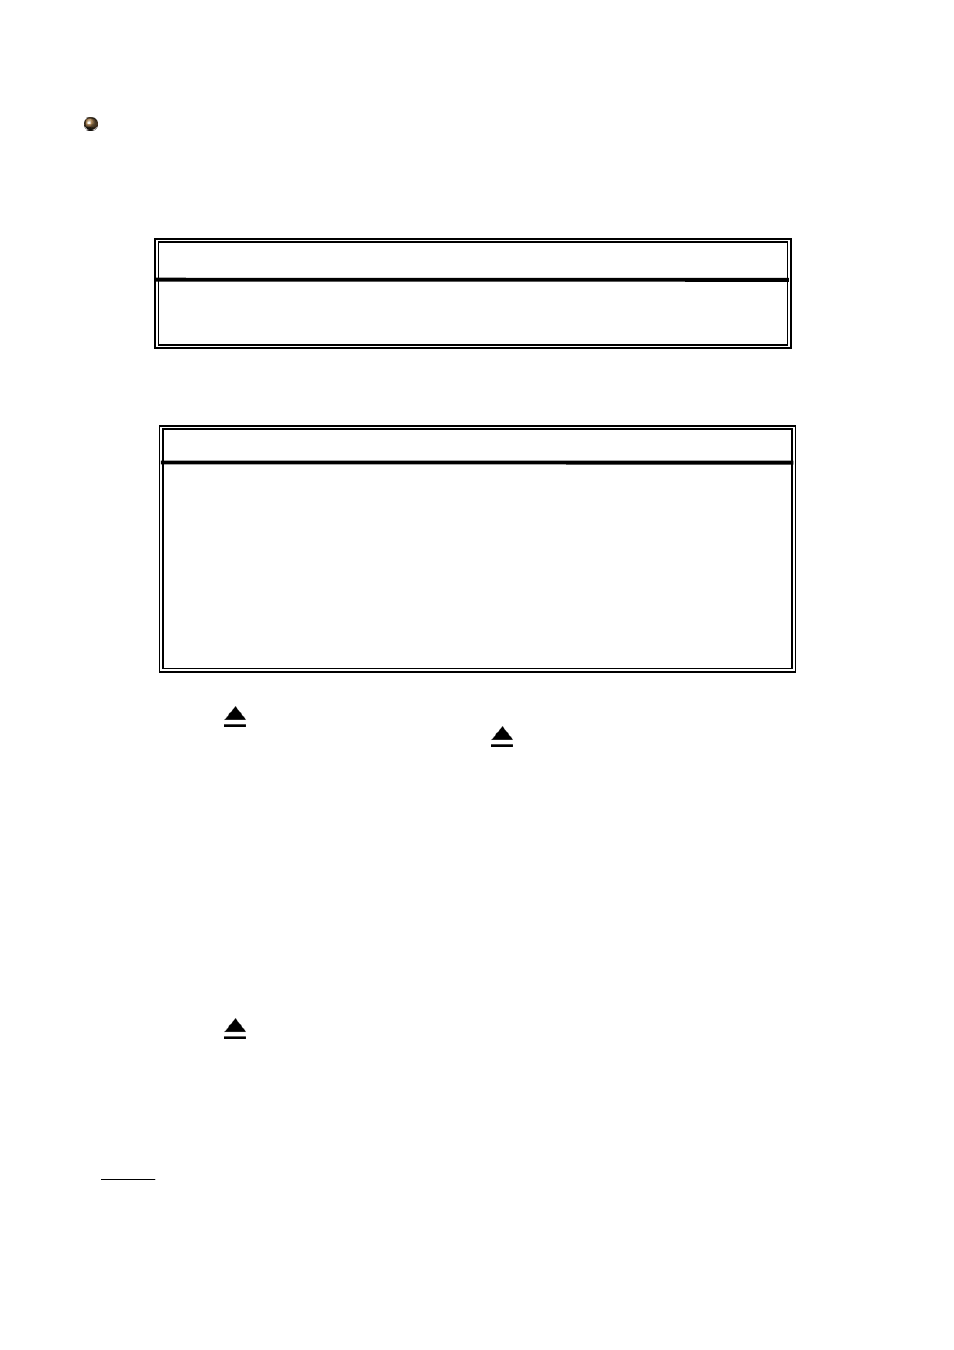
BACKUP
BACKUP
USB BACKUP
DISK BACKUP
Select “DISK BACKUP” and then press “Enter”.
For Model 1
DISK BACKUP
DISK BACKUP
START TIME
2006-05-12 16 : 00 : 00
END TIME
2006-05-12 21 : 00 : 00
AVAILABLE SIZE
4083 MB
CHANNEL
●
01
●
02 X 03 X 04
X 05 X 06 X 07 X 08
X 09 X 10 X 11 X 12
X 13 X 14 X 15 X 16
HDD NUM
MASTER
BACKUP TO DISK
START
1)
Press “
” buttons to open the CD Writer.
Put the CD into the CD Writer, and press “
” buttons again to close.
2)
Go to “DISK BACKUP” menu and set the start time, end time, channels and HDD number.
Note:
Select channels by pressing “ENTER” button to change the symbol in front of the channel
number.
Symbol “X” means that this channel is not selected.
Symbol “●” means that this channel is selected.
3)
After setting up the backup information,
move the cursor to “START”, and press “ENTER”.
While the files are backup to CD, users will see the backup completed percentage on the screen.
4)
After backup files to CD, “DISK BURN FINISH” will prompt on the screen.
Press “
” to take out the CD from CD Writer.
5)
Put CD into the CD-ROM drive of PC.
(O/S system: Windows XP, and Windows2000).
And then double click the file Æ Convert the file
Æ
Play the backup file at PC Side.
NOTE:
NOTE:
1.
The maximum number of backup files in the CD is 41.
2.
The backup file can be played directly in your PC via the supplied licensed AP,
or via other media players (Ex: Windows Media Player or RealPlayer) after the
file is converted to “AVI” format.