Installing the battery, Page 38 – Epson 3 User Manual
Page 50
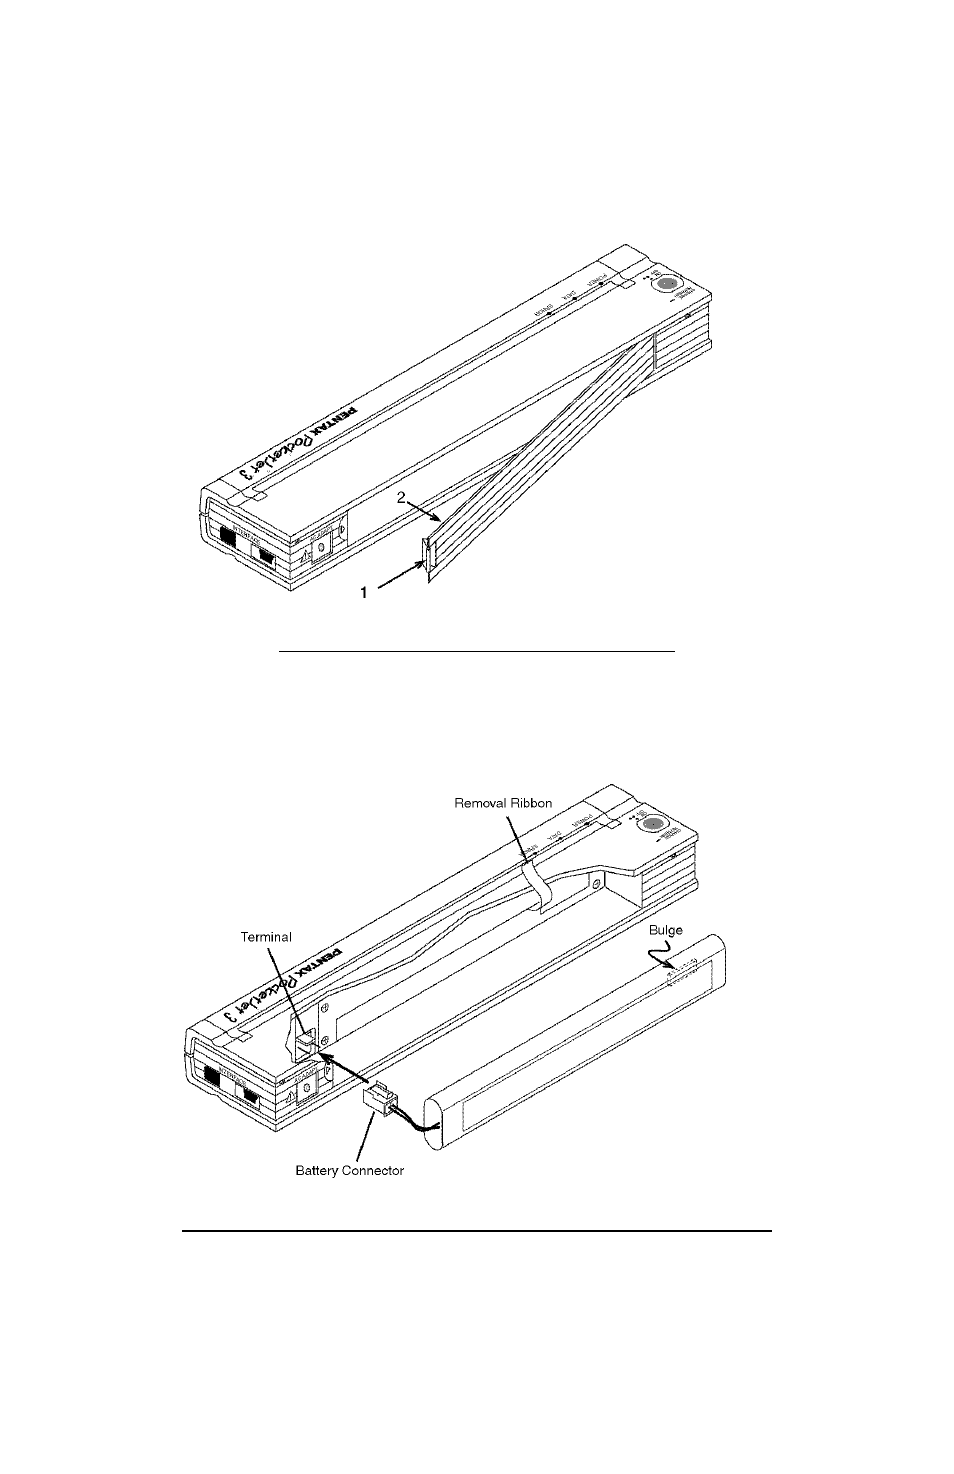
Installing the Battery
1. Open the printer’s battery cover by pressing the cover latch.
Push the cover away from the AC adapter receptacle. See
Figure 10.
FIGURE 10. Opening the Battery Cover
2. Swing the cover open and remove it.
3. Gently push the battery connector into the terminal on the
inside of the printer’s battery compartment. See Figure 11.
FIGURE 11. Pushing the battery connector into the terminal
CAUTION: Do not force the battery connector into the terminal. If
you are having difficulty inserting the connector, make
sure the connector is not upside down. See Figure 11.
Page 38
This manual is related to the following products:
See also other documents in the category Epson Printers:
- Stylus Pro 7800 (11 pages)
- Stylus Pro 4000 (49 pages)
- Stylus Photo R300 (2 pages)
- Stylus Pro 7000 (147 pages)
- AcuLaser C3000 (316 pages)
- Stylus Pro 7900 (24 pages)
- Stylus Pro 4450 (21 pages)
- 1000 (272 pages)
- T034120 (4 pages)
- T580300 (4 pages)
- 300 (91 pages)
- B 510DN (190 pages)
- B 510DN (218 pages)
- Stylus NX510 (8 pages)
- Stylus Photo RX580 (95 pages)
- T549300 (4 pages)
- B 500DN (168 pages)
- AculaserCX11NF (5 pages)
- 480SXU (24 pages)
- 4500 (317 pages)
- STYLUS RX500 (99 pages)
- 2100 (13 pages)
- Stylus NX215 (2 pages)
- T098320 (4 pages)
- T041020 (4 pages)
- R210 (8 pages)
- All-In-One Stylus Photo RX600 (164 pages)
- 777I (53 pages)
- T033120 (4 pages)
- Stylus CX7000F (8 pages)
- 60 (113 pages)
- T034220 (4 pages)
- WorkForce 40 Series (36 pages)
- T054220 (4 pages)
- Stylus CX3200 (11 pages)
- Stylus CX7800 (18 pages)
- T060220 (4 pages)
- 2500 (180 pages)
- AcuLaser CX11N (4 pages)
- AcuLaser CX11N (32 pages)
- 2000P (16 pages)
- T606600 (4 pages)
- Stylus CX6000 (18 pages)
- FS-4000DN (2 pages)
- MSDS T544700 (4 pages)